









Introduction
Setting up a SONOFF security camera? This guide covers installation, Wi-Fi pairing through the eWeLink app, motion detection, privacy settings, microSD recording, and RTSP/ONVIF integration with third-party platforms.
You'll also learn how to troubleshoot common issues, including Wi-Fi connection failures, cameras going offline, recording problems, and false motion alerts, so you can get your camera up and running and keep it working reliably.
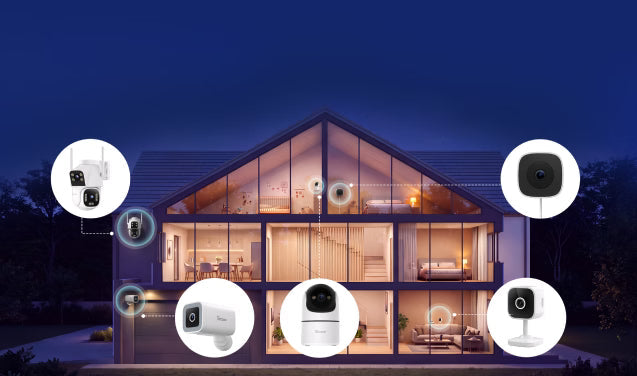
This guide covers five SONOFF camera models — CAM-B1P, CAM-C44HE, CAM-PT2, CAM-S2, and CAM-S3W.
SONOFF Security Camera Overview
SONOFF offers security cameras for indoor, outdoor, and window monitoring. Find your camera model below to check its installation options, viewing capabilities, and power requirements before getting started.
Outdoor Security Cameras
● CAM-B1P (Outdoor Security Camera): An IP65-rated outdoor camera with 180° horizontal rotation, designed for wall mounting to monitor yards, driveways, entrances, and other outdoor areas. Powered by 5V/2A via USB-A.
● CAM-C44HE (Outdoor Dual-Lens Camera): An IP65-rated outdoor camera with a fixed lens and a motorized pan-tilt lens (260° pan / 90° tilt) for monitoring multiple areas, such as yards, driveways, and entrances. Supports wall or ceiling mounting and uses a 12V/1A DC power adapter. (Note: The camera body is IP65-rated, but the included power adapter is not waterproof. Outdoor power and Ethernet connections must be properly protected.)
Indoor Security Cameras
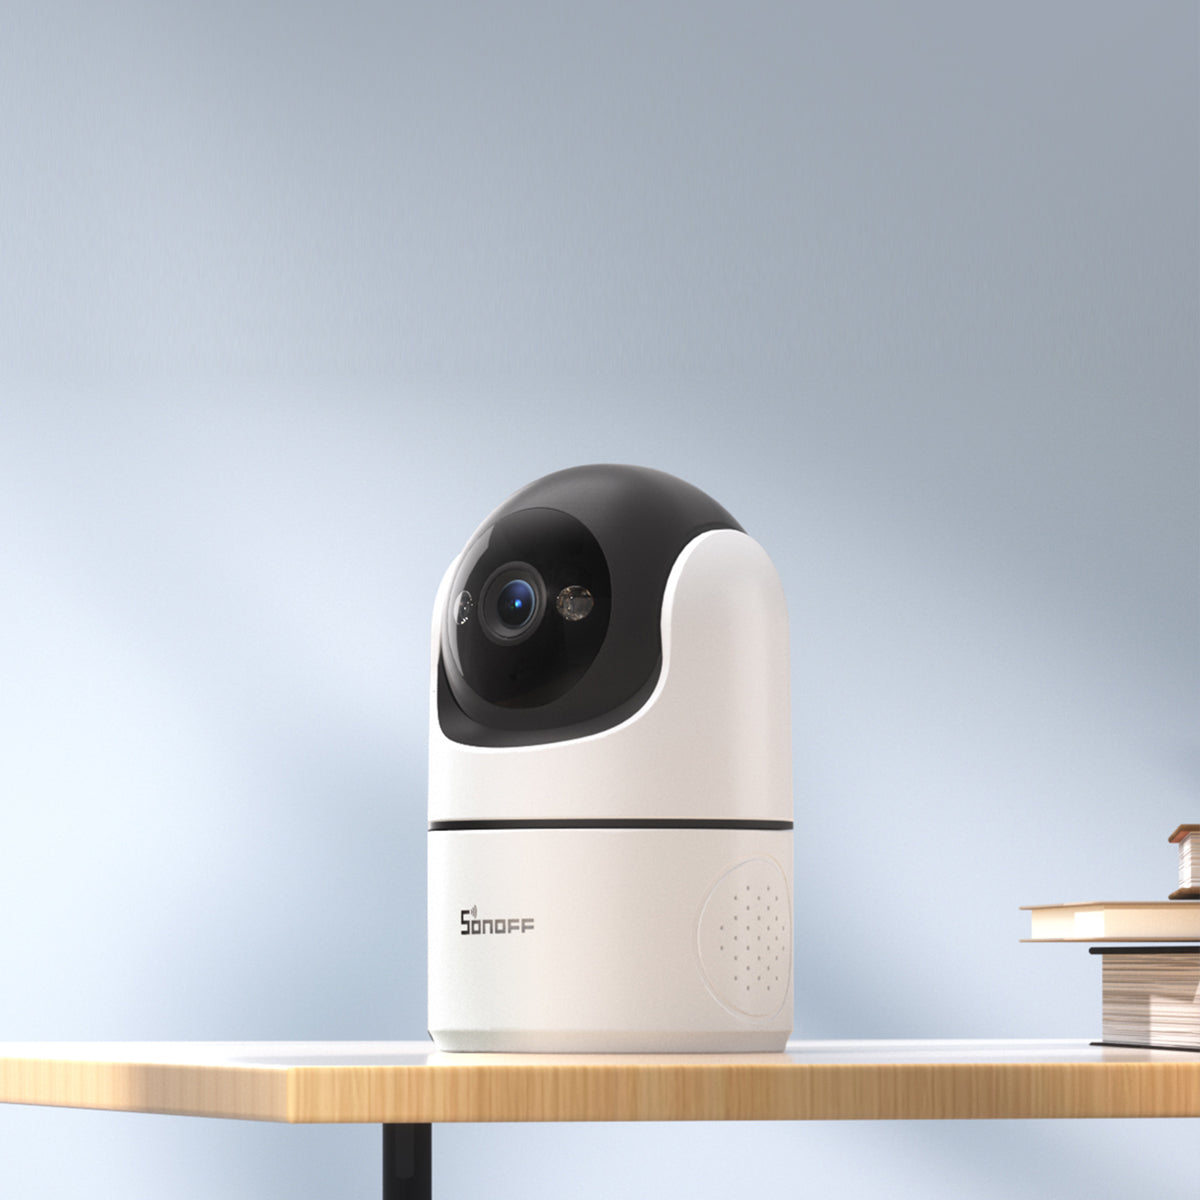
● CAM-PT2 (Indoor Pan-Tilt Camera): An indoor camera with 340° horizontal and 180° vertical rotation, suitable for monitoring living rooms, nurseries, pets, and other indoor areas. Supports desktop placement, wall mounting, and ceiling mounting. Powered by 5V/2A via USB-C.
● CAM-S2 (Indoor Slim Camera): A compact indoor camera with a fixed lens and manual angle adjustment, suitable for monitoring rooms, entrances, desks, and other indoor spaces. Supports desktop placement, wall mounting, and ceiling mounting. Powered by 5V/1A via USB-C.
Window Security Camera
● CAM-S3W (Window Camera): A fixed-lens camera that attaches to the inside of window glass to monitor outdoor areas such as driveways, front yards, and entrances. Its adjustable mounting bracket allows manual angle adjustment without drilling. Powered by 5V/1A via USB-C.
1. What Should You Check Before Installing Your SONOFF Camera?
Before installation, check the included accessories, power requirements, mounting location, and network coverage to avoid common setup problems.
1.1 Check the Package Contents
Make sure you have the camera, power cable, mounting accessories, and quick start guide. Package contents vary by model, so refer to your camera's quick start guide for the exact items included.
1.2 Check the Power Requirements
Use a power adapter with the correct output voltage, sufficient current, and a compatible connector (USB-C, USB-A, or DC barrel connector). Make sure the adapter meets applicable safety standards, such as EN IEC 62368-1, and check your camera's power specifications before installation.
● Indoor cameras: Use the camera and its power adapter in a dry indoor location, away from moisture and water exposure.
● Outdoor cameras: Protect the power adapter and external connections from rain and moisture. An IP65-rated camera body does not mean the power adapter or connectors are waterproof. Install any non-waterproof adapter indoors or in a suitable weatherproof enclosure, and follow the waterproofing instructions for your model.
Check your camera's specified operating temperature and humidity range to make sure it suits the installation environment.
1.3 Choose a Suitable Installation Location
Choose an installation spot based on your camera's indoor or outdoor rating, mounting method, and intended monitoring area. Follow these general installation best practices:
● Wi-Fi coverage: Make sure the camera has a strong Wi-Fi signal at the installation location. Avoid thick walls, metal surfaces, and other obstructions that may weaken the signal.
● Field of view: Position the camera to minimize blind spots. After connecting it to eWeLink in Section 2, check the live view before finalizing the mounting position.
● Lighting conditions: Avoid prolonged direct sunlight where possible, as it may cause glare, affect image quality, or expose the camera to excessive heat.
● Weather protection: Keep indoor cameras away from moisture and water exposure. For outdoor models, follow the recommended mounting and waterproofing requirements, and avoid locations prone to flooding or water accumulation.
● Mounting surface: Choose a stable surface and follow the mounting instructions for your model. For adhesive mounts, clean the surface to remove dust, grease, and moisture before installation.
● Installation height: Choose a mounting height that provides a clear view of the monitoring area while keeping the camera securely installed. Follow any model-specific height and safety requirements.
For detailed, model-specific mounting instructions, see the corresponding SONOFF Help Center guide:
2. How to Add Your SONOFF Camera to eWeLink and Connect It to Your Network
Follow the steps below to power on your camera, add it to eWeLink, connect it to your network, and complete the basic setup.
2.1 Download eWeLink
Download the eWeLink app from the Google Play Store or Apple App Store, then sign in with your account.
2.2 Power On and Enter Pairing Mode
- Connect your camera to power using the supplied cable and a compatible power adapter.
- On first power-up, the camera enters pairing mode automatically. Check the LED indicator or the camera's setup instructions to confirm its pairing status.
- If the camera exits pairing mode before setup is complete, press and hold the reset button for about 5 seconds to re-enter pairing mode.
Note: On CAM-C44HE, pairing mode automatically ends after 30 minutes if the camera has not been paired. Pairing time limits and LED indicators may vary by model.
2.3 Add Your Camera and Connect to the Network
- Open the eWeLink app and tap Add Device.
- Select Scan and scan the QR code on the camera or its quick start guide.
- The app will search for nearby devices. When your camera appears, tap Connect.
- Select a compatible Wi-Fi network and enter the password when prompted.
- Wait for the camera to connect. This may take longer depending on the network and camera model (typically within 90 seconds).
- Once the camera has been added successfully, give it a name and assign it to a room.
Alternative Setup Options:
● CAM-C44HE: This model also supports a wired Ethernet connection. You can connect an Ethernet cable during setup and follow the instructions in the CAM-C44HE Add Device Guide.
● CAM-S2: You can also configure Wi-Fi through the local OpenEdge Web Console using the camera's AP hotspot. See the CAM-S2 Setup Guide for details.
2.4 Check the Camera Connection
After adding your camera, confirm that it is working properly:
● Connection status: Make sure the camera appears online in the eWeLink app.
● Live view: Open the live feed to confirm that the video displays correctly.
● Viewing angle: Check that the camera covers the intended area and adjust its position or viewing angle if needed before finalizing the installation.
Note: On CAM-PT2, CAM-S2, and CAM-B1P, a steady LED indicates that the camera is online. Indicator patterns vary by model; refer to your camera's setup guide if the connection fails.
2.5 Complete the Basic Settings
Once your camera is online, review the following settings:
● Firmware updates: Check for available firmware updates in the device settings.
● Audio settings: Adjust the speaker and microphone volume under More Settings, if available.
● Time settings: Check that the correct date, time, and time zone are configured.
You can configure motion detection, privacy settings, and recording in the following sections.
2.6 Wi-Fi and Ethernet Support by Model
|
Model |
Wi-Fi Support |
Ethernet Port (RJ45) |
|
CAM-B1P |
2.4GHz only |
❌ No |
|
CAM-C44HE |
Dual-band 2.4GHz + 5GHz |
✅ Yes, 10/100Mbps |
|
CAM-PT2 |
2.4GHz only |
❌ No |
|
CAM-S2 |
2.4GHz only |
❌ No |
|
CAM-S3W |
Dual-band 2.4GHz + 5GHz |
❌ No |
3. How to Set Up Motion and Person Detection?
Motion and person detection help your camera monitor activity and notify you when something happens. You can adjust the detection settings to focus on important areas and reduce unwanted notifications.
3.1 Enable Motion Detection
- Open your camera's settings in the eWeLink app.
- Find Motion Detection and turn it On.
- Under Detection Objects, select what you want the camera to detect:
-
- Moving objects: Detects motion within the camera's monitoring area.
- Human: Uses AI to identify people and help reduce false alerts from other movement.
Note: CAM-C44HE also supports Pet and Vehicle detection, allowing you to choose additional detection targets.
3.2 Adjust Detection Sensitivity
● Choose from three sensitivity levels: Low, Medium, or High.
● Higher sensitivity can detect smaller movements but may also trigger more unwanted alerts.
● Start with Medium, then increase or decrease the sensitivity based on your monitoring area and the alerts you receive.
3.3 Set Up Detection Zones
For models that support detection zones, you can choose which parts of the camera's view should trigger motion alerts.
● Select detection areas: Focus on important areas, such as doorways, walkways, or driveways.
● Exclude busy areas: Leave out areas with frequent movement, such as trees or passing traffic, to reduce unnecessary notifications.
3.4 Configure Notifications and Alarms
● Push Notifications: Enable or disable notifications when motion or a person is detected.
● Effective Period: Set when motion detection should be active, such as during certain hours of the day.
● Alarm Settings: On supported models, enable the camera's audible alarm and adjust its duration or schedule.
● Event Recording: If you want to save videos when motion is detected, enable the appropriate event recording settings. Recording options and storage requirements vary by model.
3.5 Use Detection Events in Smart Scenes
You can also use camera detection events to trigger automations in eWeLink.
● Triggers: Motion detected or Person detected.
● Actions: Depending on the camera model, available actions may include opening the live view, enabling or disabling the alarm, putting the camera into sleep mode, or controlling other compatible smart devices.
For example, you can create a scene that turns on a compatible smart light when your camera detects motion.
For CAM-C44HE: Smart scenes also support Vehicle detected and Pet detected as triggers. Additional actions include moving the camera to a preset position, recording video, and activating supported siren or warning light alarms.
Note: Detection zones, notification settings, and available Smart Scene actions vary by camera model. Refer to the corresponding SONOFF Help Center guide for details.
3.6 Detection Features by Camera Model
|
Model |
Detection Targets |
Detection Sensitivity |
Smart Tracking |
|
CAM-B1P |
Motion, Human |
Low / Medium / High |
✅ Supported |
|
CAM-C44HE |
Motion, Human, Pet, Vehicle |
Low / Medium / High |
✅ Supported |
|
CAM-PT2 |
Motion, Human |
Low / Medium / High |
✅ Supported |
|
CAM-S2 |
Motion, Human |
Low / Medium / High |
❌ Not supported |
|
CAM-S3W |
Motion, Human |
Low / Medium / High |
❌ Not supported |
Available detection zones, notification options, and smart scene actions may vary by model. Refer to your camera's SONOFF Help Center guide for detailed settings.
4. How to Set Up Privacy, PTZ, Video Quality, and Night Vision?
Customize your camera's privacy, viewing angle, video quality, and night vision settings. Available features vary by model.
4.1 Set Up Privacy Zones
On supported models, Privacy Zone lets you block specific areas of the camera's view.
1. Enable Privacy Zone in the camera settings.
2. Open Privacy Zone Setting to adjust the position and size of the masked areas.
You can use this feature to obscure neighboring windows, private spaces, or other areas you do not want to monitor.
Note: Privacy Zone is not currently listed in the CAM-C44HE Help Center. Check your camera's available settings.
4.2 Enable Sleep Mode
Use Sleep to temporarily pause camera monitoring when privacy is needed.
● Manual control: Tap Sleep in the eWeLink app to put the camera into sleep mode or wake it up.
● Sleep Mode Schedule: Set a schedule to activate sleep mode automatically at specific times.
For CAM-PT2: The lens moves into a concealed position when sleep mode is activated, providing physical privacy protection.
For CAM-C44HE: Camera Sleep is separate from the Home / Away / Sleep security modes, which control security monitoring and alarm responses.
4.3 Adjust PTZ, Presets, and Smart Tracking
For cameras with motorized movement, use the PTZ controls to adjust the viewing direction.
● Pan-Tilt: Move the camera to monitor different areas. CAM-B1P supports horizontal rotation, while CAM-PT2 and CAM-C44HE support both horizontal and vertical movement.
● Presets: On CAM-B1P, CAM-PT2, and CAM-C44HE, save up to six viewing positions for quick access.
● Smart Tracking: On supported models, enable automatic tracking to follow selected moving targets.
Note: CAM-S2 and CAM-S3W have fixed lenses without motorized PTZ or Smart Tracking. Adjust their viewing angles manually.
4.4 Adjust Image Rotation and Video Quality
● Rotate: On supported models, enable or disable this setting to flip the camera image when the camera is mounted upside down.
● Quality: Select the available video quality setting based on your preference and network conditions. Options differ by model, including Auto / 2K / 360P, Auto / 1080P / 360P, 1080P / 360P, and HD / SD. See Section 4.7 for model-specific options.
● Full Screen: Switch to landscape viewing for a larger live video display.
● Watermark: Enable or disable the on-screen watermark where available. CAM-C44HE offers separate image display settings, including timestamps and the brand logo.
4.5 Set Up Night Vision
Night vision settings vary by camera model:
● CAM-B1P and CAM-PT2: Choose between Infrared Light, White Light, and Smart Night Vision.
● CAM-C44HE: Choose Infrared Light, White Light, Smart Night Vision, or OFF, with adjustable brightness settings.
● CAM-S2: Use Auto, On, or Off to control infrared night vision.
● CAM-S3W: Uses ambient outdoor light for full-color nighttime imaging without infrared illumination. Ensure sufficient outdoor lighting for clear night monitoring.
4.6 Reduce Window Glare on CAM-S3W
Indoor lighting can reflect off window glass and reduce CAM-S3W's image clarity, especially at night. To minimize reflections:
● Use the large flat bracket: Mount it horizontally and avoid trimming it, as its wider surface helps block indoor reflections.
● Reduce nearby lighting: Turn off indoor lights close to the window when possible.
● Close curtains or blinds: Block surrounding indoor light without obstructing the camera lens.
● Block stray light: If reflections persist, add 1–2 rings of opaque tape around the bracket's outer edge.
For additional mounting and reflection troubleshooting, see the CAM-S3W Help Center.
4.7 Camera Privacy and Viewing Features by Model
|
Feature |
CAM-B1P |
CAM-C44HE |
CAM-PT2 |
CAM-S2 |
CAM-S3W |
|
PTZ Capability |
180° horizontal |
260° pan / 90° tilt |
340° pan / 180° tilt |
Fixed lens |
Fixed lens |
|
Presets |
Up to 6 |
Up to 6 |
Up to 6 |
❌ No |
❌ No |
|
Video Quality |
Auto / 2K / 360P |
Auto / 2K / 360P |
Auto / 2K / 360P |
Auto / 2K / 360P |
Auto / 2K / 360P |
|
Night Vision |
Infrared / White Light / Smart |
Infrared / White Light / Smart |
Infrared / White Light / Smart |
Infrared / White Light / Smart |
Infrared / White Light / Smart |
|
Privacy Zone |
Supported |
— |
Supported |
Supported |
Supported |
|
Physical Privacy Protection |
❌ No |
❌ No |
✅ Yes |
❌ No |
❌ No |
|
Sleep Mode |
✅ Supported |
✅ Supported |
✅ Supported |
✅ Supported |
✅ Supported |
Note: CAM-C44HE's PTZ specifications apply to its motorized lens, not its fixed lens. It also supports separate Home / Away / Sleep security modes with configurable alarm responses.
5. How to Set Up MicroSD Card Storage and Recording?
You can record video locally to a TF/microSD card without a cloud subscription. Follow the steps below to set up local recording, manage storage, and view saved footage.
5.1 Insert a TF/microSD Card
- Insert a compatible TF/microSD card into the camera's TF card slot. The card is sold separately.
- Open the camera settings in the eWeLink app and go to Local Recording > Micro SD Card Status.
- Check that the camera recognizes the card before configuring recording.
Supported microSD card capacities vary by model. See the comparison table in Section 5.6.
5.2 Choose a Recording Mode
Go to Local Recording and enable Save to Micro SD Card. Under Record Mode, choose one of the following:
● Full time: Record video continuously, 24 hours a day.
● Schedule: Record during specified time periods.
● Record events only: Record video when a supported detection event occurs.
For event-based recording, make sure the relevant detection settings are enabled. See Section 3 for Motion Detection and Detection Objects settings.
5.3 Enable Loop Recording
● Enable Loop Recording under Local Recording to overwrite the oldest recordings when the microSD card runs low on available space.
● This helps maintain ongoing recording without manually deleting older footage.
Note: Overwritten recordings cannot be recovered from the card. Save any important footage before it is overwritten.
5.4 Check Storage Status and Format the Card
Under Local Recording > Micro SD Card Status, you can check:
● Total: The total storage capacity of the microSD card.
● Remaining: The available storage space.
● Format Micro SD Card: Erase the card's contents when formatting is needed. Format the card through the camera interface for best compatibility.
Important: Formatting deletes existing recordings on the card. Back up any footage you want to keep before proceeding.
5.5 View Recordings and Snapshots
Use the following options on the camera's device home page in the eWeLink app:
● Playback: View recorded video history stored on the microSD card. Use the playback timeline to find footage from specific times.
● Events: Review available motion and person detection event records, where supported.
● Snapshot: Capture an image manually from the camera view.
● Record: Start or stop a manual video recording.
● Album: View snapshots and recordings captured through the app.
Note: For CAM-S3W and CAM-C44HE, event records can still appear in the app without a microSD card, but event images and playback clips will not be available.
5.6 Local Storage Capacity and Cloud Storage by Model
|
Model |
Max. TF/microSD Capacity |
Cloud Storage |
|
CAM-B1P |
128 GB |
Optional eWeLink Camera Plan |
|
CAM-C44HE |
512 GB |
Local SD card loop recording only; no cloud storage service |
|
CAM-PT2 |
128 GB |
Optional eWeLink Camera Plan |
|
CAM-S2 |
128 GB |
Optional eWeLink Camera Plan |
|
CAM-S3W |
128 GB |
Local SD card loop recording only; no cloud storage service |
All five models support Full time, Schedule, Record events only, and Loop Recording for local microSD card storage. Local recording does not require a cloud subscription, while cloud storage is optional on supported models.
6. How to Connect Your SONOFF Camera to Third-Party Platforms via RTSP or ONVIF?
SONOFF cameras natively support RTSP and ONVIF protocols for local integration with compatible third-party platforms, including Home Assistant, Scrypted, NVR systems, and NAS surveillance software. Available features vary by camera model and integration platform.
6.1 RTSP and ONVIF Support
● RTSP: Access live video streams using a compatible media player, NVR, or third-party platform.
● ONVIF: Connect cameras to compatible surveillance systems for video streaming and additional functions, such as PTZ control or detection events, where supported.
Before setup, make sure your camera and the receiving device are connected to the same local network and that your camera firmware is up to date.
6.2 Enable ONVIF/RTSP in the eWeLink App
- Open your camera's Device Settings in the eWeLink app.
- Go to More Settings and find ONVIF/RTSP or RTSP, depending on your camera model.
- Follow the on-screen instructions to verify your eWeLink account and enable ONVIF/RTSP.
- Find the camera's connection details, including its IP address, ONVIF port, RTSP stream address, and available username and password.
- Use the appropriate connection details to add your camera to a compatible third-party platform.
Note: Your eWeLink account credentials are used for account verification, while the ONVIF/RTSP username and password are used for third-party connections. For CAM-B1P, CAM-PT2, and CAM-S2, check the firmware and eWeLink App version requirements in the relevant integration guide.
6.3 Enable ONVIF/RTSP via OpenEdge Local Web Console
CAM-S2 and CAM-S3W also support configuration through the OpenEdge Local Web Console.
1. Put the camera into pairing mode and connect your computer to its AP hotspot:
- CAM-S2: SONOFF_S2_xxxx
- CAM-S3W: SONOFF_S3W_xxxx
2. Open 192.168.33.1 in your browser. Set the console login password, reconnect to the hotspot if prompted, and log in.
3. Go to Network Settings to configure the camera's Wi-Fi connection.
4. Connect your computer to the same local network as the camera. You can usually access the console using:
- CAM-S2: cam-s2.local
- CAM-S3W: cam-s3w.local
5. Enable ONVIF/RTSP under the appropriate menu:
- CAM-S2: Connectivity Settings > ONVIF/RTSP
- CAM-S3W: Device Settings > ONVIF/RTSP
For detailed instructions, refer to the CAM-S2 OpenEdge Setup Guide or CAM-S3W OpenEdge Setup Guide.
6.4 Connect to Third-Party Platforms
Once ONVIF/RTSP is enabled, use the camera's connection details to connect it to compatible third-party platforms:
● Home Assistant: Use the ONVIF integration for live video and supported camera functions, or the Generic Camera integration to access an RTSP stream.
● NVR / NAS systems: Connect through ONVIF device discovery or manually enter the RTSP stream URL in compatible software, such as Blue Iris or Synology Surveillance Station.
● Scrypted: Add the camera using the ONVIF plugin and configure the supported video and detection features.
● Other surveillance platforms: Use RTSP or ONVIF according to the platform's supported connection methods.
Tip: If the camera cannot be detected or the video stream does not load, confirm that ONVIF/RTSP is enabled and both devices are on the same local network. You can test RTSP playback with VLC Media Player or ONVIF connectivity with ONVIF Device Manager (ODM).
👉 You can also display compatible camera feeds on NSPanel Pro. See How to Add an RTSP Camera to NSPanel Pro for setup instructions.
6.5 RTSP and ONVIF Features by Camera Model
|
Model |
RTSP & ONVIF Support |
Camera Video Feeds |
Additional ONVIF Features |
|
CAM-B1P |
✅ Supported |
Single-lens feed |
PTZ control, video streaming, motion detection events |
|
CAM-C44HE |
✅ Supported |
Fixed-lens + PTZ-lens feeds |
PTZ control, audio toggle, detection events |
|
CAM-PT2 |
✅ Supported |
Single-lens feed |
PTZ control, video streaming, motion detection events |
|
CAM-S2 |
✅ Supported |
Single-lens feed |
Video streaming, motion detection events |
|
CAM-S3W |
✅ Supported |
Single-lens feed |
Video streaming |
Note: CAM-C44HE provides separate fixed-lens and PTZ-lens views. Available ONVIF features, including detection events and PTZ controls, depend on the camera model and third-party platform.
6.6 Further Integration Guides
For detailed setup instructions, refer to the official SONOFF guides below:
● Home Assistant: How to Integrate SONOFF Camera into Home Assistant — Configure ONVIF integration, live video, detection events, and supported PTZ controls.
● Scrypted: How to Integrate SONOFF Camera into Scrypted — Add a SONOFF camera through the ONVIF plugin and configure supported features.
● ONVIF/RTSP: How to Connect CAM-S3W to Third-Party Platforms via ONVIF/RTSP — Follow connection examples for Home Assistant, Synology NAS, and other compatible platforms.
● Developers: CAM-S3W API Documentation — Explore the CAM-S3W API, or download the CAM-S3W API files.
Note: The Home Assistant and Scrypted tutorials use CAM-PT2 as an example and include compatibility requirements for CAM-B1P, CAM-PT2, and CAM-S2. For CAM-S3W, refer to the dedicated ONVIF/RTSP guide.
7. How to Troubleshoot Common SONOFF Camera Problems?
If your SONOFF camera won't connect, goes offline, or has problems with video, audio, or recording, try the following troubleshooting steps. Some solutions vary by camera model.
7.1 Why Won't My Camera Connect to Wi-Fi?
● Check Wi-Fi compatibility: CAM-B1P, CAM-PT2, and CAM-S2 support 2.4 GHz Wi-Fi only. CAM-C44HE and CAM-S3W support both 2.4 GHz and 5 GHz.
● Check network settings: Make sure your Wi-Fi password is correct and your phone is connected to the appropriate network during setup.
● Improve signal strength: Move the camera closer to the router and avoid thick walls, metal surfaces, or other obstructions.
● Retry pairing: If the camera still won't connect, press and hold the reset button for about 5 seconds to re-enter pairing mode, then follow the pairing steps in Section 2.
Note: CAM-C44HE also supports Ethernet, while CAM-S2 offers Wi-Fi configuration through the OpenEdge Local Web Console.
7.2 Why Is My Camera's Live View Slow or Lagging?
● Check the Wi-Fi signal strength and network stability.
● Select a lower Quality setting in the eWeLink app, such as 360P or SD, depending on your camera model.
● Pause large downloads or other high-bandwidth activities on your network.
● If the problem continues, restart the camera and router, then check the live view again.
7.3 Why Isn't Two-Way Audio Working?
● Make sure the eWeLink app has microphone permission on your phone.
● Check whether Sound is muted and adjust the camera's speaker and microphone volume if needed.
● Keep your phone away from the camera during testing to prevent audio feedback.
● Check that the camera's microphone and speaker openings are not blocked by dust or debris.
7.4 Why Isn't My microSD Card Recognized or Recording?
● Check compatibility: Use a reliable TF/microSD card, preferably Class 10 or higher, and confirm that its capacity does not exceed your camera's supported limit.
● Check card recognition: Make sure the card is properly inserted and recognized under Local Recording > Micro SD Card Status.
● Check recording settings: Confirm that Save to Micro SD Card is enabled and the correct Record Mode is selected.
● Format or replace the card: If the card is not recognized, try reinserting it or testing another compatible card. Use Format Micro SD Card if formatting is needed.
Important: Formatting erases all data on the card. Back up important recordings before formatting.
7.5 Why Am I Getting False Alerts or Missing Motion Events?
● Too many false alerts: Lower the detection Sensitivity to reduce unwanted triggers from movement in the monitored area.
● Missed detection events: Increase Sensitivity if the camera frequently fails to detect relevant movement.
● Detection Zones: On supported models, exclude areas with frequent movement, such as trees, roads, or passing traffic.
● Detection Objects: Select the appropriate detection targets, such as Moving objects or Human, based on what you want to monitor.
● Camera view: Clean the lens and make sure the intended monitoring area is clearly visible.
If notifications are missing, also check Motion Detection, Push Notifications, Effective Period, and your phone's notification permissions.
7.6 Why Does My Camera Keep Going Offline?
● Check the power supply: Make sure the adapter provides the correct voltage and sufficient current, and that the power cable is securely connected.
● Check network stability: Look for intermittent Wi-Fi disconnections or poor coverage at the camera's installation location.
● Check Ethernet connections: For CAM-C44HE using a wired connection, inspect the Ethernet cable and network port connections.
● Restart and test: Restart the camera and router. If Wi-Fi coverage remains weak, consider repositioning the router or using a suitable Wi-Fi extender or mesh access point.
For outdoor models, also make sure the power adapter and external connections are properly protected from moisture.
7.7 Model-Specific Troubleshooting
|
Common Issue |
Applicable Models |
Priority Troubleshooting Steps |
|
PTZ rotation or position errors |
CAM-B1P, CAM-C44HE, CAM-PT2 |
Check Smart Tracking settings where applicable. Use PTZ Calibration if the viewing position is incorrect. |
|
Infrared night vision problems |
CAM-S2 |
Check Night Vision settings and make sure the infrared LEDs are not obstructed. |
|
Window glare or poor nighttime visibility |
CAM-S3W |
Clean the window, check the mounting bracket, reduce indoor reflections, and ensure sufficient outdoor ambient lighting. |
For detailed troubleshooting instructions, refer to the corresponding SONOFF Help Center guides:
FAQs
Q1: Do SONOFF Cameras Require a Cloud Subscription?
No. All models support local recording to a microSD card without a paid subscription. You can view live video and use supported detection and alert features through the eWeLink app.
Optional cloud storage is available on select models. See Section 5 for storage options and model differences.
Q2: Can I view the live feed remotely when away from home?
Yes. You can view live video through the eWeLink app when both your camera and phone have internet access. You can also receive detection notifications and access saved recordings when the relevant features are enabled.
Q3: Which third-party smart home platforms work with SONOFF Cameras?
SONOFF cameras support Amazon Alexa, Google Home, and IFTTT, with available features depending on the model and platform.
They also support RTSP and ONVIF for integration with compatible platforms such as Home Assistant and Scrypted. See Section 6 for setup details.
Q4: Can I share my SONOFF camera with family members?
Yes. In the eWeLink app, open the camera's settings, select Share Device, and follow the instructions to share access with another eWeLink account.
Q5: Does the camera work when the internet is down?
Some functions can continue working without internet access, provided the camera remains powered and the required local network is available.
Local microSD recording and RTSP/ONVIF streaming may continue, depending on the camera model and configuration. CAM-C44HE also supports local scenes that can operate without internet access.
Remote viewing through the eWeLink app, cloud services, and internet-based push notifications require an internet connection.
Q6: How many users can view the live feed at the same time?
CAM-PT2 and CAM-S2 support up to two simultaneous viewers through the eWeLink app.
For CAM-B1P, CAM-C44HE, and CAM-S3W, check the latest model specifications or SONOFF Help Center for supported viewing limits. Sharing a camera with multiple accounts does not necessarily mean everyone can watch the live feed simultaneously.

Leave a comment
All comments are moderated before being published.
This site is protected by hCaptcha and the hCaptcha Privacy Policy and Terms of Service apply.