









Introduzione
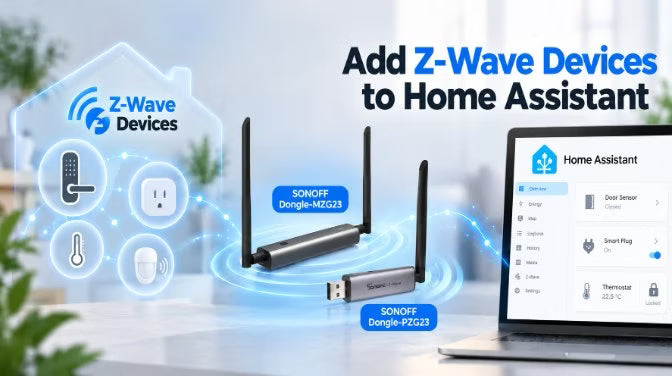
Vuoi aggiungere a Home Assistant un interruttore, un sensore, una serratura, un termostato o un altro dispositivo Z-Wave? La procedura di base è semplice: prima assicurati che Home Assistant disponga di una connessione Z-Wave funzionante, quindi utilizza il metodo di inclusione appropriato per aggiungere il dispositivo alla rete.
Se parti da zero, ti servirà innanzitutto un adattatore Z-Wave compatibile. Questa guida spiega la configurazione di base di Z-Wave su Home Assistant, come scegliere un adattatore e i passaggi principali per aggiungere dispositivi.
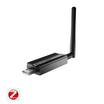
SONOFF offre due opzioni di adattatori Z-Wave per configurazioni diverse: Dongle-PZG23 (USB Dongle Plus) per l'utilizzo diretto tramite USB e Dongle-MZG23 (PoE Dongle Max) per un utilizzo più flessibile tramite USB o rete.
1. Cosa ti serve prima di aggiungere un dispositivo Z-Wave
Prima di iniziare, assicurati di avere:
● Un'installazione funzionante di Home Assistant. Home Assistant OS è il tipo di installazione consigliato per la maggior parte degli utenti e supporta l'app ufficiale Z-Wave JS. Se utilizzi Home Assistant Container, devi eseguire separatamente un server Z-Wave JS.
● Un adattatore Z-Wave compatibile. Fornisce la connessione radio alla rete Z-Wave. Questo hardware può essere indicato anche come controller Z-Wave; i modelli USB sono spesso chiamati dongle.
● L'integrazione Z-Wave di Home Assistant e un server Z-Wave JS. Per la maggior parte degli utenti di Home Assistant OS, la configurazione consigliata è l'integrazione Z-Wave + l'app Z-Wave JS.
● Un dispositivo Z-Wave per la tua regione. Z-Wave utilizza frequenze radio diverse nelle varie regioni, quindi verifica la compatibilità regionale prima dell'acquisto.
● Le istruzioni e le informazioni sulla sicurezza del produttore del dispositivo. Tieni a portata di mano le istruzioni per l'inclusione e l'esclusione, nonché qualsiasi codice QR, DSK o PIN, durante la configurazione.
Il software Home Assistant da solo non fornisce una radio Z-Wave. Sono necessari sia un hardware Z-Wave compatibile sia il livello software che collega la rete Z-Wave a Home Assistant.
👉 Per i requisiti attuali e le opzioni di configurazione, consulta la documentazione dell'integrazione Z-Wave di Home Assistant.
👉 Per i dettagli sulle frequenze regionali, consulta le indicazioni di Home Assistant sulla configurazione della regione di radiofrequenza dell'adattatore Z-Wave.
2. Scegli un adattatore Z-Wave per Home Assistant
La decisione principale riguarda dove posizionare l'adattatore Z-Wave e come collegarlo a Home Assistant.
● Scegli l'USB se l'host Home Assistant dispone di una porta USB accessibile e consente di posizionare adeguatamente l'adattatore.
● Prendi in considerazione un adattatore connesso alla rete se desideri posizionare la radio separatamente dall'host, soprattutto quando l'host si trova all'interno di un armadio metallico o di un rack per server.
SONOFF Dongle-PZG23: semplice adattatore USB Z-Wave
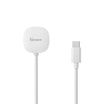
SONOFF Dongle-PZG23 è un adattatore USB Z-Wave della serie 800 basato sul chip EFR32ZG23.
È un'opzione semplice per collegare un controller Z-Wave all'host Home Assistant tramite USB. Il cavo di prolunga USB incluso consente di posizionare l'adattatore lontano dall'host e dalle apparecchiature USB vicine.
Il posizionamento è importante: tieni la radio lontana dagli involucri metallici e da potenziali fonti di interferenza, invece di scegliere la posizione esclusivamente perché è disponibile una porta USB. Consulta le indicazioni di Z-Wave JS sul posizionamento del controller e sulle interferenze per consigli pratici.
SONOFF Dongle-MZG23: installazione flessibile tramite USB o rete
Anche SONOFF Dongle-MZG23 (PoE Dongle Max) utilizza il chip Z-Wave EFR32ZG23 e supporta connessioni Ethernet, Wi-Fi e USB.
Le sue opzioni di connessione alla rete sono utili quando desideri posizionare il controller separatamente dall'host Home Assistant. Scegli una posizione con accesso adeguato alla rete e all'alimentazione.
Per l'installazione tramite Ethernet, utilizza apparecchiature PoE compatibili per fornire sia i dati sia l'alimentazione oppure collega Ethernet per i dati e fornisci separatamente l'alimentazione tramite USB-C.
👉 Segui la guida all'alimentazione e alla connessione del Dongle-MZG23 per le configurazioni supportate.
Il principale vantaggio dell'installazione in rete è la flessibilità di posizionamento. Il solo metodo di connessione non garantisce una portata Z-Wave migliore, una latenza inferiore o una maggiore affidabilità.
Confronto rapido
|
Considerazioni |
Dongle-PZG23 |
Dongle-MZG23 |
|
Connessione |
USB |
Ethernet / Wi-Fi / USB |
|
Posizionamento del controller |
Vicino all'host Home Assistant, con la flessibilità offerta dal cavo di prolunga USB |
Vicino all'host o separatamente tramite una connessione di rete |
|
Antenna |
1 antenna, 2 dBi |
2 antenne, 3 dBi |
|
SoC |
EFR32ZG23 |
EFR32ZG23 |
|
Ideale per |
Configurazione USB diretta quando l'host di Home Assistant si trova in una posizione adatta |
Posizionamento flessibile quando l'adattatore Z-Wave deve essere separato dall'host di Home Assistant |
● Se l'host di Home Assistant dispone già di una posizione adatta e di una porta USB disponibile, Dongle-PZG23 offre una configurazione più semplice.
● Se il posizionamento dell'adattatore deve essere indipendente dall'host di Home Assistant, Dongle-MZG23 offre più opzioni di distribuzione.
3. Modi per connettere un adattatore Z-Wave a Home Assistant
Home Assistant utilizza l'integrazione Z-Wave per connettersi a un server Z-Wave JS, che comunica con l'adattatore. Le configurazioni riportate di seguito mostrano come distribuire il server e la gestione dei dispositivi. Per la maggior parte dei principianti che utilizzano Home Assistant OS, si consiglia di iniziare dalla prima opzione.
|
Configurazione |
Come funziona |
Dove gestisci i dispositivi |
Uso tipico |
|
Integrazione Z-Wave + app Z-Wave JS |
L'app ufficiale Z-Wave JS esegue il server Z-Wave e l'integrazione Z-Wave di Home Assistant si connette ad esso. |
Home Assistant |
Punto di partenza consigliato per la maggior parte degli utenti di Home Assistant OS |
|
Solo interfaccia utente di Z-Wave JS |
L'interfaccia utente di Z-Wave JS esegue il server Z-Wave e gestisce l'adattatore e la rete tramite la propria interfaccia |
Interfaccia utente di Z-Wave JS |
Gestione Z-Wave autonoma; da sola, non rende disponibili i dispositivi tramite l'integrazione Z-Wave di Home Assistant |
|
Integrazione Z-Wave + interfaccia utente di Z-Wave JS |
L'interfaccia utente di Z-Wave JS esegue il server Z-Wave, mentre l'integrazione di Home Assistant si connette al suo server WebSocket. |
Home Assistant, con una gestione di rete aggiuntiva in Interfaccia utente di Z-Wave JS |
Utenti che desiderano gli strumenti dell'interfaccia utente di Z-Wave JS continuando a rendere disponibili i dispositivi tramite Home Assistant |
|
Integrazione Z-Wave + server Z-Wave proxy |
L'adattatore e il server Z-Wave vengono eseguiti su un altro host, mentre Home Assistant si connette al server tramite la rete. |
Home Assistant |
Configurazioni avanzate in cui la radio Z-Wave deve essere separata fisicamente dall'host di Home Assistant |
Per la configurazione consigliata di Home Assistant OS, segui le istruzioni di installazione per configurare il controller. Per istruzioni specifiche sul prodotto e altre configurazioni supportate, consulta:
👉 Guida alla configurazione di Dongle-PZG23 per Home Assistant
👉 Guida alla configurazione di Dongle-MZG23 per Home Assistant
4. Come aggiungere un dispositivo Z-Wave a Home Assistant
Dopo aver configurato l'adattatore Z-Wave e il server Z-Wave in Home Assistant, puoi aggiungere singoli dispositivi Z-Wave alla rete.
In Home Assistant:
1. Vai a Impostazioni → Connettività → Z-Wave.
2. Seleziona Aggiungi dispositivo. Home Assistant metterà l'adattatore Z-Wave in modalità di inclusione.
3. Verifica se il dispositivo supporta SmartStart.
4. Segui il metodo di inclusione appropriato:
-
- SmartStart: con il dispositivo spento, scansiona il relativo codice QR Z-Wave e segui le istruzioni. Se richiesto, seleziona Long Range o Mesh a seconda delle necessità. Accendi il dispositivo e segui eventuali istruzioni aggiuntive del produttore.
- Inclusione classica: metti il dispositivo in modalità di inclusione secondo le istruzioni del produttore.
5. Completa l'eventuale richiesta di sicurezza. Per un'inclusione protetta con S2, Home Assistant potrebbe chiederti il PIN fornito con il dispositivo.
6. Attendi che Home Assistant confermi l'aggiunta del dispositivo e il completamento della configurazione, quindi controlla le entità o gli eventi disponibili.
👉 Per la procedura completa e aggiornata, inclusi SmartStart, la sicurezza S2, Long Range e la risoluzione dei problemi, segui la guida ufficiale di Home Assistant per aggiungere un nuovo dispositivo alla rete Z-Wave.
Nota: mantieni il controller Z-Wave nella sua posizione normale durante l'inclusione e avvia la procedura dall'interfaccia Z-Wave di Home Assistant anziché dal controller stesso.
Dopo aver aggiunto il dispositivo
Dopo l'inclusione, Z-Wave JS esegue un'intervista del dispositivo per identificarne le funzionalità supportate. Home Assistant supporta quindi le funzioni disponibili tramite entità o eventi.
Potrebbe essere necessario riattivare manualmente i dispositivi alimentati a batteria prima che l'intervista termini.
Al termine della configurazione, testa le funzioni che prevedi di utilizzare, come accendere o spegnere una presa, aprire un sensore di contatto, controllare una lettura della temperatura o attivare un evento del pulsante.
👉 Se un dispositivo appare in Home Assistant, ma mancano alcune funzioni, consulta le indicazioni di Home Assistant sui dispositivi Z-Wave con entità mancanti o non disponibili.
Spostamento di un dispositivo Z-Wave da un altro hub
Un dispositivo Z-Wave non può unirsi a una nuova rete mentre è ancora associato a un altro controller. Se il dispositivo è ancora connesso a un hub precedente, escludilo da quella rete prima di aggiungerlo a Home Assistant.
Se l'hub originale è disponibile, usa la relativa procedura di esclusione e segui le istruzioni del produttore del dispositivo. Se l'hub originale non è più disponibile, puoi usare la procedura di Home Assistant per l'esclusione di un dispositivo estraneo.
Avvia prima l'esclusione in Home Assistant, quindi segui le istruzioni del produttore per mettere il dispositivo in modalità di esclusione. Al termine dell'esclusione, procedi con l'aggiunta del dispositivo alla rete controllata da Home Assistant.
👉 Per istruzioni dettagliate, consulta la guida di Home Assistant alla rimozione di un dispositivo da una rete Z-Wave esterna.
Domande frequenti
D1: Ho bisogno di un adattatore Z-Wave per Home Assistant?
Sì. Il software Home Assistant non include una radio Z-Wave, quindi hai bisogno di un adattatore Z-Wave compatibile per comunicare con i dispositivi Z-Wave.
Se stai configurando un nuovo impianto Z-Wave, Home Assistant consiglia di utilizzare un adattatore della serie 800 con firmware aggiornato. L'adattatore funziona con Z-Wave JS e l'integrazione Z-Wave di Home Assistant per gestire la rete.
D2: Posso usare un dongle Zigbee per Z-Wave?
No. Zigbee e Z-Wave utilizzano protocolli radio diversi, quindi un dongle esclusivamente Zigbee non può fungere da adattatore Z-Wave.
Utilizza invece hardware progettato per Z-Wave. Attualmente SONOFF offre due opzioni Z-Wave della serie 800: Dongle-PZG23 per l'utilizzo tramite USB e Dongle-MZG23 per l'utilizzo tramite USB o rete.
D3: Qualsiasi dispositivo Z-Wave funziona con Home Assistant?
Home Assistant e Z-Wave JS supportano molti dispositivi Z-Wave comuni, ma il supporto può variare in base al dispositivo e alle Command Class Z-Wave che utilizza. Un dispositivo può unirsi correttamente alla rete anche se alcune funzioni specifiche del produttore non sono esposte in Home Assistant.
Prima dell'acquisto, assicurati anche che il dispositivo utilizzi la frequenza Z-Wave corretta per la tua regione.
D4: Perché il mio dispositivo Z-Wave non ha entità in Home Assistant?
Le entità vengono create dopo che Z-Wave JS ha terminato l'intervista del dispositivo. Potrebbe essere necessario riattivare manualmente i dispositivi alimentati a batteria affinché l'intervista venga completata.
Inoltre, non tutti i dispositivi Z-Wave creano entità standard. Alcuni telecomandi con pulsanti, ad esempio, generano principalmente eventi. Se l'intervista è stata completata ma le entità previste sono ancora assenti, consulta le indicazioni di Home Assistant sui dispositivi Z-Wave con entità mancanti.


Commenta
Nota che i commenti devono essere approvati prima di essere pubblicati.
Questo sito è protetto da hCaptcha e applica le Norme sulla privacy e i Termini di servizio di hCaptcha.