


Bevezetés
Ha SONOFF Fusion sorozatú kapcsolót használ, felmerülhet a kérdés, hogyan valósítható meg a kétirányú vezérlés. Ez az útmutató bemutatja a Fusion kapcsolók különböző kommunikációs protokollokkal rendelkező okos kétirányú vezérlési megoldásait. Az okos jelenetek használatával ezek a megoldások több helyről történő vezérlést tesznek lehetővé további kábelezés nélkül — rugalmas, kényelmes és nagyon praktikus.
1. megoldás — Okos jelenet összekapcsolás
Az eWeLink vagy Home Assistant platformon a Zigbee vezeték nélküli gombok (pl. SNZB-01P / SNZB-01M) okos jelenet vagy automatizálási beállításokon keresztül jelenetindítóként használhatók. Ezek összekapcsolhatók a Fusion sorozatú kapcsolókkal be- és kikapcsolási műveletek végrehajtásához, lehetővé téve a vezeték nélküli kétirányú vezérlést.

Szükséges eszközök
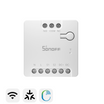
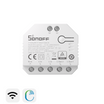
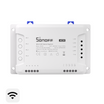
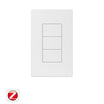
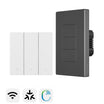
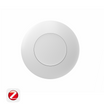
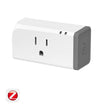
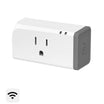
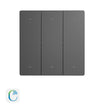
✅1 × Fusion sorozatú kapcsoló (pl. Orb-MW1 / Orb-MW2 / Orb-ZBW1 / Orb-ZBW1L / Orb-ZBW2 / Orb-ZBW2L)
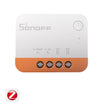
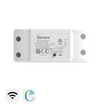
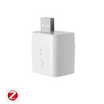
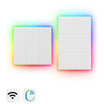
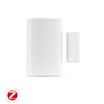
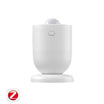
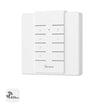
✅1 × Zigbee vezeték nélküli gomb (pl. SNZB-01P / SNZB-01M)
|
SNZB-01P vs. SNZB-01M (Orb 4 az 1-ben) |
||
|
Zigbee vezeték nélküli gomb |
SNZB-01P |
SNZB-01M (Orb 4 az 1-ben) |
|
Gombok száma |
1 gomb |
4 gomb |
|
Támogatott műveletek |
Egyszeri nyomás / Dupla nyomás / Hosszú nyomás |
Minden gomb támogatja az egyszeri / dupla / tripla / hosszú nyomást |
|
Protokoll |
Zigbee |
Zigbee és eWeLink távirányító |
|
Elem |
CR2477 |
CR2477 |
|
Felszerelés |
Mágneses / Ragasztós / Csavaros |
Mágneses / Ragasztós / Csavaros |
|
Elsődleges használat |
Egyszerű jelenetindítás |
Többjelenetes központosított vezérlés |
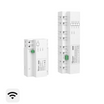
✅1 × Zigbee átjáró (pl. SONOFF ZBBridge-P / ZBBridge-U / NSPanel Pro / iHost)
Megjegyzés: Ha eszközöket szeretne hozzáadni egy ZHA vagy Z2M környezethez, szüksége lesz egy Zigbee adapterre is (pl. SONOFF Dongle Plus MG24 / Dongle Max / ZBDongle-P/E / Dongle Lite MG21)
Párosítás és jelenet beállítása
1. lépés: Eszközök hozzáadása az alkalmazáshoz
Add hozzá a Zigbee vezeték nélküli gombot (SNZB-01P / SNZB-01M) és a Fusion kapcsolót az eWeLink alkalmazáshoz vagy a Home Assistant platformhoz.
2. lépés: Automatizált jelenet létrehozása
- Indító beállítása: Válaszd a "Smart Device" lehetőséget → Válaszd ki az SNZB-01P vagy SNZB-01M eszközt (SNZB-01M esetén válaszd ki a cél gombot) → Válaszd ki az indítót (Egyszeri nyomás / Dupla nyomás / ...)
- Művelet beállítása: Válaszd a "Smart Device" lehetőséget → Válaszd ki a cél Fusion Zigbee kapcsolót (többcsatornás kapcsolók esetén válaszd ki a célcsatornát) → Válaszd ki a műveletet (Fordítás)
- Mentse el és engedélyezze az automatizált jelenetet.
3. lépés: Ellenőrzés
Nyomja meg a Zigbee vezeték nélküli gombot a jelenet elindításához. A Fusion kapcsolóhoz csatlakoztatott lámpának ennek megfelelően be kell kapcsolnia/kikapcsolnia. Mind a falikapcsoló, mind a Zigbee vezeték nélküli gomb szinkronban vezérelheti ugyanazt a lámpát.
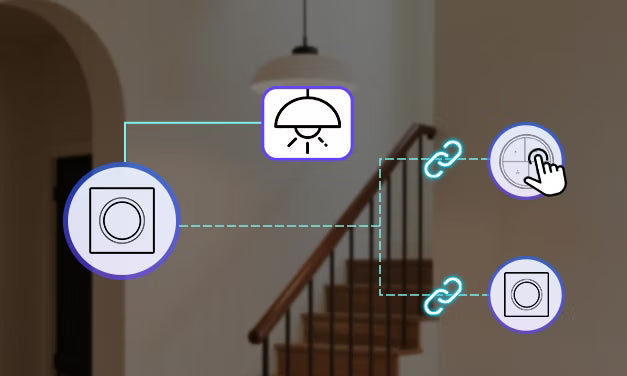
2. megoldás — Relay leválasztása
Az A kapcsoló a terheléshez csatlakozik, míg a B kapcsolón engedélyezve van a Relay Detach mód, és vezeték nélküli jelenetindítóként szolgál. Okos jelenetkapcsolással a B kapcsoló egyetlen megnyomásával az A kapcsoló állapota váltogatható, így két eszköz vezérelheti ugyanazt a lámpát.

Szükséges eszközök
✅ 2 × Fusion kapcsoló (pl. Orb-MW1 / Orb-MW2 / Orb-ZBW1 / Orb-ZBW1L / Orb-ZBW2 / Orb-ZBW2L)
Megjegyzés:
- Zigbee eszközökhöz Zigbee átjáró szükséges (pl. SONOFF ZBBridge-P / ZBBridge-U / NSPanel Pro / iHost).
- Ha ZHA vagy Z2M környezethez szeretnél eszközöket hozzáadni, szükséges a Zigbee dongle is (pl. SONOFF Dongle Plus MG24 / Dongle Max / ZBDongle-P/E / Dongle Lite MG21).
Párosítás és beállítás lépései
1. lépés: Vezetékezés előkészítése
- A kapcsoló: Csatlakozik a terheléshez, a világításhoz.
- B kapcsoló: Nem csatlakozik terheléshez, kizárólag jelenetindítóként használatos.
2. lépés: Eszközök hozzáadása az alkalmazáshoz és a Relay Detach mód engedélyezése
Add hozzá mindkét Fusion kapcsolót az eWeLink alkalmazáshoz. Zigbee eszközök esetén hozzáadhatod őket egy Z2M vagy ZHA platformhoz is, és engedélyezheted a Relay Detach módot.
3. lépés: Automatizált jelenet létrehozása
- Kiváltó beállítása: Válassza a „Smart Device” → „Kapcsoló B” (többcsatornás kapcsolók esetén válassza ki a célcsatornát) → Válassza a kiváltót (Egyszeri nyomás).
- Művelet beállítása: Válassza a „Smart Device” → „Kapcsoló A” (többcsatornás kapcsolók esetén válassza ki a célcsatornát) → Válassza a műveletet (Visszafordítás).
- Mentse el és engedélyezze az automatizált jelenetet.
4. lépés: Ellenőrzés
Nyomja meg a B kapcsolót a jelenet elindításához. Az A kapcsolóhoz csatlakoztatott lámpának ennek megfelelően be kell kapcsolnia/kikapcsolnia. Mindkét kapcsoló szinkronban vezérelheti ugyanazt a lámpát.
3. megoldás — Párosítási összekapcsolás (csak Home Assistant-hoz alkalmas)
ZHA (Zigbee Home Automation) vagy Z2M (Zigbee2MQTT) környezetben a Zigbee vezeték nélküli gomb, mint kiváltó eszköz, párosítási kapcsolatot hozhat létre egy Fusion Zigbee kapcsolóval (cél eszközként). Ez lehetővé teszi az eszközök közötti közvetlen kommunikációs vezérlést, így vezeték nélküli kétirányú vezérlést valósít meg.

Szükséges eszközök
✅ 1 × Zigbee vezeték nélküli gomb (pl. SNZB-01P / SNZB-01M)
✅ 1 × Fusion sorozatú Zigbee kapcsoló (pl. Orb-MW1 / Orb-ZBW1L / Orb-ZBW2 / Orb-ZBW2L)
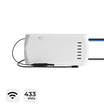
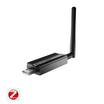
✅ 1 × Zigbee Dongle (pl. SONOFF Dongle Plus MG24 / Dongle Max / ZBDongle-P/E / Dongle Lite MG21).
Párosítás és jelenet beállítása
1. lépés: Eszközök hozzáadása a Zigbee átjáróhoz
Adjon hozzá eszközöket a ZBDongle segítségével a ZHA vagy Z2M környezethez.
2. lépés: Párosítás
- A ZHA/Z2M-ben válassza ki a kiváltó eszközt (pl. SNZB-01M), majd lépjen a Párosítás kezelése menübe.
- Válassza ki a cél eszközt (pl. Zigbee kapcsoló termék) és adja meg a Cluster-t (pl. Be/Ki Cluster).
- A párosítás befejezése után a kiváltó eszköz megfelelő gombjának megnyomásával közvetlenül vezérelhető a cél eszköz (Be/Ki/Visszafordítás).
3. lépés: Ellenőrzés
Nyomja meg a Zigbee vezeték nélküli gombot a jelenet elindításához. A Fusion kapcsolóhoz csatlakoztatott lámpának ennek megfelelően be kell kapcsolnia/kikapcsolnia. Mind a falikapcsoló, mind a Zigbee vezeték nélküli gomb szinkronban vezérelheti ugyanazt a lámpát.
Hagyjon megjegyzést
Minden hozzászólást moderálnak a közzététel előtt.
Ezt a webhelyet a hCaptcha rendszer védi, és a hCaptcha adatvédelmi szabályzata, valamint szolgáltatási feltételei vonatkoznak rá.