










Introduction
A thermostatic radiator valve controls the flow of hot water through a radiator to maintain the target room temperature. It allows each room to follow its own temperature setting and heating schedule instead of relying on one central thermostat.
Zigbee TRVs are well suited to this type of setup because Zigbee uses low-power local communication and supports a mesh network that can become more reliable as compatible powered devices are added.
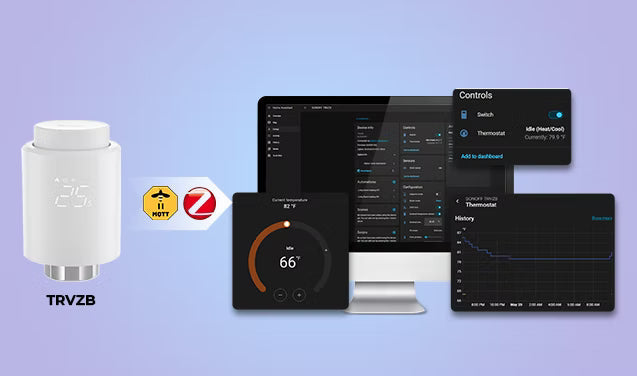
When connected to Home Assistant through ZHA or Zigbee2MQTT, a compatible TRV can be managed locally alongside devices from different brands. This enables local automations that can continue running during an internet outage, while keeping more control within your home network.
However, compatibility and available controls vary by TRV model and integration. Some devices expose only basic temperature controls, while others also provide HVAC action, temperature calibration, child lock, open-window detection, or valve-position data.
This guide explains how to choose a compatible Zigbee thermostatic radiator valve, connect it to Home Assistant through ZHA or Zigbee2MQTT, and set up practical heating automations.
What to Look for Before Buying a Zigbee Thermostatic Radiator Valve?
- Exposed entities — At minimum, look for current temperature, target temperature, HVAC mode, and battery level. More advanced TRVs may also expose HVAC action state, temperature offset controls.
- Temperature accuracy features — This affects how responsively the TRV tracks actual room conditions.
- Valve compatibility — M30×1.5mm is the most common radiator valve size in Europe, but some systems use different fittings such as RA, RAV, or Danfoss valves. Check whether adapters are included before buying.
- Battery type and battery life — AA batteries generally last longer than AAA batteries and are easier to replace. Some TRVs use proprietary battery packs, which can be less convenient long-term.
- Motor noise — This matters more than many people expect, especially in bedrooms where frequent valve adjustments can become noticeable at night.
TRVZB: A Reliable Zigbee TRV for Home Assistant

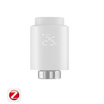
SONOFF Zigbee Thermostatic Radiator Valve | TRVZB
$27.90
【Smart Control】SONOFF Zigbee Thermostatic Radiator Valve supports full smart functions, including remote control via app, voice commands, scheduling, and group management...
View ProductKey Features:
- Local Home Assistant control — compatible with ZHA and Zigbee2MQTT, no cloud account required
- HVAC action entity — supports demand-based boiler automation out of the box
- Battery life — typically 6+ months on 3×AA alkaline batteries (not included)
- PID adaptive mode — from firmware v1.4.4+, automatically adjusts the valve opening level based on room temperature changes rather than simple on/off switching, which helps maintain more stable temperatures
- Open window detection — closes the valve automatically when it detects a sudden temperature drop
- Frost protection & child lock— useful safeguards that work even when HA is offline
- Quiet motor operation — generally suitable for bedrooms and nighttime use
- Wide valve compatibility — fits M30×1.5mm natively, adapters included for other common types 👉 TRVZB Applicable Valve List
How to Add a Zigbee Thermostatic Radiator Valve to Home Assistant?
ZHA vs Zigbee2MQTT
- ZHA (Zigbee Home Automation) is the native integration built directly into Home Assistant. No extra software required — the pairing process is straightforward, and everything lives inside HA's UI. For most beginners, this is the easier starting point.
- Zigbee2MQTT (Z2M) is a separate application that communicates with Home Assistant via MQTT. The setup is more involved, but it has been around longer and has a very active community behind it.
What You Need Before Setup
- Home Assistant — up and running with ZHA or Zigbee2MQTT configured
- A Zigbee Coordinator or Dongle — Manages your Zigbee network (e.g., ZBDongle-P, ZBDongle-E, PoE Dongle | Dongle-M, Dongle Plus MG24, Dongle-LMG21). If you haven't set one up yet, these guides cover everything:
- A Zigbee TRV — compatible with ZHA or Zigbee2MQTT. We're using the TRVZB as the example device in this guide.
Note:
- Before pairing, make sure your TRV is physically installed on the radiator and powered on. Most devices also run a short self-calibration on first boot. Check your manufacturer's instructions for the exact steps — it usually takes under a minute.
- If you're still setting up your Zigbee network, it's worth choosing a reliable coordinator first. Heating automations tend to work best when the underlying Zigbee network is stable.
Via ZHA
- Put your TRV into pairing mode — typically by holding a button for a few seconds until an LED flashes. Always refer to the device manual for the exact pairing steps.
- Add the device in ZHA: go to Settings → Devices & Services → ZHA → Add Device. ZHA will scan and find your TRV.


- Configure climate entities — after pairing, rename the device to something recognizable (e.g., "Living Room Radiator") and assign it to a room.

-
Verify the Device in Home Assistant:
- Go to Settings → Devices & Services → ZHA → Devices.
- Open the TRV device page.
- Your TRV will appear as a climate entity, allowing you to set specific temperatures, monitor heating activity, change HVAC modes, adjust target temperatures, track battery levels, build automations directly from Home Assistant, and more.


Via Zigbee2MQTT
- Enable permit join — in Z2M, click "Permit Join" in the dashboard. This opens your Zigbee network for new devices.
- Put your TRV into pairing mode — same as above, hold the pairing button until it starts broadcasting.
- Rename it and check that the climate entities are exposed in Home Assistant.
- Expose climate entities — once paired, Z2M will automatically create climate entities for your TRV. You may need to rename them in HA for easier identification.
- 📖 How to Sync Zigbee Devices to Home Assistant via MQTT – complete MQTT Broker setup and device sync walkthrough.
- 📖 Zigbee Devices Work with Home Assistant via Zigbee2MQTT – Zigbee2MQTT installation and configuration guide.
How to Automate Heating with TRVs in Home Assistant?
Set Up Smart Heating Schedules
Use a Schedule Helper in Home Assistant to define when each room should switch between comfort and eco temperatures. This allows bedrooms, living areas, and home offices to follow separate temperature schedules instead of heating the entire home at the same time.
- Lower bedroom temperatures overnight
- Warm the living room before morning
- Reduce heating during work hours
- Automatically switch to eco temperatures late at night
👉 In Home Assistant, go to: Settings → Devices & Services → Helpers → Create Helper → Schedule
Then use the schedule as a trigger or condition in an automation that changes the TRV target temperature.
Pause Heating When a Window Opens
Combine a TRV with a door or window sensor to stop unnecessary heating while a room is being ventilated. When the window opens, Home Assistant can lower the target temperature or lower the target temperature or switch the TRV to a supported eco or off mode. When the window closes, restore the previous temperature after a short delay.
This is usually more reliable than relying only on a sudden temperature drop, since the automation responds immediately to the window state.
Some TRVs also include built-in open-window detection, but the detection method, timeout, and available settings vary by model.
Use Presence Detection for Smart Heating Control
Use presence or occupancy detection to reduce heating when a room or home is empty. Home Assistant can switch selected TRVs to an eco temperature after a period of inactivity and restore the normal setpoint when someone returns or when the room is expected to be used again.
This works well for:
- Living rooms used only at certain times
- Home offices with irregular schedules
- Guest rooms
- Whole-home away mode
Add a delay before lowering the temperature so short periods of inactivity do not trigger unnecessary changes.
Control Central Heating with TRV Demand
If you use a central heating system with a compatible boiler controller, Home Assistant can use data from Zigbee TRVs as room-level heating demand inputs. Instead of running the boiler on a fixed schedule, the system can heat only when one or more rooms actually need warmth.
Depending on the TRV model and integration, Home Assistant may use entities such as HVAC action, heating state, heating demand, valve position, or other exposed signals.
A common setup works like this:
- A TRV reports that a room needs heating.
- Home Assistant checks whether any other rooms also require heat.
- If heating demand exists, Home Assistant activates the boiler or heating relay.
- When no rooms need additional heat, the boiler can return to standby.
Tip: Frequent on/off cycling can reduce efficiency and may affect system performance. Add appropriate delays or minimum run times and keep the boiler manufacturer's safety controls in place.
Conclusion
FAQs
Q1: Do Zigbee thermostatic radiator valves work with Home Assistant?
- Control the room temperature locally
- Build heating schedules
- Create room-by-room automations
- Reduce unnecessary heating
- Monitor heating history and battery levels
Q2: Which is better for TRVs: ZHA or Zigbee2MQTT?
Q3: Can Zigbee TRVs work without the internet?
Q4: Can I automate my boiler using TRVs in Home Assistant?
- Turn on the boiler only when a room requests heat
- Turn the boiler off when all rooms reach the target temperature
This is one of the biggest advantages of integrating TRVs with Home Assistant instead of using standalone radiator schedules.
Q5: Why is my TRV temperature reading inaccurate?
Q6: Do I need an external temperature sensor?
Q7: What happens to my heating if Home Assistant goes offline?
- If your schedule is stored only in Home Assistant (e.g., using time‑based automations), your heating schedule will stop working when HA goes offline. The TRV will either keep its last set temperature or do nothing until HA comes back.
- If your TRV has its own built‑in schedule, it can continue following that schedule independently.
- Heating‑by‑demand automations (for example, turning the boiler on only when a TRV calls for heat) will also stop working because both the decision logic and command delivery rely on Home Assistant.
Q8: Why does my TRV keep opening and closing?
- Aggressive temperature calibration
- Poor sensor placement
- Rapid room temperature fluctuations
- Strong drafts near the radiator
Q9: Why does the radiator stay warm after reaching the target temperature?
Q10: What is the PID adaptive mode on the TRVZB?


Leave a comment
All comments are moderated before being published.
This site is protected by hCaptcha and the hCaptcha Privacy Policy and Terms of Service apply.