









Introdução
Adicionar uma câmara de segurança compatível ao Home Assistant dá-lhe acesso local ao fluxo de vídeo, uma interface unificada para câmaras de diferentes marcas e mais controlo sobre como o vídeo e os eventos da câmara são usados na sua casa inteligente.
Uma vez ligada, a câmara pode fazer mais do que mostrar vídeo em direto. Dependendo do modelo e da integração, o Home Assistant pode receber eventos de deteção de movimento ou pessoas, controlar funções suportadas de pan e tilt, guardar instantâneos ou gravações e usar a atividade da câmara para ativar luzes, alarmes ou notificações.
ONVIF é frequentemente usado para adicionar câmaras compatíveis ao Home Assistant, enquanto o RTSP fornece o fluxo de vídeo em direto. Este guia explica as principais opções de ligação, como adicionar uma câmara compatível com ONVIF e como usar eventos da câmara em automações práticas de segurança doméstica.
Formas de Ligar uma Câmara de Segurança ao Home Assistant
As câmaras de segurança podem ligar-se ao Home Assistant de várias formas. A opção certa depende do que a câmara suporta e se precisa apenas de vídeo em direto ou também de eventos de deteção, controlos PTZ, gravação e definições do dispositivo.
|
Rota de ligação |
Como funciona |
Capacidades típicas |
|
Integração específica de marca |
O Home Assistant liga-se através de uma integração dedicada para a marca da câmara |
Vídeo em direto, eventos de deteção, estado do dispositivo e controlos específicos do modelo |
|
Uma câmara compatível é adicionada através da integração ONVIF incorporada no Home Assistant |
Vídeo em direto, eventos de deteção e controlos PTZ, dependendo da câmara |
|
|
Fluxo RTSP direto |
A URL RTSP da câmara é usada como fonte de vídeo via Generic Camera, FFmpeg ou outra plataforma compatível |
Principalmente vídeo em direto; eventos de deteção e controlos da câmara geralmente requerem uma integração separada |
|
NVR ou plataforma de vídeo |
As câmaras ligam-se ao Frigate, a um NVR específico de marca ou a outro sistema de vídeo antes de serem adicionadas ao Home Assistant |
Gravação, histórico de eventos, gestão de múltiplas câmaras e entidades de deteção de objetos |
Dica: ONVIF e RTSP têm funções diferentes. ONVIF é um padrão de interoperabilidade usado para descoberta de câmaras, perfis de media, eventos e controlos suportados. RTSP é um protocolo de streaming usado para transmitir áudio e vídeo em direto. Podem funcionar em conjunto: uma câmara ONVIF pode ainda usar RTSP para o seu fluxo em direto.
Qual Método de Ligação Deve Usar?
- Para iniciantes, comece com uma integração de marca suportada se o Home Assistant suportar a marca da câmara. Se a câmara suportar ONVIF, pode adicioná-la através da integração ONVIF incorporada no Home Assistant.
- Use RTSP quando precisar principalmente de vídeo em direto ou quiser enviar o fluxo para um NVR.
- Câmaras sem uma integração nativa adequada ou ONVIF podem necessitar de Generic Camera, FFmpeg, Scrypted, go2rtc ou uma integração personalizada. Estas opções requerem uma configuração mais manual e são principalmente úteis para conversão de stream, compatibilidade de codecs ou câmaras que não são suportadas diretamente.
O Que Procurar Numa Câmara de Segurança para Home Assistant?
Uma câmara pode funcionar bem na sua própria app, mas oferecer apenas funcionalidades limitadas quando ligada ao Home Assistant. Antes de comprar, verifique o que o dispositivo suporta através de uma integração nativa, ONVIF ou RTSP.
Suporte à Integração e Acesso Local
- Verifique se a câmara suporta uma integração local da marca, ONVIF ou um stream RTSP.
- Confirme também que a funcionalidade necessária pode ser ativada e que a câmara fornece o endereço IP, porta e dados de login necessários para a configuração.
Formato de Vídeo e Opções de Stream
- H.264 é geralmente a escolha mais segura para painéis do Home Assistant e reprodução no navegador.
- Uma câmara com um stream principal e um substream de resolução inferior oferece mais flexibilidade: se disponível, use o stream principal para gravação e o substream de resolução inferior para visualização no painel ou deteção.
- Verifique as definições disponíveis de resolução, taxa de frames e bitrate.
Deteção de Eventos e Controlo da Câmara
Funcionalidades mostradas na app da câmara podem não aparecer no Home Assistant.
- Confirme se a deteção de movimento ou de pessoa pode ser exposta através do ONVIF ou de uma integração nativa.
- Para câmaras de panorâmica e inclinação, verifique também se o Home Assistant pode aceder aos controlos PTZ.
Alimentação e Ligação de Rede
Escolha entre PoE e Wi-Fi com base no local de instalação.
- Câmaras PoE fornecem energia e dados através de um único cabo Ethernet, mas requerem acesso a rede com fios e um switch ou injetor PoE.
- Câmaras Wi-Fi oferecem mais flexibilidade de colocação, mas ainda precisam de um sinal estável e de uma fonte de energia próxima.
Câmaras alimentadas por bateria são geralmente mais adequadas para gravações baseadas em eventos do que para transmissão contínua em direto. Reservar o endereço IP do dispositivo no router também pode evitar que a ligação ao Home Assistant seja interrompida após uma alteração de endereço.
Dica: Considere também o ângulo de visão, visão noturna, proteção contra intempéries e funcionalidades de privacidade para o local pretendido.
Qual Câmara de Segurança SONOFF se Adequa ao Seu Setup do Home Assistant?
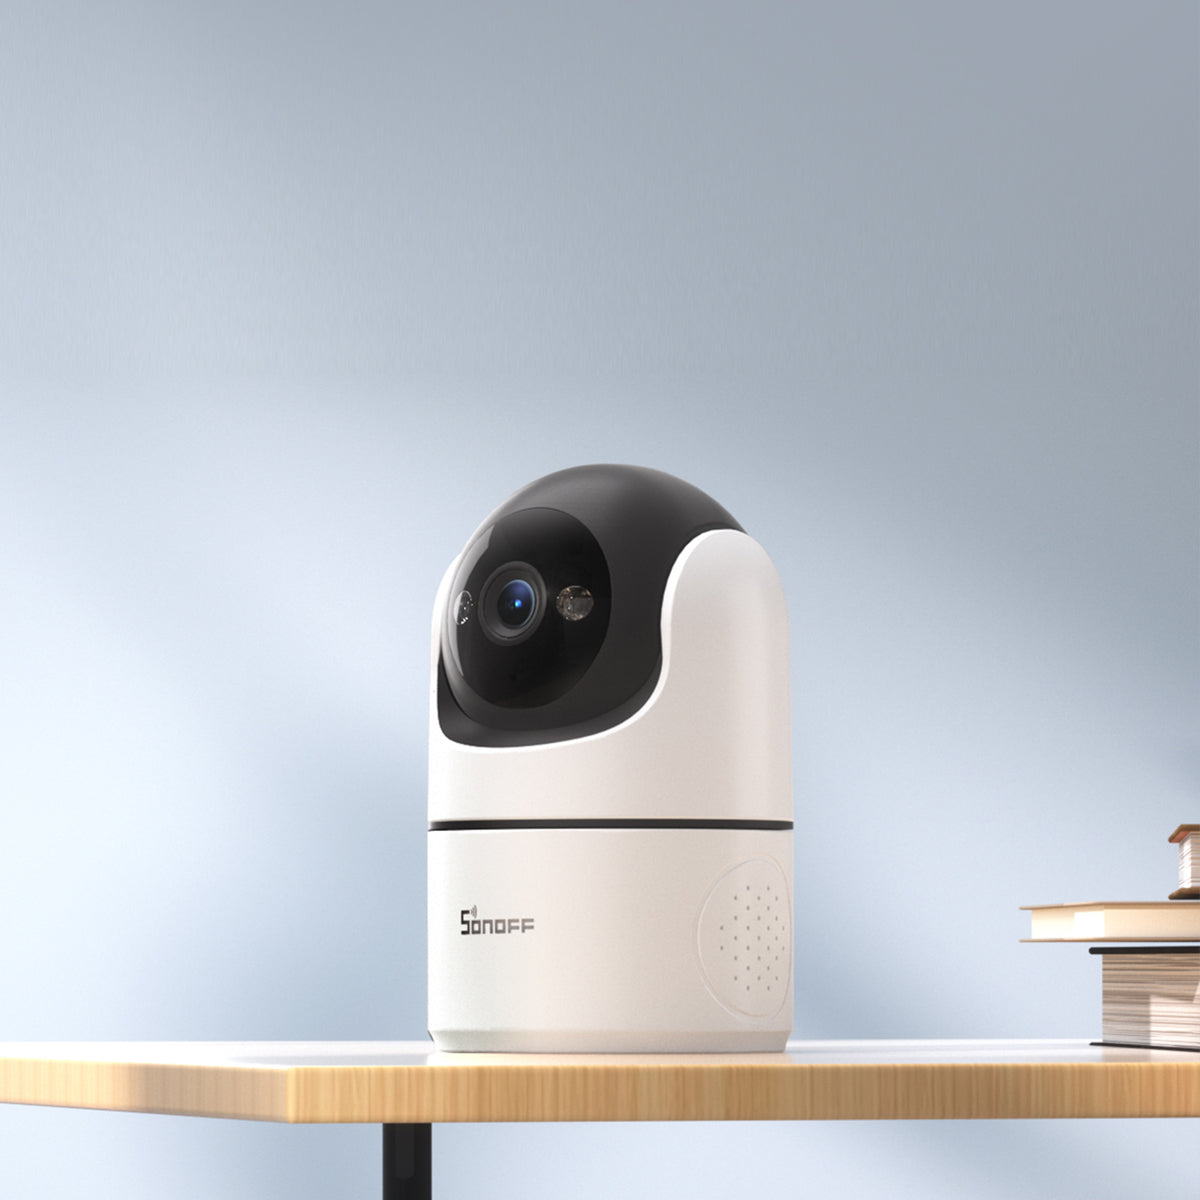
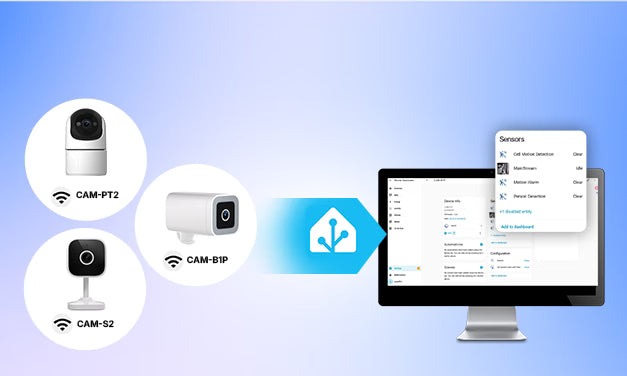
A SONOFF oferece três câmaras de segurança Wi-Fi para monitorização interior e exterior, incluindo modelos de visão fixa e de panorâmica e inclinação. Todas as três suportam ONVIF e RTSP. Através do ONVIF, o Home Assistant pode aceder a vídeo em direto e a eventos de deteção de movimento ou pessoa. Escolha o modelo com base no local onde planeia instalá-lo e na cobertura necessária.
CAM-B1P — Para Segurança Externa
CAM-B1P combina vídeo 2K, pan horizontal de 180°, resistência às intempéries IP65, deteção e seguimento de pessoas, e múltiplos modos de visão noturna, incluindo a cores e infravermelho.
✅ Melhor para: Portas da frente, quintais, garagens, entradas e saídas de caminhos de acesso, entradas e saídas de parques de estacionamento, arredores de armazéns e pequenas áreas comerciais exteriores.

Câmara de segurança inteligente SONOFF CAM Outdoor | CAM-B1P
$29.90
【Controlo de pan horizontal de 180° com resolução HD 2K】Cobre uma área mais ampla com uma lente rotativa para menos pontos cegos e monitorização mais abrangente. Com resolução HD 2K, capture cada detalhe com vídeo nítido e de alta definição para maior segurança e clareza na vigilância...
Ver produto
CAM-PT2 — Para cobertura interior com pan e tilt
CAM-PT2 fornece vídeo 1080p, rotação horizontal de 340°, inclinação vertical de 180°, até seis posições predefinidas, e visão noturna tanto infravermelha como a cores.
✅ Melhor para: Salas de estar, quartos de bebé, áreas para animais de estimação, corredores, escritórios domésticos e espaços interiores maiores.

Câmara de segurança inteligente SONOFF CAM Pan-Tilt 2 para interiores | CAM-PT2
$24.90
【Vista panorâmica quase 360°】Com a sua funcionalidade suave de pan-tilt, a câmara elimina pontos cegos, permitindo monitorizar cada canto do seu espaço com facilidade, ideal para segurança doméstica ou de escritório 24/7...
Ver produto
CAM-S2 — Para monitorização fixa interior
CAM-S2 oferece vídeo em direto 1080p num design fixo e fino, com zonas de privacidade personalizadas e modo de descanso para monitorização interior focada.
✅ Melhor para: Entradas, corredores, quartos de bebé, quartos, escritórios domésticos, áreas para animais de estimação e outras localizações fixas interiores.

Câmara de segurança inteligente SONOFF CAM Slim Gen2 | CAM-S2
$19.90
【Proteção de privacidade – O seu espaço, as suas regras】Proteja o seu espaço pessoal com múltiplas funcionalidades de privacidade: Modo de descanso para desligar totalmente a monitorização de vídeo; Zonas de privacidade personalizadas para bloquear áreas sensíveis de serem gravadas...
Ver produto
Suporte de funcionalidades do Home Assistant
A tabela abaixo mostra quais as funcionalidades disponíveis quando CAM-B1P, CAM-PT2 e CAM-S2 estão ligados ao Home Assistant através de ONVIF ou RTSP.
|
Modelo |
Método de ligação |
Descoberta de dispositivo |
Visualização em direto |
Controlo PTZ |
Eventos de deteção de movimento / pessoa |
|
CAM-B1P |
ONVIF |
✅ |
✅ |
✅ — configuração manual de script necessária |
✅ — Gatilho de automação |
|
RTSP |
❌ |
✅ |
❌ |
❌ |
|
|
CAM-PT2 |
ONVIF |
✅ |
✅ |
✅— configuração manual de script necessária |
✅ — Gatilho de automação |
|
RTSP |
❌ |
✅ |
❌ |
❌ |
|
|
CAM-S2 |
ONVIF |
✅ |
✅ |
Não aplicável |
✅ — Gatilho de automação |
|
RTSP |
❌ |
✅ |
Não aplicável |
❌ |
Nota: O controlo PTZ para CAM-B1P e CAM-PT2 requer configuração manual de script. A disponibilidade da funcionalidade pode variar consoante a versão do firmware.
🔎Guia relacionado: Veja como integrar câmaras SONOFF com o Home Assistant, incluindo requisitos de firmware e configuração PTZ.
Como Adicionar uma Câmara ONVIF ao Home Assistant?
O ONVIF é amplamente usado com câmaras de segurança IP compatíveis e pode expor vídeo, eventos e controlos PTZ. A configuração exata varia consoante a marca da câmara, mas o processo básico é semelhante para a maioria das câmaras de segurança compatíveis com ONVIF.
Antes de Começar
- Confirme que a câmara suporta ONVIF.
- Anote o endereço IP da câmara, porta ONVIF, nome de utilizador e palavra-passe.
- Certifique-se de que a câmara pode comunicar com o Home Assistant através da rede.
- Atualize o firmware da câmara se necessário.
1. Ative o ONVIF na Câmara
Abra a app da câmara ou a interface web e procure ONVIF nas definições de rede, avançadas ou de integração de terceiros. Alguns modelos requerem uma conta ONVIF separada, enquanto outros usam os dados normais de login da câmara.
Dica SONOFF: Para CAM-B1P, CAM-S2 e CAM-PT2, ative ONVIF e RTSP na app eWeLink antes de iniciar a configuração no Home Assistant.

2. Adicione a Integração ONVIF
No Home Assistant:
1. Vá a Definições → Dispositivos & serviços.
2. Selecione Adicionar Integração.
3. Procure por ONVIF.
4. Escolha a câmara descoberta ou introduza manualmente o seu endereço IP e porta.
5. Introduza os dados de login da câmara e complete a configuração.
O Home Assistant pode descobrir automaticamente muitas câmaras ONVIF. A configuração manual está disponível se a deteção falhar.

3. Verifique as Entidades Disponíveis
Abra a nova página do dispositivo da câmara e verifique quais as funcionalidades disponíveis, tais como:
- Vídeo em direto
- Deteção de movimento
- Deteção de pessoas
- Entidades adicionais de câmara ou controlo
As entidades disponíveis dependem do modelo da câmara, firmware e implementação ONVIF. Os controlos PTZ podem requerer configuração adicional em modelos suportados.

4. Adicione a Visualização em Direto a um Painel
Abra um painel existente, selecione Editar painel e adicione um cartão compatível com câmara, como Entidade de Imagem. Selecione a entidade da câmara, depois teste a visualização em direto e os controlos disponíveis.
Um substream de resolução inferior pode carregar mais rapidamente no painel, enquanto o stream principal é geralmente melhor para gravação.

Está a usar uma câmara SONOFF? Veja o guia completo de integração da câmara SONOFF para requisitos de firmware, definições ONVIF, scripts PTZ e funcionalidades específicas do modelo.
Câmara apenas RTSP: Use o stream com Generic Camera, FFmpeg ou uma plataforma NVR compatível.
Automatizações de Câmara no Home Assistant para Melhor Segurança
Uma vez ligada, a deteção de movimento ou de pessoas pode desencadear ações úteis no Home Assistant. As opções disponíveis dependem dos eventos e controlos que a câmara expõe no Home Assistant.
Receba uma Notificação com Fotografia da Câmara Quando Alguém For Detetado
Envie uma notificação para o telemóvel com uma fotografia da câmara quando uma pessoa for detetada perto da porta da frente, entrada de garagem ou garagem. Quando suportado, a deteção de pessoas pode reduzir alertas causados por chuva, sombras ou plantas em movimento.
Ligue as Luzes Exteriores Quando For Detetado Movimento
Use a câmara como gatilho para ligar uma luz na varanda, entrada de garagem ou jardim após o anoitecer. Adicione um atraso curto para desligar a luz novamente quando não for detetada mais atividade.
Grave um Clipe Curto Quando Alguém Se Aproximar
Se a entidade da câmara suportar gravação, guarde um clipe curto quando a câmara detetar uma pessoa, uma porta abrir ou um alarme disparar. Isto é útil para rever a atividade em entradas e outras áreas-chave. Para gravação contínua e histórico de eventos, use um NVR como o Frigate.
Também pode mostrar a visualização em direto da câmara num painel de parede do Home Assistant quando alguém é detetado ou quando a campainha é pressionada, facilitando ver quem está na entrada sem abrir a aplicação da câmara.
Problemas Comuns de Câmaras no Home Assistant
A Câmara Não É Detetada no Home Assistant
Confirme que o ONVIF está ativado e que a câmara e o Home Assistant conseguem comunicar pela rede. Depois, verifique o endereço IP, a porta ONVIF, o nome de utilizador e a palavra-passe. Um firewall, regra VLAN ou rede Wi-Fi para convidados também pode bloquear a deteção.
O Fluxo em Direto Está Lento ou Continua a Fazer Buffering
Experimente um subfluxo de resolução inferior para o painel. Também pode reduzir a taxa de frames ou o bitrate e verificar o sinal Wi-Fi da câmara. Evite abrir o fluxo principal em muitos dispositivos ao mesmo tempo.
O Vídeo Funciona mas os Eventos de Movimento Não Aparecem
Um fluxo RTSP normalmente fornece apenas vídeo. Eventos de deteção de movimento ou pessoas requerem suporte a eventos ONVIF, uma integração nativa da marca ou uma plataforma de vídeo como o Frigate. Funcionalidades disponíveis na aplicação da câmara podem nem sempre estar expostas no Home Assistant.
A Câmara Funciona na Aplicação da Marca mas Não Localmente
Algumas câmaras dependem principalmente da aplicação da marca ou do serviço na cloud e não fornecem acesso local a ONVIF ou RTSP. Verifique as especificações do produto, as definições da aplicação e o suporte do firmware antes de continuar a resolver problemas no Home Assistant.
Conclusão
Comece com uma integração de marca suportada ou ONVIF quando precisar de eventos de deteção e controlo da câmara. Use RTSP quando precisar principalmente do fluxo de vídeo e adicione um NVR como o Frigate quando precisar de gravação contínua ou deteção local de objetos.
Antes de comprar, verifique o suporte real a ONVIF ou RTSP, as entidades disponíveis no Home Assistant e quaisquer limitações em PTZ ou deteção de eventos. Confirme quais funcionalidades estão realmente disponíveis no Home Assistant, e não apenas na aplicação da câmara.
Para configurações SONOFF, escolha CAM-B1P para monitorização exterior 2K com panorâmica horizontal de 180°, rastreio humano e proteção IP65 contra intempéries. Escolha a compacta CAM-S2 para uma vista fixa interior com zonas de privacidade e modo de suspensão. Para cobertura interior mais ampla, CAM-PT2 adiciona movimento de panorâmica e inclinação, posições predefinidas e visão noturna infravermelha ou a cores.
Perguntas Frequentes
P 1: Qualquer câmara de segurança pode funcionar com o Home Assistant?
Nem todas as câmaras de segurança podem ligar-se diretamente ao Home Assistant. A câmara precisa de uma integração de marca suportada, suporte ONVIF, um fluxo RTSP ou outro método de ligação compatível. Alguns modelos só funcionam através da sua própria aplicação e não fornecem um fluxo de vídeo local ou controlos de dispositivo que o Home Assistant possa aceder.
P 2: Como posso saber se uma câmara suporta ONVIF?
- Consulte as especificações do produto, o manual do utilizador ou a documentação de suporte para compatibilidade ONVIF.
- Procure definições ONVIF na aplicação da câmara ou na interface web.
- Use ONVIF Device Manager (ODM) para uma verificação mais detalhada. O ODM é uma ferramenta gratuita para Windows que analisa a rede local à procura de dispositivos ONVIF. Pode mostrar se a câmara responde a pedidos ONVIF, quais os perfis que suporta, URLs disponíveis do fluxo RTSP e quaisquer capacidades reportadas de PTZ ou eventos.
P 3: Preciso do Frigate para usar uma câmara no Home Assistant?
Nem sempre. Muitas câmaras podem fornecer vídeo em direto, eventos de deteção e automação básica através de integração nativa ou ONVIF. O Frigate é principalmente útil quando precisa de gravação contínua, histórico de eventos, gestão de múltiplas câmaras ou deteção local de objetos.
P 4: O Home Assistant pode gravar imagens da câmara?
O Home Assistant pode guardar instantâneos e gravações curtas de entidades de câmara suportadas. No entanto, a fiabilidade da gravação e as ações disponíveis dependem da integração da câmara e do fluxo de vídeo. Para gravação contínua, linhas temporais de eventos e reprodução mais fácil, um NVR como o Frigate é geralmente mais adequado.
P 5: Porque é que consigo ver o vídeo mas não os eventos de movimento?
A câmara pode estar ligada através de RTSP, que normalmente fornece apenas o fluxo de vídeo. Eventos de deteção de movimento ou pessoas requerem suporte do ONVIF, uma integração nativa de marca, ou uma plataforma de vídeo como o Frigate. Uma funcionalidade disponível na aplicação da câmara pode nem sempre estar acessível no Home Assistant.

Deixe um comentário
Todos os comentários são moderados antes de serem publicados.
Este site está protegido pela Política de privacidade da hCaptcha e da hCaptcha e aplicam-se os Termos de serviço das mesmas.