










Introdução
Um interruptor dimmer do Home Assistant pode fazer mais do que ligar e desligar luzes. Permite definir diferentes níveis de brilho para luzes noturnas, cozinhar, ver filmes, hora de dormir e outras rotinas diárias.
Mas escolher um interruptor dimmer não é tão simples como escolher um interruptor inteligente normal. Precisa de verificar se as suas luzes são dimmáveis, se o dimmer corresponde à sua fiação e faixa de carga, e se o Home Assistant pode disponibilizar controlo de brilho após o emparelhamento.
Este guia explica como funcionam os interruptores dimmer do Home Assistant, como escolher entre dimmers inteligentes, lâmpadas inteligentes e módulos dimmer embutidos, e como usá-los para automatizações práticas de iluminação.
Resposta rápida: Pode usar um interruptor dimmer com o Home Assistant?
Sim. O Home Assistant pode controlar muitos interruptores dimmer inteligentes através do ZHA, Zigbee2MQTT, Matter, Z-Wave ou integrações Wi-Fi suportadas. Após a configuração, o dimmer deve idealmente aparecer como uma entidade de luz com controlo de ligar/desligar e brilho, e não apenas como um interruptor básico.
Antes de escolher, verifique se as suas luzes são dimmáveis, se a carga e a fiação correspondem ao dimmer e se a integração disponibiliza controlo de brilho no Home Assistant.
Para a maioria dos utilizadores, o protocolo certo depende do sistema que já está a usar: o Zigbee é uma boa opção para controlo local, automatizações responsivas, rede mesh e amplo suporte a dispositivos de casa inteligente. O Matter facilita o emparelhamento com um código QR ou código de configuração e funciona bem para configurações multiplataforma. O Wi-Fi depende da integração da marca, enquanto o Z-Wave é uma opção mesh local que normalmente custa mais e tem menos opções de dimmers.
O que é que um Interruptor Dimmer do Home Assistant Realmente Faz?
Um interruptor dimmer inteligente permite ligar e desligar as luzes e ajustar o brilho. Ao contrário de um interruptor inteligente normal, não se limita ao controlo básico de ligar/desligar — permite definir o brilho certo para diferentes divisões, horas do dia e rotinas.
Também é diferente de um dimmer de parede tradicional. Pode continuar a usar o interruptor de parede, mas uma vez adicionado ao Home Assistant, pode também controlá-lo a partir do painel, incluí-lo em cenas e usá-lo em automatizações.
Com o Home Assistant, um interruptor dimmer pode ser usado para:
- Controlo local da iluminação, especialmente com dimmers Zigbee ligados através do ZHA ou Zigbee2MQTT.
- Automatizações com sensores de movimento, sensores de presença, botões sem fios e outros dispositivos de casa inteligente.
- Cenas baseadas no brilho, como modo cinema, iluminação para a hora de dormir ou luzes noturnas de baixo brilho.
- Iluminação diária mais confortável, como luzes suaves no corredor à noite, luzes mais brilhantes na cozinha durante a cozinha e luzes atenuadas na sala para ver televisão.
- Monitorização de energia opcional, se o modelo do dimmer disponibilizar dados de energia no Home Assistant.
Interruptor Dimmer Inteligente vs Lâmpadas Inteligentes: Qual Deve Escolher?
Antes de escolher um interruptor dimmer para o Home Assistant, decida que tipo de controlo de iluminação precisa. Na maioria das casas, a escolha resume-se a três opções: um interruptor dimmer inteligente, lâmpadas inteligentes ou um módulo dimmer embutido na parede.
Escolha um interruptor dimmer inteligente se...
- Quer manter o controlo físico na parede, para que familiares, convidados ou qualquer pessoa possa continuar a usar o interruptor normalmente.
- Um interruptor controla várias luzes dimmáveis, como luzes embutidas ou focos.
- Precisa principalmente de controlo de brilho, não de cor RGB ou efeitos avançados de temperatura de cor.
- Quer adicionar luzes dimmáveis existentes ao Home Assistant sem substituir todas as lâmpadas.
Escolha lâmpadas inteligentes se...
- Precisa de cor RGB, branco ajustável ou efeitos de iluminação decorativos.
- Está a alugar e não pode modificar a fiação nem substituir os interruptores de parede.
- Quer controlar cada lâmpada separadamente, como diferentes lâmpadas na mesma luminária ou divisão.
Escolha um módulo dimmer embutido na parede se...
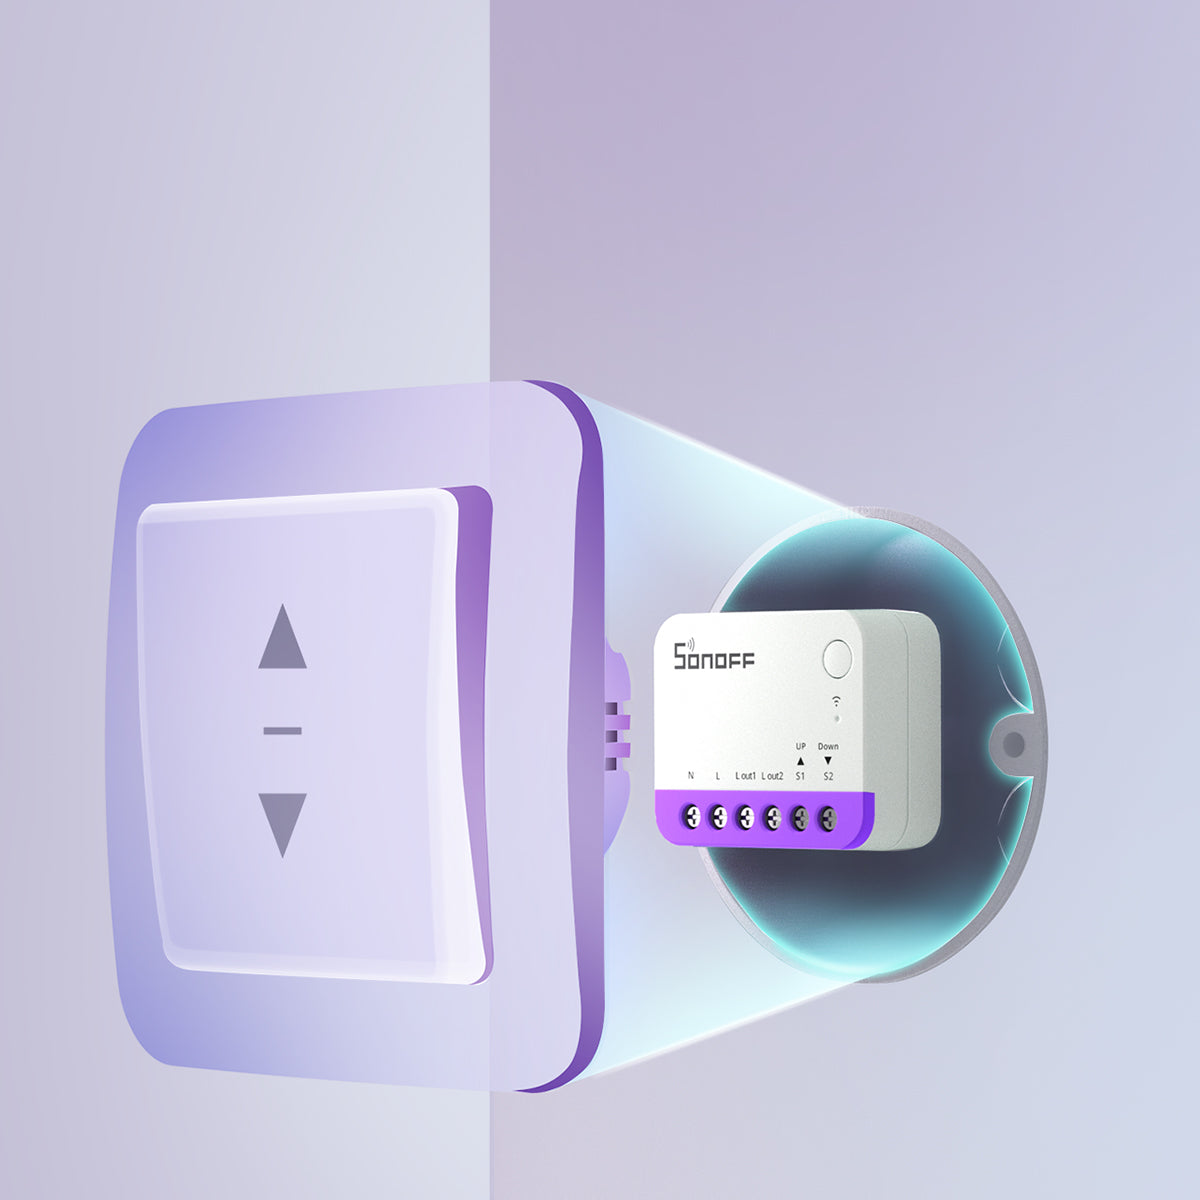
- Quer manter o interruptor de parede ou painel decorativo existente, com o módulo dimmer escondido atrás dele.
- A sua caixa de parede tem espaço suficiente para um módulo oculto.
- Está a atualizar uma caixa de interruptores existente de um ou vários módulos sem substituir a placa frontal inteira.
👉Resumo rápido: Escolha um interruptor dimmer inteligente para controlo de brilho na parede, lâmpadas inteligentes para controlo de cor e de lâmpadas individuais, e um módulo dimmer embutido na parede se quiser dimmer inteligente atrás do interruptor existente.
Qual Protocolo Deve Escolher para um Interruptor Dimmer no Home Assistant?
Antes de verificar a fiação ou especificações de carga, certifique-se de que o dimmer é compatível com a sua configuração atual do Home Assistant. O protocolo afeta como o dispositivo é adicionado, se pode funcionar localmente e quais funcionalidades aparecem após o emparelhamento.
- Zigbee: Uma boa escolha se já usar ZHA ou Zigbee2MQTT. Suporta controlo local e rede mesh, mas requer um coordenador Zigbee.
- Matter: Útil se quiser emparelhamento multiplataforma mais fácil, normalmente através da leitura de um código QR ou introdução de um código de configuração. Pode funcionar com o Home Assistant e outras plataformas compatíveis com Matter, mas as funcionalidades disponíveis podem variar consoante o dispositivo.
- Wi-Fi: Fácil de ligar ao seu router existente sem necessidade de hub, mas o suporte no Home Assistant depende da integração da marca. Verifique se o fabricante oferece uma integração oficial ou uma integração suportada pela comunidade.
- Z-Wave: Uma opção estável de rede local mesh se já usar Z-Wave. Comparado com as opções Zigbee, Wi-Fi e Matter, os dimmers Z-Wave geralmente têm menos opções populares e podem ser mais caros.
O Que Procurar Antes de Comprar um Interruptor Dimmer para Home Assistant?
Antes de comprar, certifique-se de que é compatível com as suas luzes, fiação, caixa de parede e configuração do Home Assistant.
Luzes Dimmáveis e Compatibilidade com Tipo de Lâmpada
Nem todas as lâmpadas ou luminárias LED podem ser dimmadas. Verifique se as suas luzes estão claramente indicadas como dimmáveis e se o dimmer suporta o seu tipo de lâmpada, como LED dimmável, incandescente, halogénea ou luzes com transformador eletrónico.
O método de dimming também deve corresponder às suas luzes. Para muitos LEDs dimmáveis modernos, o dimming por trailing-edge é geralmente mais adequado.
Intervalo de Carga e Potência Nominal
Antes de comprar, verifique:
- Intervalo de carga suportado: Certifique-se de que as luzes estão dentro do intervalo de potência suportado pelo dimmer.
- Potência máxima por tipo de lâmpada: Luzes LED, incandescentes, halogéneas e com transformador eletrónico podem ter limites de potência diferentes.
- Potência total: Certifique-se de que a potência total de todas as luzes no mesmo interruptor fique abaixo do limite nominal do dimmer.
- Tensão nominal: Certifique-se de que corresponde ao padrão de tensão local, como 100–120V ou 220–240V.
Dica: Tente deixar alguma margem em vez de usar o dimmer próximo do seu limite máximo.
Requisito de Fio Neutro
Se não houver fio neutro na caixa do seu interruptor, escolha um dimmer que seja claramente indicado para instalação sem fio neutro. Se houver fio neutro disponível, normalmente terá mais opções.
Dimmers com fio neutro geralmente têm uma alimentação mais estável para o módulo inteligente em si. Dependendo do modelo, isso pode ajudar a suportar cargas mais baixas, operação mais estável ou funcionalidades adicionais.
Tamanho e Espaço da Caixa de Parede
O tamanho da caixa de parede é importante, especialmente para módulos dimmer embutidos como o MINI-ZBDIM ou o MINI-DIM. Se a caixa for muito rasa ou estiver cheia de fios, o módulo pode não caber atrás do interruptor existente.
Antes de comprar, verifique a profundidade da caixa de parede, o espaço disponível e o tipo local de caixa de parede.
Funcionalidades Úteis a Procurar
Alguns dimmers também oferecem funcionalidades úteis, como calibração de brilho, monitorização de energia, suporte a interruptores externos e proteção de segurança contra sobrecarga, sobrecorrente ou sobreaquecimento. Verifique quais funcionalidades são suportadas no Home Assistant antes de comprar.
Como Adicionar um Interruptor Dimmer ao Home Assistant?
O processo de configuração depende do protocolo que o seu interruptor dimmer utiliza.
Os dimmers Zigbee podem geralmente ser adicionados via ZHA ou Zigbee2MQTT; os dimmers Matter podem ser adicionados através da integração Matter do Home Assistant, e os dimmers Wi-Fi podem usar Matter, uma integração oficial de marca ou uma integração comunitária.
Adicionar um interruptor dimmer Zigbee via ZHA ou Zigbee2MQTT
Para ZHA (Zigbee Home Automation), ligue um coordenador Zigbee ao Home Assistant, abra Definições > Dispositivos & serviços > ZHA, clique em Adicionar dispositivo e coloque o dimmer em modo de emparelhamento.
Para Zigbee2MQTT, certifique-se de que o broker MQTT e o Zigbee2MQTT estão a funcionar, ative Permit join no Zigbee2MQTT, coloque o dimmer em modo de emparelhamento e aguarde que o dispositivo apareça no Zigbee2MQTT.
Após o emparelhamento, verifique quais as funcionalidades expostas, como controlo de ligar/desligar, brilho, calibração ou monitorização de energia.
👉 Para passos detalhados, veja: Como Adicionar Dispositivos Zigbee ao Home Assistant Via ZHA ou Zigbee2MQTT
Adicionar um interruptor dimmer Matter ao Home Assistant
Passos básicos:
- Certifique-se de que a integração Matter do Home Assistant está pronta.
- Coloque o dimmer em modo de emparelhamento.
- Abra a App Companion do Home Assistant no seu telemóvel.
- Digitalize o código QR Matter no dimmer ou introduza o código de configuração.
- Atribua o dispositivo a uma divisão e renomeie-o se necessário.
- Teste o controlo de ligar/desligar e brilho no Home Assistant.
👉 Como Adicionar Dispositivos Matter ao Home Assistant
Adicionar um interruptor dimmer Wi-Fi ao Home Assistant
Wi-Fi é um método de conexão de rede, mas não define como o dispositivo comunica com o Home Assistant. Isso significa que os dimmers Wi-Fi podem usar diferentes caminhos de integração dependendo da marca e modelo.
As opções comuns de integração incluem:
● Matter — se o dimmer Wi-Fi suportar o padrão Matter para casas inteligentes.
● Integrações oficiais de marcas — se fornecidas pelo fabricante.
● Integrações da comunidade HACS — se não existir uma integração oficial, mas houver suporte confiável da comunidade.
Alguns dimmers Wi-Fi podem expor apenas funcionalidades limitadas, dependendo da integração. Antes de criar automações, verifique se o controlo de brilho está disponível.
👉 Para dispositivos SONOFF Wi-Fi, veja: Como Adicionar Dispositivos SONOFF Wi-Fi ao Home Assistant
O que Deve Ver Após a Configuração?
Após a configuração, um interruptor dimmer deve idealmente fornecer:
● Uma entidade de luz no Home Assistant
● Controlo de ligar/desligar
● Um deslizador de brilho no painel
● Controlo de brilho em cenas e automações
● Suporte para ações como light.turn_on
● Controlo da percentagem de brilho, como 25%, 50%, 75% ou 100%.


Nota: Se o dispositivo aparecer apenas como um interruptor básico de ligar/desligar, a integração pode não expor o controlo de brilho para esse modelo de dimmer. Verifique se está a usar a entidade correta e procure atualizações de firmware necessárias, peculiaridades ZHA, conversores Zigbee2MQTT ou atualizações da integração.
Automação de Dimmer do Home Assistant para Iluminação Diária
Assim que um interruptor dimmer aparecer no Home Assistant como uma entidade de luz com controlo de brilho, pode usá-lo em cenas e automações. Em vez de ligar as luzes sempre com brilho total, pode definir diferentes níveis de brilho para luzes noturnas, cenas de filmes, rotinas para dormir e iluminação diária.
Automação 1: Luz Noturna Ativada por Movimento
O que faz: Liga uma luz de baixo brilho quando é detetado movimento durante a noite, para que possa ver sem iluminação forte.
Disparador:
- Movimento detetado por um sensor de movimento.
- Condição noturna, como das 22:00 às 06:00.
Ação:
- Ligue a luz às 10–20% de brilho.
- Desliga-a após 2–5 minutos sem deteção de movimento.
- Opcionalmente, retorna a luz ao seu estado anterior.
✅ Melhor para: Corredores, casas de banho, escadas, entradas e qualquer caminho que possa percorrer durante a noite.
Automação 2: Iluminação da Sala de Estar ao Pôr do Sol
O que faz: Define as luzes da sala de estar para um nível confortável e suave à medida que a luz natural desaparece após o pôr do sol.
Disparador:
- Evento de pôr do sol, com um desfasamento opcional, por exemplo, 30 minutos antes ou depois do pôr do sol.
Ação:
- Ligue as luzes da sala de estar às 40–60% de brilho.
- Opcionalmente, desligue-as mais tarde se não for detetada presença.
Dica: Combine isto com um sensor de presença para que as luzes só liguem quando alguém estiver na divisão.
✅ Melhor para: Salas de estar, salões, áreas de jantar e relaxamento noturno.
Automação 3: Modo Filme
O que faz: Escurece as luzes selecionadas para TV, filmes ou jogos enquanto reduz o reflexo no ecrã.
Disparador:
- Um botão de cena de filme, estado de energia da TV, reprodução do media player ou comando de voz.
Ação:
- Definir as luzes selecionadas para 5–15% de brilho.
- Desliga as luzes que causam reflexos no ecrã.
✅ Melhor para: Salas de cinema em casa, salas de estar com TV, salas de media e setups de jogos
Automação 4: Escurecimento para a Hora de Dormir
O que faz: Diminui gradualmente as luzes antes de dormir e depois desliga-as.
Disparador:
- Uma hora fixa, como 22:00
Ação:
- Começar por volta das 30–40% de brilho.
- Desvanecer durante 15–30 minutos.
- Desligue as luzes no final da rotina.
Nota: Use a transição apenas se o seu dimmer e integração a suportarem. Alguns dispositivos podem saltar diretamente para o brilho alvo em vez de desvanecer suavemente.
✅ Melhor para: Quartos, berçários, e qualquer divisão onde relaxa antes de dormir.
Automação 5: Brilho Adaptativo por Hora do Dia
O que faz: Utiliza diferentes níveis de brilho para o dia, a noite e a madrugada — como mais brilhante durante o dia, mais suave à noite e o mais baixo durante a madrugada.
Disparador:
- Hora do dia, sensor de iluminância, sensor de presença ou posição do sol.
Ação:
- Durante o dia: 80–100%
- Noite: 40–60%
- Madrugada: 5–20%
✅ Melhor para: Iluminação de toda a casa, corredores, cozinhas, quartos, salas de estar e escritórios domésticos.
Interruptores Dimmer SONOFF Recomendados para Home Assistant
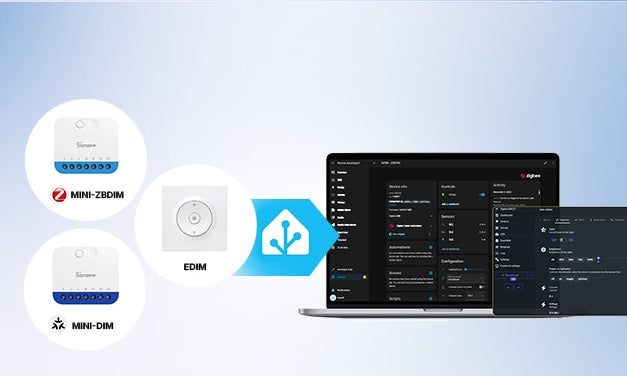
A SONOFF oferece opções de dimmers Zigbee e Matter para diferentes configurações do Home Assistant. Escolha MINI-ZBDIM se já usar ZHA ou Zigbee2MQTT. Escolha MINI-DIM se preferir Matter via Wi-Fi e não quiser adicionar um coordenador Zigbee. EDIM é um acessório de caixa para quem quer um acabamento mais limpo no interruptor de parede.
MINI-ZBDIM — Módulo Dimmer Zigbee para ZHA/Zigbee2MQTT
Um módulo dimmer inteligente Zigbee para utilizadores do Home Assistant que preferem ZHA ou Zigbee2MQTT. Instala-se atrás do interruptor de parede, suporta tipos comuns de lâmpadas dimmáveis e funciona bem para automações locais de iluminação Zigbee.

Interruptor Dimmer SONOFF MINI Extreme Zigbee | MINI-ZBDIM
$26.90
Suporta calibração de brilho automática ou manual, monitorização de energia em tempo real e tipos comuns de lâmpadas dimmáveis. Compatível com caixas de montagem padrão tipo 86, tipo EU e tipo 120.
Ver Produto
Nota: O MINI-ZBDIM é apenas para 220–240V. Siga sempre a gama de voltagem indicada.
MINI-DIM — Módulo Dimmer Matter via Wi-Fi
Um módulo dimmer Matter via Wi-Fi para utilizadores do Home Assistant que preferem emparelhamento Matter sem um coordenador Zigbee. Suporta controlo ligar/desligar, dimmer, cenas inteligentes e calibração automática no Home Assistant.

Interruptor Dimmer SONOFF MINI Extreme Matter via Wi-Fi | MINI-DIM
$26.90
Ajuste de brilho, calibração automática, suporte a lâmpadas dimmáveis comuns e controlo flexível do interruptor de parede. Emparelhamento fácil com Home Assistant via Matter.
Ver Produto
Nota: O MINI-DIM é apenas para 220–240V. Algumas definições avançadas do dimmer podem estar disponíveis apenas no eWeLink, não no Home Assistant.
Suporte de Funcionalidades no Home Assistant: MINI-ZBDIM vs MINI-DIM
Como o EDIM é um acessório de caixa, a tabela abaixo compara o suporte de funcionalidades no Home Assistant apenas para MINI-ZBDIM e MINI-DIM.
|
Funcionalidade |
MINI-ZBDIM via ZHA |
MINI-ZBDIM via Zigbee2MQTT |
MINI-DIM via Matter |
|
Controlo LIGAR/DESLIGAR |
✓ |
✓ |
✓ |
|
Ajuste de brilho |
✓ |
✓ |
✓ |
|
Cenas inteligentes / automações |
✓ |
✓ |
✓ |
|
Calibração automática |
✓ |
✓ |
✓ |
|
Calibração manual |
✓ |
✓ |
× |
|
Configuração do brilho mínimo |
✓ |
✓ |
× |
|
Configuração do tempo de transição |
✓ |
✓ |
× |
|
Taxa de desvanecimento acionada por interruptor |
✓ |
✓ |
× |
|
Monitorização de energia |
✓ |
✓ |
× |
|
Atualização OTA |
✓ |
✓ |
× |
EDIM — Caixa para MINI-DIM e MINI-ZBDIM
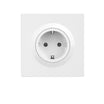
Uma caixa dedicada para o SONOFF MINI-DIM e MINI-ZBDIM. Não é um módulo dimmer em si, mas ajuda a transformar um módulo dimmer embutido numa instalação de interruptor de parede mais limpa.

Caixa para Interruptor Dimmer da Série SONOFF Fusion | EDIM
$8.99
Caixa fina de 21 mm para caixas tipo 86 e redondas europeias Ø60 mm. Material PC durável, design de encaixe para fácil instalação, e um botão ergonómico que proporciona uma pressão mais natural com feedback tátil claro.
Conclusão
Um interruptor dimmer para Home Assistant permite controlar o brilho para cenas de iluminação do dia a dia, desde luzes noturnas de baixo brilho até modo cinema e rotinas para a hora de dormir.
Antes de escolher, verifique as suas luzes, fiação, gama de carga, espaço na caixa de parede, protocolo e suporte de funcionalidades no Home Assistant. O essencial não é só se o dimmer pode emparelhar, mas se expõe o controlo adequado do brilho após a configuração.
👉 Já usa Zigbee no Home Assistant? MINI-ZBDIM é uma escolha prática para ZHA ou Zigbee2MQTT. Prefere Matter em vez de Wi-Fi? MINI-DIM é mais fácil de começar sem adicionar um coordenador Zigbee. Para um acabamento mais limpo no interruptor de parede, EDIM completa a instalação para MINI-DIM ou MINI-ZBDIM.
Perguntas Frequentes
P1: Qual é o melhor interruptor dimmer para o Home Assistant?
Não existe um interruptor dimmer único que seja o melhor para todas as configurações do Home Assistant. A escolha certa depende da sua fiação, tipo de luz, protocolo e de como quer controlar as luzes.
Se já usa Zigbee, um dimmer Zigbee que funcione com ZHA ou Zigbee2MQTT é uma boa opção. Se quiser um controlo multiplataforma mais fácil, um dimmer Matter pode ser mais adequado.
Antes de comprar, verifique sempre se as suas luzes são dimmáveis, se a gama de carga é compatível e se o dimmer expõe o controlo de brilho no Home Assistant.
P2: O Home Assistant pode controlar interruptores dimmer?
Sim. O Home Assistant pode controlar interruptores dimmer se o dispositivo for suportado por uma integração compatível, como ZHA, Zigbee2MQTT, Matter, Z-Wave ou uma integração Wi-Fi fiável.
Após a configuração, um dimmer deve idealmente aparecer como uma entidade de luz no Home Assistant. Isto permite ligar ou desligar a luz, ajustar o brilho, usá-la em cenas e criar automações.
Alguns dimmers podem também suportar efeitos de transição, calibração ou monitorização de energia, dependendo do dispositivo e da integração.
P3: O Zigbee ou o Matter é melhor para um interruptor dimmer no Home Assistant?
Nenhum é sempre melhor. Depende da sua configuração atual.
- A Dimmer Zigbee é uma escolha sólida se já usar um coordenador Zigbee e preferir controlo local através do ZHA ou Zigbee2MQTT.
- Dimmer Matter pode ser melhor se quiser uma ligação mais fácil e compatibilidade com o Home Assistant e outras plataformas compatíveis com Matter. No entanto, as funcionalidades disponíveis podem variar consoante o dispositivo.
A melhor escolha depende da sua configuração existente e das funcionalidades expostas após o emparelhamento.
P4: Porque é que o meu interruptor dimmer só mostra ligar/desligar no Home Assistant?
Se o seu dimmer aparecer apenas como um interruptor básico de ligar/desligar, o Home Assistant pode não estar a reconhecer as suas funcionalidades de controlo de brilho.
As razões comuns incluem:
- Suporte limitado da integração.
- Está a ser usada a entidade errada.
- O dispositivo precisa de uma atualização de firmware.
- O ZHA pode precisar de um quirk, ou o Zigbee2MQTT pode precisar de uma atualização do conversor.
- O dispositivo pode expor apenas funcionalidades limitadas através dessa integração.
Verifique se existe uma entidade de luz com controlo de brilho. Se não, consulte a documentação da integração ou as notas de suporte do fabricante para o Home Assistant.
P5: Porque é que as luzes LED cintilam com um interruptor dimmer inteligente?
A cintilação do LED geralmente indica um problema de compatibilidade entre o dimmer, a lâmpada e a carga.
As causas possíveis incluem:
- A lâmpada LED ou o equipamento não é dimmável.
- A carga está abaixo do requisito mínimo do dimmer.
- O método de atenuação não corresponde ao tipo de lâmpada.
- O brilho mínimo está definido demasiado baixo.
- As lâmpadas precisam de calibração de brilho.
Use lâmpadas LED dimmáveis, verifique a gama de carga suportada pelo dimmer e ajuste a calibração do brilho ou as definições de brilho mínimo se o dispositivo o suportar.
P6: Os interruptores dimmer inteligentes precisam de um fio neutro?
Depende do modelo do dimmer e da sua fiação. Alguns interruptores dimmer inteligentes requerem um fio neutro, enquanto outros suportam instalação sem neutro.
Casas mais antigas podem não ter um fio neutro na caixa do interruptor, por isso verifique sempre a sua fiação antes de comprar. Se houver um fio neutro disponível, normalmente tem mais opções de dimmers. Dependendo do modelo, os dimmers com fio neutro podem também suportar uma operação mais estável, cargas mais baixas ou funcionalidades mais amplas.
Se não tiver a certeza, peça a um eletricista qualificado para inspecionar a caixa da parede.
P7: Posso usar um interruptor dimmer inteligente com lâmpadas inteligentes?
Na maioria dos casos, não é recomendado atenuar lâmpadas inteligentes com um interruptor dimmer tradicional. As lâmpadas inteligentes geralmente precisam de energia constante, e cortar ou atenuar essa energia pode causar cintilação, desconexão ou comportamento instável.
Se usar lâmpadas inteligentes, mantenha-as ligadas e controle-as através do Home Assistant, de um botão sem fios, de um controlador de cenas ou de um modo de interruptor concebido para lâmpadas inteligentes, como um relé destacado ou modo de lâmpada inteligente.
P8: Pode o Home Assistant atenuar as luzes gradualmente?
Sim. O Home Assistant pode atenuar gradualmente as luzes usando definições de brilho, transições, scripts, cenas ou configurações de iluminação adaptativa.
No entanto, o desvanecimento suave depende do dimmer, do firmware e da integração. Alguns dispositivos suportam efeitos de transição, enquanto outros podem saltar diretamente para o brilho alvo, por isso teste o comportamento antes de o usar para automações de hora de dormir ou de despertar.

Deixe um comentário
Todos os comentários são moderados antes de serem publicados.
Este site está protegido pela Política de privacidade da hCaptcha e da hCaptcha e aplicam-se os Termos de serviço das mesmas.