


1. Configuración local de ZBBridge-U
Para gestionar el ZBBridge-U localmente, encienda el dispositivo y conéctelo a su router doméstico mediante un cable Ethernet. Asegúrese de que ZBBridge-U y Home Assistant estén en la misma red local.
Abra su navegador web preferido y visite el panel web local en: http://zbbridgeu.local/. Alternativamente, puede acceder al panel usando la dirección IP asignada al gateway por su router.
La interfaz web local es totalmente responsiva y está optimizada para diferentes dispositivos, facilitando el acceso y la gestión desde un smartphone o tablet.
Cuando ingrese a la interfaz por primera vez, se le guiará para configurar la zona horaria y crear una contraseña para futuros inicios de sesión.

Resumen del portal ZBBridge-U
Después de iniciar sesión y completar la guía de configuración, será dirigido a la página Inicio. En el lado izquierdo, el menú principal ofrece acceso rápido a todas las funciones y ajustes clave. La página de Inicio destaca las funciones principales del gateway y muestra claramente el estado de sincronización del dispositivo.
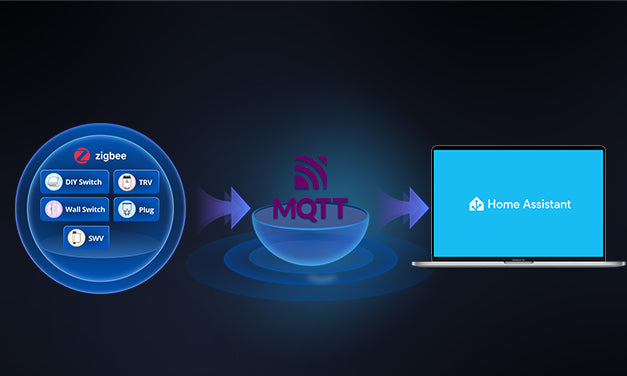
Los dispositivos se agrupan en cuatro categorías según cómo se agregan:
- Zigbee
- eWeLink-Remote
- eWeLink Wi-Fi
- Home Assistant
Para cada categoría, puede ver fácilmente el número total de dispositivos, cuántos están en línea actualmente y cuántos se han sincronizado con otras plataformas a través del puente Matter.

2. Añadir ZBBridge-U a una plataforma Matter
En la página Inicio, haga clic en Iniciar emparejamiento en la esquina inferior izquierda. Use la aplicación de su plataforma Matter objetivo para escanear el código QR de emparejamiento y luego siga las instrucciones en pantalla para completar la configuración.

Una vez que el dispositivo se añade a una red Matter, aparecerá en la esquina inferior derecha de la página de Inicio. Haga clic en Ver más para ver y gestionar información detallada de la red.

3. Iniciar sesión en su cuenta de Home Assistant
En la página Home Assistant, seleccione Sincronizar entidades de Home Assistant con redes Matter.

ZBBridge-U comenzará inmediatamente a buscar instancias de Home Assistant en la misma red local. Seleccione la dirección IP detectada o ingrese los datos manualmente si es necesario. Haga clic en Iniciar sesión en Home Assistant, luego inicie sesión y otorgue autorización en la ventana emergente.

La autorización puede cancelarse en cualquier momento.
4. Seleccionar dispositivos y sincronizar
Después de iniciar sesión correctamente, aparecerá una lista de dispositivos de su cuenta de Home Assistant en la página Home Assistant.

Los dispositivos están agrupados según su configuración, y las capacidades compatibles se muestran junto a cada dispositivo. Seleccione los dispositivos que desea sincronizar y guarde los ajustes.
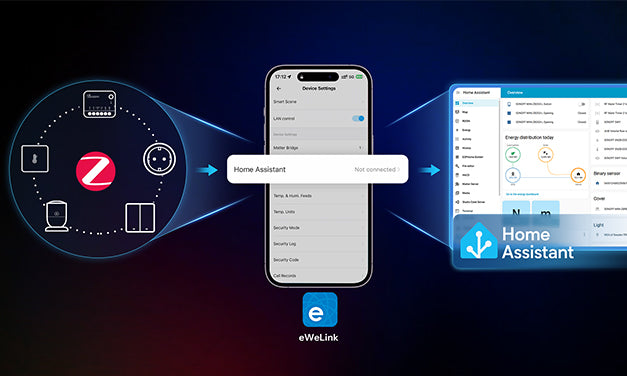
Una alternativa: Completar la configuración mediante la app eWeLink
- Agregue ZBBridge-U a la app eWeLink.
- Vaya a Ajustes del dispositivo → Matter, toque el icono "+" en la esquina superior derecha y escanee el código QR de emparejamiento usando su app Matter preferida. Siga las instrucciones de la app para añadir el dispositivo a la red Matter correspondiente.

- En Ajustes del dispositivo → Home Assistant, seleccione Sincronizar dispositivos de Home Assistant con la red Matter. Inicie sesión y autorice su cuenta de Home Assistant como se describió anteriormente.
- Una vez completada la autorización, aparecerá una lista de dispositivos agrupados por configuración y mostrando las capacidades compatibles. Seleccione los dispositivos que desea sincronizar y guarde.

Dejar un comentario
Todos los comentarios se revisan antes de su publicación.
Este sitio está protegido por hCaptcha y se aplican la Política de privacidad de hCaptcha y los Términos del servicio.