


Introducción
Si usas un interruptor Serie Fusion de SONOFF, quizás te preguntes cómo lograr un control bidireccional. Esta guía presenta soluciones inteligentes de control bidireccional para interruptores Fusion con diferentes protocolos de comunicación. Mediante escenas inteligentes, estas soluciones permiten el control desde múltiples ubicaciones sin cableado adicional — flexible, conveniente y muy práctico.
Solución 1 — Vinculación de escena inteligente
En la plataforma eWeLink o Home Assistant, los botones inalámbricos Zigbee (por ejemplo, SNZB-01P / SNZB-01M) pueden usarse como disparadores de escena mediante la configuración de escena inteligente o automatización. Se vinculan con los interruptores Serie Fusion para realizar acciones de encendido/apagado, permitiendo un control inalámbrico bidireccional.

Dispositivos Requeridos
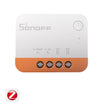
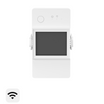
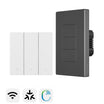
✅1 × interruptor Serie Fusion (por ejemplo, Orb-MW1 / Orb-MW2 / Orb-ZBW1 / Orb-ZBW1L / Orb-ZBW2 / Orb-ZBW2L)
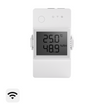
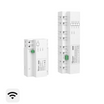
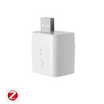
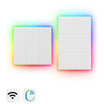
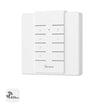
✅1 × botón inalámbrico Zigbee (por ejemplo, SNZB-01P / SNZB-01M)
|
SNZB-01P vs. SNZB-01M (Orb 4 en 1) |
||
|
Botón inalámbrico Zigbee |
SNZB-01P |
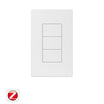
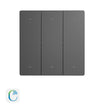
SNZB-01M (Orb 4 en 1) |
|
Número de botones |
1 botón |
4 botones |
|
Acciones soportadas |
Pulsación simple / doble / larga |
Cada botón soporta pulsación simple / doble / triple / larga |
|
Protocolo |
Zigbee |
Control remoto Zigbee y eWeLink |
|
Batería |
CR2477 |
CR2477 |
|
Montaje |
Magnético / Adhesivo / Tornillo |
Magnético / Adhesivo / Tornillo |
|
Uso principal |
Activación simple de escenas |
Control centralizado multi-escena |
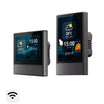
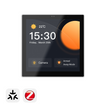
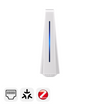
✅1 × gateway Zigbee (por ejemplo, SONOFF ZBBridge-P / ZBBridge-U / NSPanel Pro / iHost)
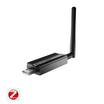
Nota: Si tienes la intención de añadir dispositivos a un entorno ZHA o Z2M, también necesitas tener un Dongle Zigbee (por ejemplo, SONOFF Dongle Plus MG24 / Dongle Max / ZBDongle-P/E / Dongle Lite MG21)
Emparejamiento y Configuración de Escena
Paso 1: Agrega dispositivos a la APP
Agrega el botón inalámbrico Zigbee (SNZB-01P / SNZB-01M) y el interruptor Fusion a la APP eWeLink o a la plataforma Home Assistant.
Paso 2: Crear una escena de automatización
- Configurar disparador: Selecciona "Dispositivo inteligente" → Elige SNZB-01P o SNZB-01M (para SNZB-01M, selecciona el botón objetivo) → Selecciona disparador (Pulsación simple / Doble pulsación / ...)
- Configurar acción: Selecciona "Dispositivo inteligente" → Elige el interruptor Fusion Zigbee objetivo (para interruptores multicanal, selecciona el canal objetivo) → Selecciona acción (Invertir)
- Guarda y habilita la escena de automatización.
Paso 3: Verificar
Presiona el botón inalámbrico Zigbee para activar la escena. La luz conectada al interruptor Fusion debería encenderse/apagarse en consecuencia. Tanto el interruptor de pared como el botón inalámbrico Zigbee pueden controlar la misma luz de forma sincronizada.
Solución 2 — Desconectar Relé
El Interruptor A está conectado a la carga, mientras que el Interruptor B tiene activado el Modo de Desconexión del Relé y funciona como disparador inalámbrico de escena. Mediante la vinculación de escenas inteligentes, una sola pulsación en el Interruptor B cambia el estado del Interruptor A, permitiendo que dos dispositivos controlen la misma luz.

Dispositivos Requeridos
✅ 2 × interruptores Fusion (por ejemplo, Orb-MW1 / Orb-MW2 / Orb-ZBW1 / Orb-ZBW1L / Orb-ZBW2 / Orb-ZBW2L)
Nota:
- Para dispositivos Zigbee, se requiere una pasarela Zigbee (por ejemplo, SONOFF ZBBridge-P / ZBBridge-U / NSPanel Pro / iHost).
- Si planeas agregar dispositivos a un entorno ZHA o Z2M, también se requiere el Dongle Zigbee (por ejemplo, SONOFF Dongle Plus MG24 / Dongle Max / ZBDongle-P/E / Dongle Lite MG21).
Pasos para emparejar y configurar
Paso 1: Preparación del cableado
- Interruptor A: Conectado a la luz de la carga.
- Interruptor B: No conectado a ninguna carga, usado únicamente como disparador de escena.
Paso 2: Agrega dispositivos a la APP y activa el Modo de Desconexión del Relé
Agrega ambos interruptores Fusion a la APP eWeLink. Para dispositivos Zigbee, también puedes agregarlos a una plataforma Z2M o ZHA y activar el Modo de Desconexión del Relé.
Paso 3: Crear una Escena de Automatización
- Configurar disparador: Selecciona "Dispositivo Inteligente" → Elige "Interruptor B" (para interruptores multicanal, selecciona el canal objetivo) → Selecciona disparador (Presión Simple).
- Configurar acción: Selecciona "Dispositivo Inteligente" → Elige "Interruptor A" (para interruptores multicanal, selecciona el canal objetivo) → Selecciona acción (Invertir).
- Guarda y habilita la escena de automatización.
Paso 4: Verificar
Presiona el Interruptor B para activar la escena. La luz conectada al Interruptor A debería encenderse/apagarse en consecuencia. Ambos interruptores pueden controlar la misma luz de forma sincronizada.
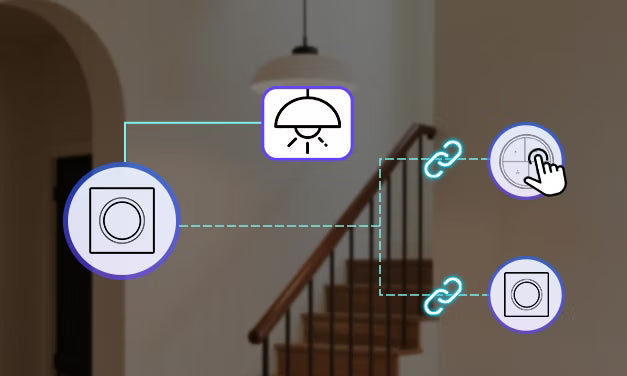
Solución 3 — Vinculación Enlazada (Apto solo para Home Assistant)
En entornos ZHA (Zigbee Home Automation) o Z2M (Zigbee2MQTT), el botón inalámbrico Zigbee, como dispositivo disparador, puede establecer una relación de vinculación con un interruptor Zigbee Fusion (como objetivo). Esto permite un control directo dispositivo a dispositivo, logrando un control inalámbrico bidireccional.

Dispositivos Requeridos
✅ 1 × Botón inalámbrico Zigbee (por ejemplo, SNZB-01P / SNZB-01M)
✅ 1 × Interruptor Zigbee Serie Fusion (por ejemplo, Orb-MW1 / Orb-ZBW1L / Orb-ZBW2 / Orb-ZBW2L)
✅ 1 × Dongle Zigbee (por ejemplo, SONOFF Dongle Plus MG24 / Dongle Max / ZBDongle-P/E / Dongle Lite MG21).
Emparejamiento y Configuración de Escena
Paso 1: Agregar dispositivos al gateway Zigbee
Agrega dispositivos a través del ZBDongle al entorno ZHA o Z2M.
Paso 2: Vinculación
- En ZHA/Z2M, selecciona el dispositivo disparador (por ejemplo, SNZB-01M) y ve a la gestión de Vinculación.
- Selecciona el dispositivo objetivo (por ejemplo, producto de interruptor Zigbee) y especifica el Cluster (por ejemplo, Cluster de Encendido/Apagado).
- Una vez que la vinculación esté completa, presionar el botón correspondiente en el dispositivo disparador controlará directamente el dispositivo objetivo (Encender / Apagar / Invertir).
Paso 3: Verificar
Presiona el botón inalámbrico Zigbee para activar la escena. La luz conectada al interruptor Fusion debería encenderse/apagarse en consecuencia. Tanto el interruptor de pared como el botón inalámbrico Zigbee pueden controlar la misma luz de forma sincronizada.
Dejar un comentario
Todos los comentarios se revisan antes de su publicación.
Este sitio está protegido por hCaptcha y se aplican la Política de privacidad de hCaptcha y los Términos del servicio.