


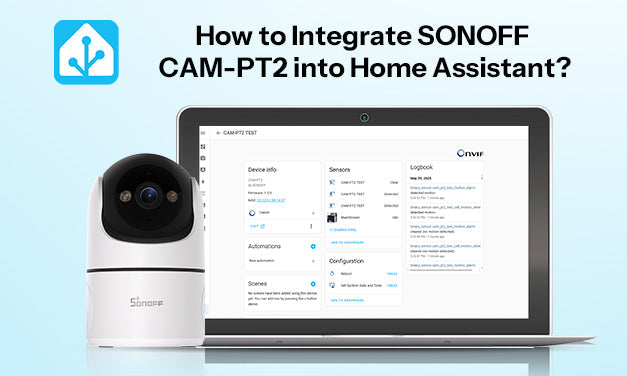
1. Introduction
This guide walks you through integrating the SONOFF CAM-PT2 into Home Assistant using the ONVIF protocol. With this setup, you'll be able to:
- View real-time video in Home Assistant
- Receive motion and human detection events
- Set up automation (e.g., trigger recording when motion is detected)
Before you start, make sure your device firmware and app version meet the requirements for ONVIF support.
2. What You'll Need
To complete this integration, make sure you have the following:
Hardware & Software
- SONOFF CAM-PT2 camera with firmware ≥ v1.0.5
- eWeLink App (version ≥ v5.17.0) installed on your phone
- A device running Home Assistant (e.g., Raspberry Pi 4+, PC, or Docker)
- Both camera and Home Assistant are in the same local network
Account Info & Access
- Your CAM-PT2 added to the eWeLink app
- ONVIF/RTSP function enabled via: Device Settings → More Settings → ONVIF/RTSP
Record the Following Info:
- IP address of the camera
- ONVIF port
- User name and Password (modifiable)

3. Pair with Home Assistant
Step 1: Install ONVIF Integration
- Go to the Home Assistant main dashboard.
- Navigate to: Settings → Devices & Services → Add Integration

- Search for ONVIF and select it

- Click Submit

Step 2: Add the Camera
- When CAM-PT2 is detected, select it and click Submit

- Enter the ONVIF Username & Password

- Click Skip and Finish

You will now see your camera in the Home Assistant dashboard under the Overview tab.

4. What You Can Do
4.1 Real-Time Streaming
- Watch live video feed directly in Home Assistant
- Toggle audio on/off
4.2 Motion & Human Detection Status
- Motion/Human Detection as Automation Triggers
4.3 Automations
Create automations using camera events as triggers. Example:
When motion is detected:
- Go to Device Info → + Add Automation → Use device as trigger


- Select “Motion started detecting”

-
Choose an action:
Camera → Record, set file path like:/media/{{ now().strftime('%Y%m%d-%H%M%S') }}.mp4


- Configure duration and lookback
- Click Save

You can then find recordings under Media → My media.


5. Feature Overview
CAM-PT2 supports ONVIF and RTSP, enabling easy integration with Home Assistant. To help you get to know the differences, a quick feature overview is provided below.
|
Feature |
ONVIF |
RTSP |
|
Device Discovery |
√ |
× |
|
Live View |
√ |
√ |
|
PTZ Control |
√ Manual configuration via script is required. |
× |
|
Event Notification |
√ Triggers Automation (Motion, Human) |
× |
6. Conclusion
By integrating SONOFF CAM-PT2 with Home Assistant via ONVIF for:
- Device Discovery
- Local video streaming
- Smart automations based on motion or human detection

6 comments
DMart
Hello, great guide. I selected these cameras because of the ease of working with Home Assistant. I’ve followed the guide, added to a dashboard, have the PTZ controls working. When I select the camera feed I can watch a live feed with audio. BUT, after setting up camera.record, it records the video properly, but there is no audio in the mp4 file. What is missing to get the audio working in the recordings?
MaMia
Reply to Aurelio: Lamentamos que la CAM-PT2 actualmente no permita configurar el Modo de Privacidad directamente en Home Assistant. Puede consultar la respuesta anterior para obtener instrucciones sobre cómo habilitar el control PTZ mediante scripts. Gracias por su comprensión.
MaMia
Reply to Bobo Cher:
Thank you for reaching out. PTZ control can be achieved by adding cards to the dashboard.
Go to the dashboard and start with creating a new card. Choose the “Picture Glance” one.
Next, switch to “Show Code Editor” mode by pressing the button at the bottom left side. You will see the following code:
camera_view: live
type: picture-glance
title: Kitchen
image: https://demo.home-assistant.io/stub_config/kitchen.png
entities: []
camera_image: camera.tapo_mainstream
Replace the original code with the code we provide:
camera_view: auto
type: picture-glance
title: Kitchen
image: https://demo.home-assistant.io/stub_config/kitchen.png
entities:
– entity: camera.pt2_profile_0
tap_action:
action: call-service
service: onvif.ptz
service_data:
entity_id: camera.pt2_profile_0
pan: LEFT
speed: 1
distance: 0.3
move_mode: ContinuousMove
name: Pan Left
icon: mdi:arrow-left
– entity: camera.pt2_profile_0
tap_action:
action: call-service
service: onvif.ptz
service_data:
entity_id: camera.pt2_profile_0
tilt: UP
speed: 1
distance: 0.3
move_mode: ContinuousMove
name: Tilt Up
icon: mdi:arrow-up
– entity: camera.pt2_profile_0
tap_action:
action: call-service
service: onvif.ptz
service_data:
entity_id: camera.pt2_profile_0
tilt: DOWN
speed: 1
distance: 0.3
move_mode: ContinuousMove
name: Tilt Down
icon: mdi:arrow-down
– entity: camera.pt2_profile_0
tap_action:
action: call-service
service: onvif.ptz
service_data:
entity_id: camera.pt2_profile_0
pan: RIGHT
speed: 1
distance: 0.3
move_mode: ContinuousMove
name: Pan Right
icon: mdi:arrow-right
image_entity: person.jimmy
camera_image: camera.pt2_profile_0
That’s all. Now you should see the PTZ camera card on the dashboard along with control buttons.
Aurelio
A mí también me interesa saber cómo entrar en el modo privacidad en home assistant en el mismo supuesto.
Además de cómo hacer el ptz como script
Bobo Cher
Thanks for the Guide. How to make PTZ controls work?
Leave a comment
All comments are moderated before being published.
This site is protected by hCaptcha and the hCaptcha Privacy Policy and Terms of Service apply.