


Introduction
L'émergence de Matter a rendu possible — pour la première fois — que les appareils intelligents de différentes marques et protocoles parlent un langage commun. Pourtant, intégrer des appareils non-Matter dans l'écosystème Matter reste un véritable défi pour la plupart des utilisateurs de domotique.
Pour ceux qui préfèrent les plateformes ouvertes comme Home Assistant, gérer des configurations complexes peut déjà être frustrant — sans parler du débogage et de la maintenance continus. Les passerelles prêtes à l'emploi peuvent simplifier le processus, mais elles offrent souvent une compatibilité limitée avec les appareils et dépendent du cloud, ce qui n'inspire pas toujours confiance.
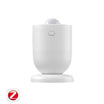
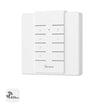
Alors, existe-t-il vraiment une solution qui trouve un équilibre — combinant sécurité locale et facilité d'utilisation au niveau de l'application ? Avec le firmware v1.15.0, ZBBridge-U répond à cette question en introduisant une nouvelle interface web locale, conçue pour rendre l'accès à Matter simple, entièrement local et accessible même aux débutants en domotique. Que vous préfériez les plateformes ouvertes ou les écosystèmes basés sur des applications, ZBBridge-U offre une manière flexible de commencer.

Installation facile en deux étapes
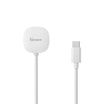
Commencer localement ne nécessite qu'un câble Ethernet et un navigateur web.
1. Connectez ZBBridge-U à votre routeur domestique à l'aide d'un câble Ethernet.
2. Ensuite, ouvrez un ordinateur ou une tablette — votre téléphone fonctionne aussi, nous avons optimisé l'interface pour toutes les tailles d'écran. Connectez votre appareil au même réseau Wi-Fi que ZBBridge-U, puis ouvrez votre navigateur préféré et rendez-vous sur http://zbbridgeu.local ou l'adresse IP attribuée à ZBBridge-U par votre routeur, pour vous connecter et accéder au tableau de bord principal à tout moment.

Votre Matter Bridge basé sur le web
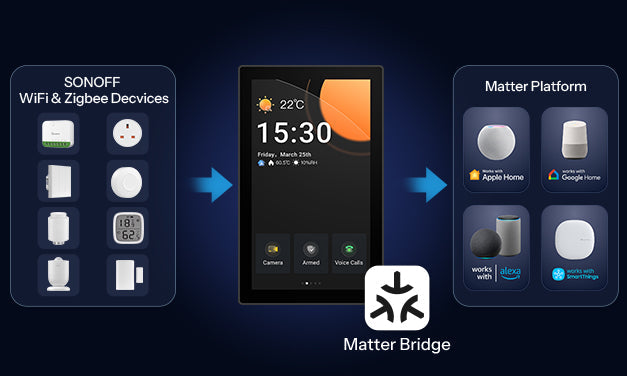
La page d'accueil de ZBBridge-U sert de tableau de bord dédié à Matter Bridge. Vous pouvez connecter quatre types d'appareils à l'écosystème Matter : Zigbee, Home Assistant, Wi-Fi eWeLink et Télécommande eWeLink. Pour chaque type, le nombre total d'appareils ajoutés, d'appareils en ligne et d'appareils synchronisés est clairement affiché.

Pour garder l'expérience simple et efficace, ZBBridge-U est conçu autour d'un flux de travail simplifié. Depuis l'entrée Ajouter un appareil en haut à gauche de la page d'accueil, vous pouvez accéder directement à la page de configuration pour tout type d'appareil.
Une fois les appareils ajoutés, vous pouvez les gérer ou les synchroniser avec Matter depuis leurs listes respectives dans la barre latérale.
| Type d'appareil | Comment ajouter | Synchroniser avec Matter | Renommer | Supprimer | Mise à jour OTA |
|---|---|---|---|---|---|
| Zigbee |
Ajouter directement via ZBBridge-U Prend en charge SONOFF et la plupart des appareils tiers |
√ | √ | √ | √ (appareils SONOFF) |
| Home Assistant | Connectez-vous à votre compte Home Assistant | √ | × | × | × |
| Wi-Fi eWeLink |
Connectez-vous à votre compte eWeLink Informations sur l'appareil conservées localement après déconnexion |
√ | √ | √ | × |
| Télécommande eWeLink |
Ajouter directement via ZBBridge-U / Se connecter à eWeLink Informations sur l'appareil conservées localement après déconnexion |
√ | √ | √ | × |
Points forts
- Synchronisation stable : ZBBridge-U est officiellement certifié selon la norme Matter 1.4 et fonctionne avec les principales plateformes Matter, notamment Apple, Google, SmartThings et Alexa, garantissant une intégration fiable et bien prise en charge des appareils après synchronisation.
- Maintenance sans tracas : ZBBridge-U ne dépend pas des services OTA basés sur le cloud. Une fois connecté à Internet, il peut télécharger les mises à jour du firmware directement depuis une adresse IP désignée.
Comment configurer
1. Ajouter ZBBridge-U à une plateforme Matter
Sur la page d'accueil, cliquez sur Démarrer l'appairage en bas à gauche. Utilisez l'application de votre plateforme Matter cible pour scanner le code QR d'appairage, puis suivez les instructions à l'écran pour terminer la configuration.

Une fois ajouté, l'appareil apparaît en bas à droite de la page d'accueil. Cliquez sur Voir plus pour consulter les détails du réseau.

2. Ajouter des appareils Zigbee à ZBBridge-U
Sélectionnez Ajouter des appareils sur la page d'accueil, choisissez le type d'appareil, puis suivez les instructions.

Après l'ajout des appareils, vous pouvez accéder à la page des appareils depuis la barre latérale pour voir la liste des appareils. Vous pouvez modifier les informations de base des appareils dans la liste.

3. Sélectionner les appareils et synchroniser
Dans chaque liste d'appareils, cliquez sur Gestion de la synchronisation, sélectionnez les appareils, puis cliquez sur Enregistrer. Les appareils apparaîtront sur la plateforme Matter et afficheront leur statut sur la page d'accueil.

Fonctionne en parallèle avec Home Assistant
La sécurité et la confidentialité des utilisateurs sont des motivations clés pour notre interface web locale. ZBBridge-U fonctionne comme un compagnon puissant pour Home Assistant, offrant une expérience locale sécurisée et un processus de configuration simplifié via téléphone.
Il prend en charge l'ajout des appareils SONOFF et de la plupart des appareils Zigbee tiers et leur synchronisation avec Home Assistant via MQTT en une seule étape — une alternative pratique aux adaptateurs Zigbee traditionnels.

Points forts
-
Configuration conviviale pour les débutants
ZBBridge-U peut découvrir automatiquement les instances Home Assistant sur le réseau local.
Configurer MQTT dans l'interface web locale est aussi simple que de se connecter à un compte, ne nécessitant que le module complémentaire Mosquitto Broker intégré à Home Assistant — ce qui le rend facile même pour les débutants. -
Conçu pour une stabilité à long terme
Les appareils Zigbee synchronisés avec Home Assistant via MQTT restent gérés par ZBBridge-U.
Cela signifie que vous pouvez continuer à ajouter et gérer des appareils Zigbee via l'interface web locale, tandis que ZBBridge-U maintient le réseau Zigbee lui-même — réduisant la charge sur votre matériel Home Assistant et améliorant la stabilité globale du système.
Comment configurer
1. Configurer le courtier MQTT dans Home Assistant
Tout d'abord, assurez-vous que Home Assistant fonctionne sur un serveur. Vous devez également avoir activé la configuration MQTT dans Home Assistant et installé le module complémentaire Mosquitto Broker.
Une fois le module complémentaire installé, créez un nom d'utilisateur et un mot de passe dans la configuration du Mosquitto Broker. Ces identifiants seront utilisés plus tard lors de la connexion de ZBBridge-U à Home Assistant.

2. Ajouter des appareils Zigbee à ZBBridge-U
Sur la page d'accueil, sélectionnez Ajouter des appareils → Appareils Zigbee pour démarrer le mode d'appairage Zigbee.
Alternativement, vous pouvez accéder directement à la page Zigbee depuis la barre latérale pour activer l'appairage.
Après l'ajout des appareils, vous pouvez les gérer depuis la liste des appareils.
Lorsque le routeur connecté à ZBBridge-U a accès à Internet, les mises à jour OTA du firmware sont prises en charge pour les appareils SONOFF Zigbee.
3. Synchroniser les appareils vers Home Assistant
Allez sur la page Home Assistant dans l'interface web locale de ZBBridge-U et sélectionnez Synchroniser les sous-appareils Zigbee vers Home Assistant. Puis configurez la connexion au Broker MQTT.
Paramètres du Broker MQTT
- Analyse automatique de l'adresse IP de Home Assistant, ou saisissez-la manuellement
- Port : saisissez le port MQTT normal configuré dans Mosquitto Broker
- Nom d'utilisateur et mot de passe : utilisez les identifiants créés dans Mosquitto Broker
- Chiffrement : réglé sur Aucun par défaut, ou ajustez selon la configuration de votre Mosquitto Broker
Activez MQTT et enregistrez les paramètres.

Une fois la configuration terminée, sélectionnez les appareils que vous souhaitez synchroniser dans la liste. Les appareils synchronisés apparaîtront ensuite dans Home Assistant → configuration MQTT.
Avantages pour les utilisateurs eWeLink
-
Synchronisation multiplateforme
Les appareils Wi-Fi et les appareils distants eWeLink sous votre compte peuvent être synchronisés avec Home Assistant. Même après déconnexion, vous pouvez choisir de conserver les informations des appareils localement. -
Contrôle à distance des appareils Home Assistant
Une fois synchronisés, les appareils Home Assistant peuvent être contrôlés à distance via l'application eWeLink, offrant une plus grande flexibilité entre le contrôle local et basé sur le cloud. -
Support complet pour les appareils SONOFF
ZBBridge-U continue d'offrir la compatibilité la plus complète et prioritaire ainsi que le support fonctionnel pour les appareils SONOFF.
Guide d'utilisation
👉 Cliquez ici pour consulter un guide d'utilisation complet.
👉 Cliquez ici pour consulter la liste des sous-appareils pris en charge et leurs capacités sur différentes plateformes Matter.
Votre avis compte
ZBBridge-U continuera d'évoluer avec des améliorations fonctionnelles continues, une compatibilité étendue des appareils et plus de fonctionnalités publiées sur l'interface web locale.
Vous pouvez suivre le lien ci-dessous pour rester informé des dernières versions. Si vous rencontrez des problèmes après la mise à jour, vous êtes également invité à soumettre vos retours via le même canal. Notre équipe de développement communiquera directement avec vous.
👉 En savoir plus et suivre les mises à jour
https://forum.ewelink.cc/t/release-note-zigbee-bridge-ultra-v1-17-0-update/206886/4
Nous vous invitons également chaleureusement à partager votre expérience et vos idées avec la communauté. Vos suggestions et cas d'utilisation sont inestimables pour nous et contribuent à façonner l'avenir de ZBBridge-U.
👉 Rejoignez la discussion
https://forum.ewelink.cc/c/sonoff-bridge-x/48
Acheter maintenant
👉 Lien d'achat : SONOFF Pont Zigbee Ultra | ZBBridge-U
Utilisez le code ZBBridge10 lors du paiement pour bénéficier de 10% de réduction.

Laisser un commentaire
Tous les commentaires sont modérés avant d'être publiés.
Ce site est protégé par hCaptcha, et la Politique de confidentialité et les Conditions de service de hCaptcha s’appliquent.