










Introduction
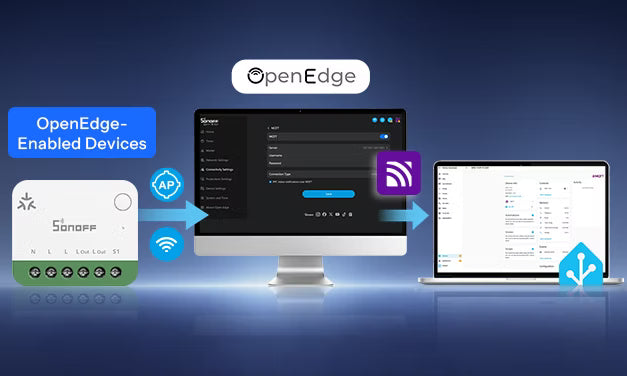
SONOFF is introducing OpenEdge, a local-first architecture for next-generation smart devices, designed to give you greater local control, broader interoperability, and more flexible ways to connect your devices across different platforms and ecosystems.
With OpenEdge, supported SONOFF devices can communicate locally via open interfaces including HTTP, MQTT, and WebSocket.
For Home Assistant users, this means more choice in how you integrate your devices: you can connect them locally via MQTT when you prefer local control and flexible ecosystem integration, while cloud connectivity remains available when it better fits your needs.
How MQTT Integration with Home Assistant Works
Before you start configuring MQTT, it helps to understand how the connection works.
The basic architecture looks like this:
OpenEdge-enabled SONOFF device → MQTT Broker → Home Assistant
- OpenEdge-enabled SONOFF device — Connects to the broker as an MQTT client, publishes device states and data, and receives control commands.
- MQTT broker — Receives and distributes MQTT messages between connected clients. In Home Assistant setups, Mosquitto is a common choice.
- Home Assistant — connects to the same broker via the MQTT integration, receives device updates, sends commands, and manages the device in Home Assistant.
Set Up OpenEdge Devices with Home Assistant via MQTT
Now let's set up the MQTT integration. This guide uses the SONOFF MINI-1GSP as an example, while the same basic workflow can be used for other compatible OpenEdge devices with MQTT support.
What You'll Need
- An OpenEdge-enabled SONOFF device with MQTT support.
- Home Assistant is installed and running.
- An MQTT broker is installed and running.
- The MQTT integration was added and connected to the broker in Home Assistant.
Install and Set Up an MQTT Broker
- Open Home Assistant.
- Go to Settings → Apps (formerly known as add-ons) → Install app.
- Search for Mosquitto broker and click INSTALL.
- Once installed, start the Mosquitto broker app.
- It is recommended to enable Start on boot and Watchdog, so the broker starts automatically with Home Assistant and can be restarted if it stops unexpectedly.
- If needed, create a dedicated Home Assistant user for MQTT devices under Settings → People → Users.
For more details about choosing and configuring an MQTT broker, see Home Assistant's official setting up a broker guide.
Add the MQTT Integration in Home Assistant
- In Home Assistant, go to Settings → Devices & Services → Add Integration.
- Search for MQTT and complete the setup.
- Go to Settings → Devices & Services → MQTT to confirm that the integration is connected to your broker.
Step 1: Power On the Device
For the MINI-1GSP, the device automatically enters pairing mode on first power-up. When the LED shows two short flashes followed by one long flash, its AP hotspot is ready for setup.
Step 2: Access the OpenEdge Web Console
There are two ways to access the Web Console.
Method 1: Access via AP Hotspot — Recommended for First-Time Setup
- Open the Wi-Fi settings on your desktop, tablet, or mobile device.
- Connect to the device hotspot: SONOFF_1GSP_xxxx.

- Open a web browser and navigate to: http://192.168.33.1
- The Web Console login page will open. The first time you access it, create a login password of at least 8 characters.
 Log in to enter the OpenEdge Web Console.

From the Web Console, you can manage local functions including ON/OFF control, historical energy data, timers, Matter Pairing, Network Settings, AP/Wi-Fi configuration, OTA updates, and About OpenEdge.
Under Connectivity Settings, you can configure Cloud connectivity, MQTT for Home Assistant, TLS options, and outbound WebSocket connections for third-party platforms.
Method 2: Access via LAN
If the device is already connected to your local network, you can access the Web Console directly without connecting to its AP hotspot.
For the MINI-1GSP, open a browser on a device that can reach the same LAN, enter either of the following in your browser:
- MINI-1GSP.local
- The device's local IP address.
Step 3: Connect the Device to Your Wi-Fi Network
Connect the device to a Wi-Fi network that can reach both Home Assistant and your MQTT broker, so they can communicate over the local network.
- Go to Network Settings → Wi-Fi Settings.
- Select the Wi-Fi network that you can access from Home Assistant and the MQTT broker.
- Enter the Wi-Fi password.
- Click Save.
- Wait for the device to connect.

Once the device connects to your local network, your router will typically assign it a local IP address via DHCP. This address is shown in the Wi-Fi settings and can be used for later LAN access to the Web Console, as described in Method 2 above.

Note: AP Hotspot Timeout
The MINI-1GSP automatically exits pairing mode after about 10 minutes. When pairing mode ends, the AP hotspot used for first-time setup is no longer available.
If the AP hotspot disappears before you finish the setup:
- If the device is already connected to your local network, continue the setup through the LAN access method described above.
- If you need to use the AP hotspot again, press and hold the device button for 5 seconds to re-enter pairing mode.
- Reconnect to SONOFF_1GSP_xxxx, open http://192.168.33.1, and continue the setup.
Tip: Pressing and holding the device button for 10 seconds performs a factory reset.
Step 4: Enable MQTT and Configure the Parameters
- Go to Connectivity Settings → MQTT.
- Enable MQTT.
- Configure the MQTT parameters as shown below
- When the settings are complete, click Save.

Device Web Console MQTT Configuration Example:
|
Setting |
What to Enter |
|
Server |
MQTT broker address and port, e.g. |
|
Username |
MQTT broker username |
|
Password |
MQTT broker password |
|
Connection Type |
Select the TLS option that matches your broker |
|
RPC status notifications over MQTT |
Enable or disable as needed |
- The Server field should point to your MQTT broker. If Mosquitto Broker is running on the same host as Home Assistant, this is typically the Home Assistant host IP address with MQTT port 1883, for example: 192.168.1.242:1883.
- If you're using the official Home Assistant Mosquitto Broker and haven't created separate MQTT credentials (username and password), you can use an existing Home Assistant username and password.
- If Mosquitto is already configured with a username and password, enter the same username and password in the device's Web Console MQTT settings.
Step 5: Verify and Control the Device in Home Assistant
- After saving the MQTT settings, reconnect your desktop, tablet, or mobile device to the local network that can access Home Assistant and the MQTT broker.
- Open Home Assistant, go to Settings → Devices & Services → MQTT
The device should already appear in the MQTT device list. OpenEdge-enabled SONOFF devices with MQTT support natively publish Home Assistant MQTT Discovery information, allowing Home Assistant to automatically add the device and create its supported entities without manual MQTT topic or YAML configuration.

-
Open the device page to view its available controls and entities. For the MINI-1GSP example, these include functions such as:
- Relay control
- Current
- Voltage
- Power
- Frequency
- Energy data
You can then add these entities to your Home Assistant dashboard or use them in automations and scenes.

OpenEdge-Supported Devices
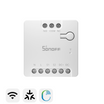
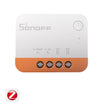
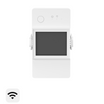
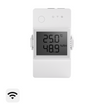
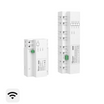
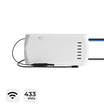
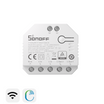
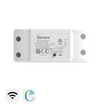
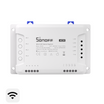
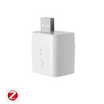
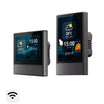
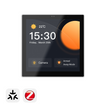
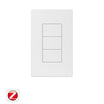
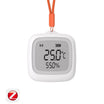
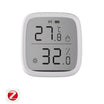
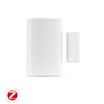
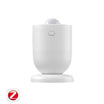
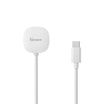
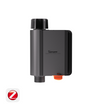
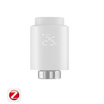
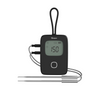
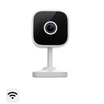
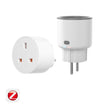
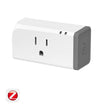
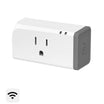
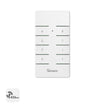
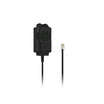
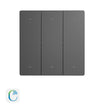
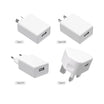
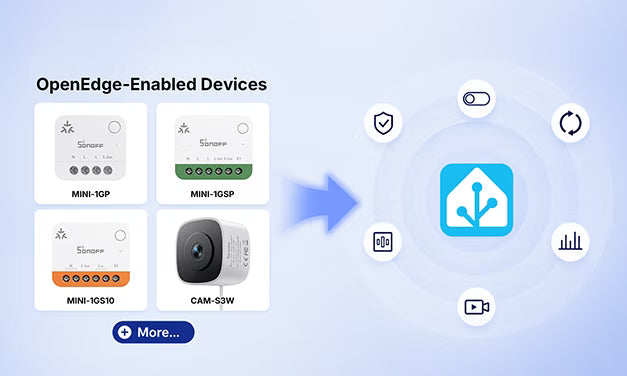
The following SONOFF products currently support OpenEdge:
More OpenEdge-enabled devices are coming soon, including:
- MINI-1GS
- MINI-1GS10
- ……
OpenEdge will also gradually expand to more SONOFF product categories, including:
- Smart switches — enabling more flexible local control and integration through open interfaces.
- Energy management products — bringing local data processing and more transparent energy monitoring.
- Other smart devices — connecting with more platforms and ecosystems through OpenEdge's open integration capabilities.
👉 For the latest supported devices and the features available after integration with Home Assistant, see the Home Assistant Feature Support List for SONOFF OpenEdge devices.
Conclusion
SONOFF OpenEdge makes Home Assistant integration simpler, more local, and more flexible. Through the built-in Web Console and OpenEdge's standardized Local API over MQTT, supported SONOFF devices can be configured directly from a browser and integrated locally with Home Assistant — bringing straightforward setup, responsive local control, and more flexible automation without relying on the cloud for the integration path.
MQTT Integration with Home Assistant FAQs
Quick Diagnosis
|
What you see |
What does it usually mean |
What to check/do |
|
MQTT Disconnected |
SONOFF cannot connect to the MQTT Broker |
Broker address, port, username, password, and network |
|
MQTT Connected, but no device in HA |
SONOFF can reach the Broker, but HA or MQTT Discovery may have an issue |
HA MQTT Integration and MQTT Discovery |
|
Device appears, but entities are missing |
Discovery or entity configuration may be incomplete |
Delete the old entities and rediscover the device. |
|
Device appears as Unavailable |
The device or MQTT communication may no longer be reachable |
Check the network connection first and ensure communication is working properly. Then, delete the existing entities and rediscover the device. |
1. How does MQTT connect SONOFF Devices to Home Assistant?
SONOFF devices do not connect directly to Home Assistant. Instead, they communicate with Home Assistant through an MQTT Broker.
┌───────────────┐
│ SONOFF Device │
└───────┬───────┘
        │ MQTT
        ▼
┌───────────────┐
│  MQTT Broker  │
└───────┬───────┘
        │ MQTT
        ▼
┌────────────────┐
│ Home Assistant │
└───────┬────────┘
        │ MQTT Discovery
        ▼
┌─────────────────┐
│ Device / Entity │
└─────────────────┘
The integration process can therefore be divided into four stages:
① SONOFF Device → MQTT Broker
- Make sure the SONOFF device can connect to the MQTT Broker.
② Home Assistant → MQTT Broker
- Make sure Home Assistant can connect to the MQTT Broker.
③ MQTT Discovery
- Make sure Home Assistant can discover the SONOFF device through MQTT Discovery.
④ Entity
- Make sure Home Assistant creates the entities correctly and can control the device and read its status.
Note: When a SONOFF device shows "MQTT Connected", this only means that the device has successfully connected to the MQTT Broker. It does not mean that Home Assistant has connected successfully or discovered the device.
2. Stage 1: Connecting the SONOFF Device to the MQTT Broker
Q1: Does "MQTT Connected" mean that my SONOFF device is successfully connected to Home Assistant?
No. “MQTT Connected” only means the SONOFF device has successfully connected to the MQTT Broker.
The SONOFF device generally cannot determine whether Home Assistant is online, whether Home Assistant is connected to the Broker, or whether the device has already been discovered.
The complete communication path is:
SONOFF Device
     ↓
MQTT Broker        ✓
     ↓
Home Assistant     ?
     ↓
MQTT Discovery     ?
     ↓
Entity             ?
If the device shows MQTT Connected but does not appear in Home Assistant, continue with Stages 2 and 3.
Q2: What should I check if my SONOFF device cannot connect to the MQTT Broker?
Check the following items in order:
1. MQTT Broker Address
- Make sure the Broker address configured on the SONOFF device is correct.
For example: 192.168.1.100
2. MQTT Port
- Common MQTT ports include:
|
MQTT Type |
Common Port |
|
MQTT TCP |
1883 |
|
MQTT TLS |
8883 |
- Make sure the port configured on the SONOFF device matches the port on which the MQTT Broker is actually listening.
3. MQTT Username and Password
If authentication is enabled on the Broker, check:
- Username
- Password
- Whether the account is disabled
- Whether any ACL permissions restrict the account
If the username or password is incorrect, the SONOFF device may not be able to establish an MQTT connection.
4. Network Connection
- Make sure the SONOFF device can reach the MQTT Broker. For example:
SONOFF device
192.168.1.50
     ↓
MQTT Broker
192.168.1.100:1883
If making configuration changes, restart Home Assistant or reload the MQTT integration before checking again.
3. Stage 2: Connecting Home Assistant to the MQTT Broker
Q3: My SONOFF device shows “MQTT Connected,” but it does not appear in Home Assistant. What should I check?
First, check whether Home Assistant itself has successfully connected to the MQTT Broker.
SONOFF device and Home Assistant are independent MQTT clients:
              MQTT Broker
             /           \
            /             \
   SONOFF device           HA
        |                   |
    Connected           Connected?
A successful connection from the SONOFF device does not mean that Home Assistant is also connected to the MQTT Broker.
Q4: How can I check whether Home Assistant is connected to the MQTT Broker?
In Home Assistant, go to: Settings → Devices & services → MQTT → Reconfigure
Check that the MQTT Broker configuration is correct, including:
- Broker IP address
- Username
- Password
The Home Assistant web interface commonly uses port 8123. This is different from the MQTT port. A commonly used MQTT port is 1883.
Q5: Can the SONOFF OpenEdge device and Home Assistant use different MQTT Brokers?
Normally, automatic discovery will not work correctly if they use different MQTT Brokers. For example:
SONOFF device
     ↓
Broker A

Home Assistant
     ↓
Broker B
Because the two systems are connected to different Brokers, Home Assistant cannot receive the MQTT messages published by the SONOFF device.
The normal setup is:
4. Stage 3: MQTT Discovery
Q6: OpenEdge device and Home Assistant are both connected to the MQTT Broker, but the device still does not appear in Home Assistant. What should I do?
At this point, check MQTT Discovery.
The device needs to provide device and entity information to Home Assistant through MQTT Discovery.
- In Home Assistant, go to: Settings → Devices & services → MQTT → Configure → Configure MQTT options
- Check whether Enable discovery is enabled.
- Also, check whether the Discovery Prefix is set to the default value: homeassistant
If Discovery was disabled, simply enabling it and saving the settings will not immediately cause Home Assistant to rescan MQTT devices that are already connected.
Please restart Home Assistant or click “Reload” in the MQTT integration so that Home Assistant can resubscribe to the Discovery Topic and identify the devices.
5. Discovery Prefix Issues
Q8: What is the Discovery Prefix?
The Discovery Prefix is the Topic prefix used by Home Assistant MQTT Discovery.
Home Assistant uses the following value by default: homeassistant
Q9: Will changing the Home Assistant Discovery Prefix affect OpenEdge device integration?
Yes. For example, if the device uses the default prefix: homeassistant
However, if the Home Assistant Discovery Prefix has been changed to: myhome
Home Assistant will listen for Discovery Topics under: myhome/...
The communication path would then look like this:
Because the two prefixes do not match, Home Assistant cannot discover the device correctly.
Recommendation
- Keep the Home Assistant Discovery Prefix set to: homeassistant
- Do not change it.
- If the Prefix was previously changed and this caused the device to become unavailable, changing it back to the default value will not automatically remove old entities or rediscover the device.
- In this case, restart Home Assistant or reload the MQTT integration. If previously discovered entities still show as “Unavailable”, you may need to delete the old entities and rediscover the device.
6. Special Network Environment Issues
Q11: Why does MQTT work on my local network but stop working when I switch to an external network?
If the MQTT Broker is deployed only on your home local network:
Once the device leaves that network while on another LAN:
It can no longer access the Broker through the LAN IP address.
For cross-network access, consider:
- Public IP MQTT Broker
Security note: It is not recommended to expose an unencrypted MQTT port 1883 directly to the public Internet.
7. Common Issues in Docker Environments
Q12: Home Assistant is running in Docker. Why can't it connect to the MQTT Broker when I use localhost:1883?
If Home Assistant and the MQTT Broker are running in different Docker containers, localhost usually refers to the Home Assistant container, not the container where the MQTT Broker is running.
For example:
Therefore, entering localhost:1883 in Home Assistant does not necessarily connect to Mosquitto.
Recommended Configuration
If you are not familiar with Docker network configuration, it is recommended to enter the local network IP address of the host running the MQTT Broker. For example:
Replace 192.168.1.100 with the actual IP address of the host running the MQTT Broker.
If Home Assistant and Mosquitto are connected to the same Docker Network, you can also use the Mosquitto container name, for example: mosquitto:1883
Note: A container name such as mosquitto can only be used within the corresponding Docker network. SONOFF devices should generally use the IP address or domain name of the host running the MQTT Broker, rather than the Docker container name.
After making changes, restart the Home Assistant container or reload the MQTT integration to apply the new configuration.

Leave a comment
All comments are moderated before being published.
This site is protected by hCaptcha and the hCaptcha Privacy Policy and Terms of Service apply.