











Introduction
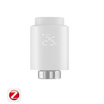
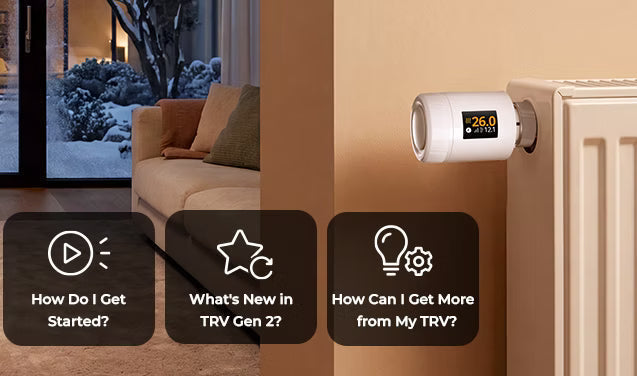
As SONOFF's second-generation smart thermostatic radiator valve, the TRV-ZBT features a more compact design compared with the first generation (TRVZB), reducing the space it occupies around the radiator. TRV-ZBT also comes with upgraded features, including smart schedules, open window detection, valve calibration, and more.
Designed for rooms with hydronic radiator heating systems, including bedrooms, living rooms, studies, and other spaces, TRV-ZBT allows independent temperature control for each room based on different usage schedules and temperature requirements, making home heating more flexible and comfortable.
1. Installing and Removing TRV-ZBT
TRV-ZBT consists of two main parts: the battery base and the valve body. During installation and removal, the metal nut at the bottom of the battery base is the component used to secure the valve connection. Do not tighten or loosen the device by forcefully rotating the valve body.
Installation
- Align the battery base with the radiator valve interface and make sure the valve pin is positioned in the center of the base.
- Hold the battery base firmly with one hand, then turn the metal nut at the bottom clockwise with the other hand until the base is securely attached.
- Remove the battery insulation tab to power on the device. The screen will display "Setup" after startup.
- When the screen shows "Ready", align the device body with the battery base and attach it. Slightly rotate it until it is securely locked in place.
- Gently shake the device to confirm that the metal nut, device body, and battery base are all securely installed.
- After installation is complete, press the center button. The screen will display a "Calibrate" animation, indicating that the device is adapting to the radiator valve.
Once calibration is completed successfully, the screen will display the current room temperature.
Removal
- Hold the device body, gently rotate it to unlock, and remove it from the base.
- Hold the battery base firmly and turn the metal nut at the bottom counterclockwise.
- Once the metal nut is completely loosened, remove the battery base from the radiator valve.
Note: During installation and removal, always support the valve body to prevent it from falling. When attaching or removing the battery base, operate the bottom metal nut. Do not forcefully rotate, pull, or remove the device body.
2. Operating Modes
TRV-ZBT supports two operating modes. Press the device's center button briefly to switch between the two modes.
- Auto Mode: The device automatically adjusts the temperature according to the preset schedule.
- Manual Mode: Users can manually set the target temperature based on their needs.

When adjusting the temperature manually while in Auto Mode, the device will temporarily operate according to the new temperature setting. Once the next scheduled time point is reached, it will automatically resume the preset schedule.
During this temporary manual adjustment period, both the Auto Mode and Manual Mode icons will be displayed on the screen.
3. Three Smart Schedules for Different Daily Routines
TRV-ZBT supports three independent schedules, with each schedule allowing up to 12 temperature schedule periods. Users can create different heating plans for the same room and quickly switch between them based on their daily routines, without repeatedly editing individual time settings.
For example, the three schedules can be configured as follows:
- Regular Schedule: Designed for normal weekdays and weekend routines. Set different heating routines for Monday to Friday workdays and Saturday to Sunday weekends.
- Home Schedule: Suitable for working from home, school holidays, or vacation periods. It can extend comfortable heating hours during the daytime when more time is spent indoors.
- Custom Schedule: Designed for shift workers, irregular rest periods, or other irregular schedules. Different heating schedules can be configured for each day from Monday to Sunday.
When TRV-ZBT is in Auto Mode, it automatically adjusts the target temperature according to the currently active schedule. When your daily routine changes, simply switch to the corresponding schedule to quickly update the heating plan for the entire day.
For users using Home Assistant, Samsung SmartThings, or other third-party platforms, some platforms may not yet support all three schedules or provide a convenient way to edit multiple heating periods.
In this case, you can temporarily connect TRV-ZBT to the eWeLink App via Bluetooth to quickly configure schedules. After setup is completed, the device can continue working normally through the original Zigbee platform.

4. Two Open Window Detection Methods to Reduce Energy Waste
When windows are opened for ventilation during winter, heat can quickly escape if the radiator continues heating. TRV-ZBT provides two open window detection methods: Automatic Detection and Sensor-Based Detection, allowing you to choose the option that best fits your setup and usage habits.
Automatic Detection
Auto Detection does not require an additional door/window sensor. The device monitors changes in room temperature and determines whether a window may have been opened. When an open window is detected, TRV-ZBT temporarily stops heating.
This method is suitable for users who do not have a door/window sensor installed or who want to enable open window detection with a simple setup.
For example, if you open a bedroom window in the morning, the TRV can detect the rapid temperature drop and pause heating to reduce unnecessary heating energy consumption while the window remains open.
Sensor-Based Detection
Linked Detection requires a compatible SONOFF door/window sensor. When the sensor detects that a window is open, TRV-ZBT pauses heating. Once the window is closed, normal temperature control resumes.
This method is ideal for homes that already use smart door/window sensors or frequently ventilate rooms. Since heating control is directly linked to the window status, the device does not need to wait for a noticeable temperature drop before responding.
👉 Compatible SONOFF door/window sensor models: SNZB-04P, SNZB-04, SNZB-04PR2

5. Software-Based Valve Calibration for Easier Installation and Adjustment
TRV-ZBT requires valve calibration after each power-on to identify the fully open and fully closed positions of the radiator valve.
Because different radiator valves and adapters may have different structures and valve pin travel distances calibration allows the device to correctly match the installed radiator valve and accurately control its opening and closing.
Compared with the first-generation model, TRV-ZBT provides a more flexible calibration process

Even if the initial calibration fails, you can still complete Zigbee pairing first. After checking and adjusting the installation, restart valve calibration by tapping the calibration prompt on the device page, or go to Device Settings > Valve Calibration. You do not need to reset or pair the device again.
Software-based recalibration is useful in the following situations:
- Initial calibration failed during installation;
- The radiator valve or adapter has been replaced;
- The device has been moved to another radiator.
Calibration Tips
Before starting calibration, make sure:
- The bottom metal nut is fully tightened;
- The device body and radiator valve adapter are installed correctly;
- The battery level is sufficient.
- Do not move, rotate, or remove the device during the calibration process.
6. Bluetooth Auxiliary Connection for More Flexible Setup

TRV-ZBT primarily connects to gateways, Home Assistant, Samsung SmartThings, or other compatible platforms via Zigbee. It also supports a standalone Bluetooth connection.
Bluetooth does not replace Zigbee. Instead, it works as a temporary auxiliary connection method for the following situations:
- Zigbee connection is temporarily unstable;
- The gateway is offline, but device settings need to be adjusted;
- A third-party platform does not yet fully support advanced features such as schedule management;
- You need a faster way to configure three schedules or multiple temperature periods.
Enabling standalone Bluetooth pairing only temporarily opens the Bluetooth connection. It will not remove the device from the existing Zigbee network, and it will not clear existing pairing information, schedules, or other device settings.
For example, when using Home Assistant, Samsung SmartThings, or another third-party platform, if complete schedule editing is not yet available, you can temporarily enable Bluetooth pairing and connect TRV-ZBT to the eWeLink App to configure schedules without removing the existing Zigbee device.
How to Enable Standalone Bluetooth Pairing
There are two ways to enable Bluetooth pairing:
Method 1: Enable Via a Third-Party Platform
Open the device page in Home Assistant or Samsung SmartThings, then enable Bluetooth pairing mode for TRV-ZBT.
Method 2: Enable Via the Device Button
- Press the device button once to wake up the device.
- Press the button once again, then within 3 seconds, press and hold the button for about 5 seconds.
- The device will enter standalone Bluetooth pairing mode.
After Bluetooth pairing mode is enabled, open the eWeLink App to search for and temporarily connect to TRV-ZBT. You can then configure schedules or other settings. After disconnecting Bluetooth, the device will continue operating normally through the existing Zigbee network.
7. Bluetooth OTA Support for Third-Party Platform Users
Even if TRV-ZBT has already been connected to Home Assistant, Samsung SmartThings, or another third-party platform, you can still perform firmware updates through the eWeLink App using Bluetooth without removing the device or repeating Zigbee pairing.
Compared with Zigbee OTA, Bluetooth OTA is usually faster. It is especially useful when:
- A third-party platform does not yet provide a firmware update option;
- Zigbee OTA is slow, or the connection is unstable.

Bluetooth OTA Update Steps
- Enable standalone Bluetooth pairing mode on TRV-ZBT.
- Open the eWeLink App.
- Go to: Profile > Studio > Bluetooth OTA
- Search for and select the corresponding TRV-ZBT device.
- Follow the on-screen instructions to complete the firmware update.
Update Tips
Before updating:
- Make sure the device has sufficient battery power;
- Keep Bluetooth enabled on your phone;
- Keep your phone close to the device.
During the update process, do not remove the batteries, power off the device, or exit the update page.
After Bluetooth OTA is completed, the existing Zigbee network information and device settings will remain unchanged. TRV-ZBT can continue to be used normally with Home Assistant, Samsung SmartThings, or other third-party platforms.
8. How to Set Up an External Temperature Sensor for SONOFF TRV-ZBT in Home Assistant
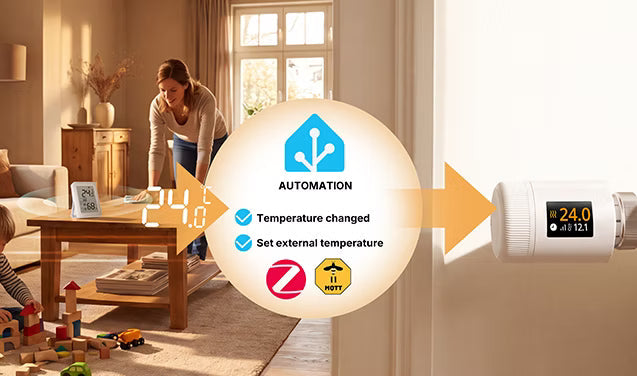
Since TRV-ZBT is mounted directly on the radiator, its built-in temperature reading may be affected by radiator heat, nearby cold air, and installation position.
If you have a separate temperature sensor in the room, you can use it as an external temperature source for TRV-ZBT in Home Assistant. This allows the TRV to regulate heating based on a temperature reading that better represents the actual room conditions.
There are two ways to configure this:
Option 1: Home Assistant Blueprint — Easier Setup
For a simpler setup, use the SONOFF Home Assistant Blueprint. You can select your thermostat and external temperature sensor directly in Home Assistant without manually configuring the trigger, action, and entity IDs.
👉 Set Up an External Temperature Sensor Using the Home Assistant Blueprint
Option 2: Manual Setup — ZHA or Zigbee2MQTT
If you prefer to configure the automation manually, follow the step-by-step guide for ZHA or Zigbee2MQTT (Z2M). This method also explains how the external temperature value is synchronized with the TRV.
👉 Set Up SONOFF TRV with an External Temperature Sensor Manually


Leave a comment
All comments are moderated before being published.
This site is protected by hCaptcha and the hCaptcha Privacy Policy and Terms of Service apply.