








Introduction
Home Assistant and Apple Home can work together, so you can keep your devices and automations in Home Assistant while controlling supported devices from the Home app or with Siri.
The best way to connect them depends on your setup. Devices already managed by Home Assistant can be exposed to Apple Home through HomeKit Bridge or a compatible Matter Bridge, while devices that already support Matter may be shared between the two platforms using Matter multi-admin.
This guide compares these options, explains when to use each one, and provides step-by-step instructions for connecting Home Assistant to Apple Home with HomeKit Bridge and SONOFF Matter Bridge.
Home Assistant vs Apple Home: What's the Difference?
Home Assistant brings devices and services together through integrations, customizable dashboards, and flexible automation. Apple Home provides a shared interface for controlling compatible accessories through Apple devices.
|
Area |
Home Assistant |
Apple Home |
|
Platform role |
Integrates devices, services, and automation systems |
Provides a shared smart home experience for Apple users |
|
Compatibility |
Depends on available Home Assistant integrations |
HomeKit, Matter, or compatible bridges |
|
Automation |
Detailed triggers, conditions, actions, scripts, and custom logic |
Scenes and home automations |
|
Interface |
Customizable dashboards |
Home app |
|
Voice control |
Assist and connected voice platforms |
Siri |
|
Hardware |
Requires an always-on Home Assistant host |
Uses Apple devices; some features require a compatible home hub |
|
Local control |
Depends on the original device integration |
Depends on the accessory and connection method |
You do not necessarily have to choose between them. A common setup is to use Home Assistant for device integrations and more advanced automations while keeping Apple Home as a familiar interface for everyday control and Siri.
It is also important to distinguish Apple Home from HomeKit. Apple Home is Apple's smart home ecosystem and user interface, while HomeKit is one of the technologies it uses to connect compatible accessories. Apple Home also supports Matter devices.
3 Ways to Connect Home Assistant to Apple Home
1. HomeKit Bridge: Bring Home Assistant Entities into Apple Home
● Home Assistant entities → HomeKit Bridge → Apple Home
HomeKit Bridge is a free, built-in integration that makes supported Home Assistant entities available in the Home app and to Siri — even when the original devices do not support HomeKit.
It requires neither a separate physical bridge nor a Home Assistant Cloud subscription. This makes it a straightforward choice when Apple Home is your main destination. Available controls depend on the entity types and features supported by the integration.
Note: An entity represents a function in Home Assistant, such as a light, switch, or temperature reading.
2. A Compatible Matter Bridge: Export Supported Home Assistant Entities
● Supported Home Assistant entities → Matter bridge → Apple Home
A Matter bridge with Home Assistant support maps supported Home Assistant entities to Matter device types and capabilities that Apple Home can recognize. This allows selected Home Assistant controls to be exposed to Apple Home and other compatible Matter ecosystems.
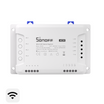
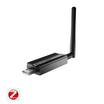
For example, SONOFF Zigbee Bridge Ultra (ZBBridge-U) and Bridge Max (Bridge-M) offer this functionality through dedicated hardware. After you authorize the bridge to access Home Assistant, you can select supported entities to expose through Matter.
👉 See How to Bridge Home Assistant Devices to Matter Fabrics
Whichever Matter Bridge implementation you use, both the bridge and Apple Home must support the required device type and features.
Note: Home Assistant's built-in Matter integration serves a different role — it controls Matter products but does not itself export existing Home Assistant entities as Matter devices.
3. Matter Multi-Admin: Share an Existing Matter Product
● Matter device → Apple Home and Home Assistant
Matter multi-admin lets a compatible Matter device or Matter bridge join multiple Matter fabrics, such as Apple Home and Home Assistant. If your device already supports Matter, use the existing platform's Matter sharing flow to add it to the second platform while keeping the original connection.
Multi-admin shares access; it does not convert ordinary Home Assistant entities into Matter devices or synchronize rooms and automations. Where supported, multi-admin can also be used with a Matter bridge to make its bridged accessories available in multiple Matter ecosystems.
👉 Already using a Matter device in Apple Home? Follow Home Assistant's official guide to sharing it with Home Assistant.
Which Connection Method Should You Choose?
|
Your goal |
Suitable method |
Main advantage |
Main consideration |
|
Control existing Home Assistant devices from Apple Home and Siri |
HomeKit Bridge |
Free and built into Home Assistant; no separate bridge hardware |
Apple-focused; supported entities and features only |
|
Export supported Home Assistant entities through Matter |
Matter Bridge |
Can expose supported HA controls through Matter to multiple ecosystems |
Requires separate bridge software or hardware and compatible feature mappings |
|
Use an existing Matter product in both platforms |
Matter multi-admin |
Uses the same Matter device across multiple ecosystems |
Requires a compatible Matter product; features may differ between platforms |
● Choose HomeKit Bridge for a straightforward Apple-focused setup.
● Choose Matter Multi-Admin when the product already supports Matter.
● Consider a compatible Matter Bridge such as ZBBridge-U or Bridge Max when you want a dedicated hardware solution for exposing supported Home Assistant controls through Matter.
How to Connect Home Assistant to Apple Home with HomeKit Bridge
Before you begin, make sure the devices you want to expose are already working in Home Assistant. During pairing, keep your iPhone or iPad and Home Assistant host on the same local network. Menu labels may vary slightly between software versions.
Step 1: Add HomeKit Bridge
In Home Assistant:
- Open Settings → Devices & services.
- Select Add integration.
- Search for HomeKit Bridge.
 4. Follow the setup prompts and choose the domains or entities you want to expose to Apple Home.
Tip: For the first setup, start with a few lights or switches.
Step 2: Confirm the HomeKit Bridge
1. After setup, the HomeKit Bridge integration appears under Settings → Devices & services.
 2. Home Assistant generates a QR code and PIN for pairing with Apple Home. If the pairing information is not visible, check Notifications in Home Assistant.

3. Use the code generated by Home Assistant — not the original device's pairing code.
Step 3: Add the Home Assistant Bridge to Apple Home
On your iPhone or iPad:
- Open the Home app and select the home you want to use.
- Tap + → Add Accessory.
- Scan the QR code generated by Home Assistant. If you cannot scan it, select More Options or the equivalent cannot-scan option, choose the discovered bridge, and enter its PIN.
- If an uncertified-accessory warning appears, verify that you are adding your own Home Assistant bridge, then choose the option to continue.
- Follow the remaining prompts to add the accessories and assign them to rooms.
Once setup is complete, the supported Home Assistant accessories should appear in the Home app.
👉 For additional pairing details, see the official HomeKit Bridge setup guide.
Step 4: Test the Connection Before Adding More Devices
Use one of the exposed devices to confirm that the connection works in both directions:
- Control it from Apple Home and check that Home Assistant updates.
- Control it from Home Assistant and check that Apple Home updates.
- Test Siri control using the accessory's Apple Home name.
Once everything works, you can expose additional supported entities as needed.
For larger setups: HomeKit supports up to 150 unique accessories per bridge. If you exceed that limit, split the exported accessories across multiple bridges. This limit refers to HomeKit accessories, which do not necessarily correspond one-to-one with physical devices.
👉 See HomeKit Bridge device limit.
How to Connect Home Assistant to Apple Home Via SONOFF Matter Bridge
A SONOFF Matter bridge lets you expose supported Home Assistant controls to Apple Home while keeping your existing Home Assistant integrations and automations.
This tutorial uses the SONOFF ZBBridge-U as the example. Bridge Max supports the same Home Assistant-to-Matter workflow.
Why Choose a SONOFF Matter Bridge?
This approach is useful when you want a dedicated hardware bridge for exposing supported Home Assistant controls through Matter with Apple Home and other Matter ecosystems.
The main benefits are:
● Cross-platform access: Expose supported controls through Matter and add the bridge to compatible ecosystems using their pairing or sharing flows.
● Keep your existing Home Assistant setup: Continue using your current integrations and automations without moving the original devices to the SONOFF bridge.
● Local configuration: Select entities through the bridge's local web interface without installing a separate software Matter bridge on your Home Assistant host.
Home Assistant must remain running and reachable. The SONOFF bridge exports supported controls; it does not take over your Home Assistant integrations or automations. Available features depend on both the bridge's mappings and Apple Home support.
Before You Begin
You will need:
● Home Assistant with the target devices working correctly.
● A supported SONOFF bridge running current firmware.
● An updated iPhone with the Home app set up.
● A compatible Apple Home hub, such as a HomePod, HomePod mini, or supported Apple TV.
● The SONOFF bridge, Home Assistant, iPhone, and Apple Home hub connected to the same local network.
Avoid guest Wi-Fi or client isolation during setup. Matter requires working local IPv6 communication and multicast discovery.
🔔Check the SONOFF device and feature matrix to confirm that the devices and Apple Home functions you need are supported.
The setup has two main stages: pair the SONOFF bridge with Apple Home, then authorize access to Home Assistant and select the entities to expose.
Step 1: Open the Bridge's Local Interface
● Power on ZBBridge-U and connect it to your router using an Ethernet cable.
● From a browser on the same network, open http://zbbridgeu.local/. If that address does not resolve, use the bridge's IP address from your router's device list.
● Complete the initial local setup.

👉 Bridge Max users should follow the Bridge Max Local Web setup guide.
Step 2: Add the Matter Bridge to Apple Home
● In the bridge interface, find Matter Bridge and select Start Pairing. You can also open Matter Bridge from the left navigation menu and start pairing from the Pairing tab.


Note: The bridge displays a Matter QR code and the numeric pairing code.


On your iPhone:
- Open the Home app and select the home you want to use.
- Tap + → Add Accessory.
- Scan the bridge's Matter QR code.
- Follow the prompts to finish pairing.
After pairing, return to the SONOFF local web interface and check the connected Matter fabrics. Click See more to view and manage detailed fabric information.

Step 3: Authorize Home Assistant Access
● Open the bridge's Home Assistant section and choose Sync Home Assistant Entities to Matter Fabrics.


● Select Get Started. The bridge scans the local network for available Home Assistant instances.
If your server is found, select it and continue. If automatic discovery fails, choose Manual Configuration and enter:
● The local IP address or domain name of Home Assistant.
● The Home Assistant port — normally 8123, unless you changed it.
Select Sign in to Home Assistant, enter your Home Assistant credentials on the authorization page, and grant access.
After authorization, the bridge loads the Home Assistant devices and entities it can evaluate for Matter synchronization.
Step 4: Select Devices to Expose to Apple Home
● In the bridge's Local Web interface, open Home Assistant → Sync Home Assistant Entities to Matter Fabrics → Sync Management.

Check only the supported entities you want Apple Home to discover, then select Save.

Step 5: Verify the Devices in Apple Home
● Allow Apple Home a moment to display the selected accessories, then review their names and room assignments.
● Test the functions you need, such as on/off control, brightness, temperature readings, or thermostat settings. For sensors, check that state changes are reflected in Apple Home.
● Also change a device's state in Home Assistant and confirm that Apple Home updates. Once basic control works, try Siri using the accessory's Apple Home name.
● If a function is missing, check that it is supported by the Home Assistant entity, the SONOFF bridge's mapping, and Apple Home.
Use one connection route per accessory where practical. Exposing the same device through both HomeKit Bridge and the Matter bridge can create duplicate accessories and complicate automations.
Common Problems Connecting Home Assistant to Apple Home
"No Response" in Apple Home
First, check whether the device still works correctly in Home Assistant.
If it does not, troubleshoot the original device or integration first.
If the device works in Home Assistant but shows No Response in Apple Home, check the bridge and local network connection. If every accessory behind the same bridge is affected, start by checking the bridge rather than the individual devices.
👉 HomeKit Bridge: Devices become unresponsive as soon as added to Apple Home
Bridge Not Found or Pairing Fails
During initial setup, keep your Apple device, Home Assistant host, and relevant bridge on the same normal local network where possible.
Guest Wi-Fi, client isolation, VLAN rules, multicast filtering, or container networking can interfere with local discovery.
- For HomeKit Bridge, make sure you are using the QR code or PIN generated by Home Assistant. Also confirm that the bridge does not exceed HomeKit's 150-accessory limit.
- For a Matter device that is already commissioned to another ecosystem, use its Matter sharing flow rather than assuming the original setup code can simply be reused.
Missing or Unsupported Entities
Check the connection in layers.
- Does the entity work correctly in Home Assistant?
- Did you select it for export?
- Does the chosen bridge support that entity type?
- Can Apple Home represent the resulting capability?
For HomeKit Bridge, also check the supported Home Assistant domains and your include/exclude filters.
For a SONOFF Matter Bridge, check the current compatibility matrix.
Re-pairing a bridge does not add support for an unsupported entity type.
FAQ
Q1: Can Home Assistant work with Apple Home?
Yes. Supported Home Assistant entities can be exposed to Apple Home through HomeKit Bridge or a compatible Matter Bridge. Existing Matter devices can also be shared between ecosystems when their multi-admin implementation supports it.
Q2: Can Siri control Home Assistant devices?
Yes. Once a supported Home Assistant entity is exposed to Apple Home through HomeKit Bridge or another compatible bridge, Siri can control the functions that Apple Home recognizes.
Q3: HomeKit Bridge or Matter Bridge: Which Should I Use?
If Apple Home is your primary destination and your devices already work in Home Assistant, start with HomeKit Bridge.
Consider a Matter Bridge when you specifically want a Matter-based export path, a dedicated hardware bridge, or a broader multi-ecosystem architecture.
Feature availability differs between the two methods, so check the devices and functions you actually need rather than assuming one method provides everything the other does.
Q4: Is Matter Multi-Admin the Same as a Matter Bridge?
No. Matter multi-admin allows an existing Matter device to join more than one Matter ecosystem.
A Matter Bridge translates supported non-Matter devices or Home Assistant entities into bridged Matter endpoints.

Leave a comment
All comments are moderated before being published.
This site is protected by hCaptcha and the hCaptcha Privacy Policy and Terms of Service apply.