








Introduction
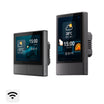
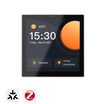
The SONOFF NSPanel Pro series combines a built-in Zigbee 3.0 gateway and Matter Bridge with touchscreen smart home control. It lets you manage smart home devices from one screen, including viewing security cameras, adjusting thermostats, triggering scenes, accessing the Local Web Portal, browsing the web, and running Home Assistant.
The series includes 3 models: NSPanel Pro 86, NSPanel Pro 120, and NSPanel Pro Gen2. All three are available in black and white, with different back box compatibility, screen sizes, and load control capabilities to suit different installation needs.
The table below compares the three models to help you choose the right one for your installation.
|
Specifications |
Compatible Back Box |
Screen Size |
Direct Load Control |
|
86-type back box (China, Europe, Saudi, Middle East, etc.) |
3.95 inches |
✅ 2-channel relay |
|
|
120-type back box (North America, Brazil, Israel, etc.) |
4.7 inches |
❌ Not supported |
|
|
86-type back box (China, Europe, Saudi, Middle East, etc.) |
3.95 inches |
❌ Not supported |
1. Wiring and Mounting
The NSPanel Pro series supports two installation methods: wall mounting and desktop installation with a dedicated stand.

1.1 Wall-Mounted Installation
NSPanel Pro 86/120
NSPanel Pro 86 and NSPanel Pro 120 have two power terminals (L and N) on the back and require a 100–240V AC power supply. Connect the live wire to the "L" terminal and the neutral wire to the "N" terminal.

⚡Safety Note: Turn off the power and verify that the circuit is de-energized before wiring. Follow the product's wiring diagram and local electrical regulations.
👀 Watch the NSPanel Pro 86/120 installation video
NSPanel Pro Gen2
Unlike NSPanel Pro 86 and 120, NSPanel Pro Gen2 features 2 built-in relay channels for direct load control. It has two power terminals (N and L) and two load output terminals (L Out1 and L Out2), making it suitable for installations that require direct control of connected loads.

👀 Watch the NSPanel Pro Gen2 installation video
1.2 Desktop Installation with a Stand
All 3 NSPanel Pro models can be used with a dedicated stand (StandB or StandW), allowing for flexible placement on a desk or other flat surface. Since NSPanel Pro devices are mains-powered, use the dedicated stand for non-wall-mounted installations to keep the electrical wiring and terminals safely enclosed.
👉 For more details, see StandB / StandW.
👀Watch the Desktop Stand Installation video
2. Qucik Start
2.1 Initial Setup and eWeLink Pairing
Power on your NSPanel Pro, follow the on-screen instructions to select your language and region, and connect to a 2.4 GHz Wi-Fi network (NSPanel Pro Gen2 also supports 5 GHz Wi-Fi). Next, open the eWeLink app, tap "+", and select "Scan" to scan the QR code displayed on the panel. This will link your NSPanel Pro to your eWeLink account.

2.2 Adding Devices and Setting Up Automations
NSPanel Pro can function as a Zigbee 3.0 gateway, allowing you to connect and manage compatible Zigbee devices and control them locally.
Follow the steps below to add devices and set up automations:
① Add Zigbee devices
You can add Zigbee devices in two ways:
● Method 1 (Device side): Tap "Add Devices" directly on the panel screen.
● Method 2 (App side): Open the eWeLink App and go to the "Gateway" section, and add your device.
② Add Matter devices
● Enable pairing: Enable Matter pairing mode on the device.
● Scan code sync: Scan the device pairing QR code to seamlessly connect third-party Matter devices to the eWeLink ecosystem. Once added successfully, the Matter device card will automatically display on the screen.
③ Sync Wi-Fi devices
● If your Wi-Fi devices have already been added to your eWeLink account, you don't need to set them up again.
● Simply go to the "Screens" settings in the eWeLink app to sync these devices to your NSPanel Pro.
④ Set up Smart Scenes
After device synchronization is complete, you can leverage the powerful local computing power of NSPanel Pro to create automations:
● Quick control (Panel side): Long-press the screen or pull down the control center to create "Tap-to-Run" scenes directly on the panel, quickly triggering multiple devices.
● Automation linkage (App side): On the "Scenes" page of the eWeLink App, add "Automation", using NSPanel Pro as a trigger condition (e.g., panel temperature changes, button operations) or an execution action (e.g., screen brightness adjustment).
● Local execution: As a gateway, NSPanel Pro supports saving associated Zigbee device scenes locally, ensuring stable execution of automation commands even when disconnected from the network.
👉 SONOFF NSPanel Pro supported devices list
For more functions, see User manual.
👀 Watch the NSPanel Pro Setup video.
3. Open Source and Third-Party Smart Home Integration
● Home Assistant Integration: SONOFF smart control panels support Home Assistant integration, allowing you to display the Home Assistant interface on the panel and connect supported Zigbee sub-devices to Home Assistant.
👉 Install Home Assistant App via F-Droid
👉 Bring NSPanel Pro Zigbee Devices Directly into Home Assistant
● Local Web Portal: Access and manage supported Zigbee sub-devices locally through the panel's IP address, without linking an eWeLink account.
● Third-Party Ecosystem Integration: Through the Matter Bridge function, sub-devices in the eWeLink ecosystem and Home Assistant entities can be synced to third-party platforms such as Apple Home, Google Home, and Samsung for control.
👉 Take your Home Assistant Devices to Apple Home
4. Firmware and FAQ
To keep NSPanel Pro compatible with newly supported devices and access the latest features and fixes, check for firmware updates regularly under Panel Settings. For detailed instructions and troubleshooting, see the FAQ linked below.
The NSPanel Pro series also supports switching between Zigbee Hub Mode and Zigbee Router Mode. Router Mode can extend Zigbee network coverage, but switching to this mode disables the panel's local scene execution function.
👉 Firmware and FAQ Info: NSPanel Pro Version Update & FAQ

Leave a comment
All comments are moderated before being published.
This site is protected by hCaptcha and the hCaptcha Privacy Policy and Terms of Service apply.