


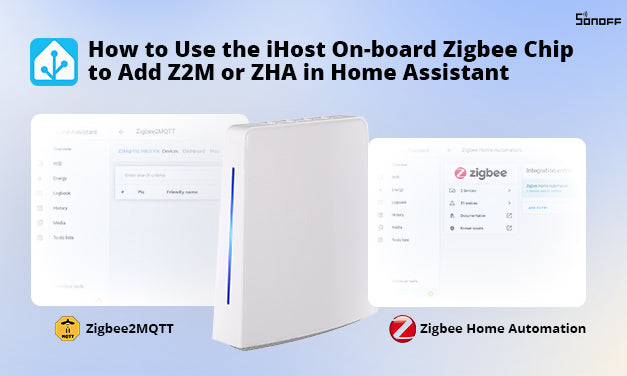
The iHost-Open-Source-Project supports the use of iHost’s on-board (built-in) Zigbee chip in Zigbee2MQTT and ZHA without the need to purchase an additional Zigbee Dongle!
iHost Built-in Zigbee Chip Information
- Model : SOC EFR32MG21A020F768IM32-B SiliconLabs QFN32-4*4 (RAM 64kB, Flash 768kB)
- Serial Port Path : Go to Settings->System->Hardware->All Hardware->/dev/ttyS4
- Current Zigbee Firmware version : 6.10.9
- adapter: ezsp

Prerequisites
- The specified HA image has been burned on the iHost via TF card according to the operation guideline: How to Run Home Assistant over SONOFF iHost
- HA has been successfully run, logged into the HA account and accessed the HA front-end page
Operating Guidelines
This guide applies if you do not need to migrate the Zigbee device, if you need to migrate the Zigbee device data, please refer to other guides.
Zigbee2MQTT
Installing the Zigbee2MQTT add-on
- Visit the Home Assistant web page
- Go to Settings->Add-ons

- Click the Add-on Store button.

- Click the More button in the top right corner and select Repositories from the dropdown list.

- In the popup window, enter the GitHub address for Zigbee2MQTT:https://github.com/zigbee2mqtt/hassio-zigbee2mqtt and click the Add button.

- After seeing Zigbee2MQTT in the popup, close the window.

- Refresh the page, and you will see the Zigbee2MQTT add-on.

- Click on the card to enter the add-on details page and click the Install button to start installing the add-on.

- Wait for the installation to complete.

Installing the Mosquitto Broker Add-on
- Go to Settings -> Add-ons -> Add-on Store.

- Search for Mosquitto.

- Click the card to enter the add-on details page, then click the Install button.

- Wait for the installation to complete.

Start the Mosquitto Broker Add-on
- Click the Start button and wait for it to start.

Adding the MQTT Integration
- Go to Settings -> Devices and services

- Click the Add Integration button

- Type MQTT in the pop-up window, click on the search result and select the first option


- Select the first option

- Wait for the installation to complete.
Configuring Zigbee2MQTT
- Go to the Zigbee2MQTT details page and click the Configuration tab at the top.

- In the Serial section, enter the protocol stack and serial port address of the iHost Zigbee chip, then click the Save button.
adapter: ezsp
port: /dev/ttyS4

Start Zigbee2MQTT
- Go back to the Information tab, then click the Start button.

- Wait for it to start, then click Open Web UI to begin using Zigbee2MQTT.

Zigbee Home Automation (ZHA)
Adding the ZHA Integration
- Go to Settings -> Devices & Services.

- Click the Add Integration button in the bottom right corner.

- In the popup window, enter ZHA, and click on the search result.

Enable ZBBridge-U or iHost as a Matter Bridge
If you use ZBBridge-U as the Matter bridge to integrate devices, please open the eWeLink app, click Device Settings→Matter. Then click the “+” in the upper right corner to enter the pairing mode. Then follow the instructions on the app.
Here I’ll take iHost to show you how to integrate non-matter devices to Home Assistant.
Steps:
- Place iHost on your network. iHost and your computer should be on the same LAN.
- Open the local web of iHost.
- Navigate to Matter Bridge → Pairing.


- Click Start, then follow the steps to bridge the device to Home Assistant.
- Tap “Start pairing” to generate the QR code, open your Home Assistant app, and Scan the QR code to sync the supported devices into Home Assistant.


Your non-Matter devices will appear natively under Devices & Services, ready for automations, dashboards, and control.
via eWeLink Add-On
Steps:
- Install the eWeLink Add-on from Home Assistant’s Add-on Store.
- In eWeLink Add-on settings, log in with your eWeLink account.
- Configure LAN Mode to discover devices on your network.
- Devices appear under the eWeLink integration.
For a detailed walkthrough, see SONOFF’s official tutorial:
➡️ How SONOFF Works with Home Assistant
Conclusion
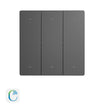
Whether you’re working with Matter-certified Wi-Fi devices or non-Matter products like the SONOFF TX Ultimate Smart Wall Switch, Home Assistant offers robust integration methods:
Direct Matter pairing for seamless setup.
Local Matter Bridge via ZBBridge-U or iHost for non-Matter Wi-Fi devices.
Legacy eWeLink Add-on as a fallback.
By leveraging these workflows, you’ll achieve a fully local, secure, and responsive smart home—no cloud dependency needed. Start adding your Wi-Fi devices today and unlock the full power of Home Assistant!


Leave a comment
All comments are moderated before being published.
This site is protected by hCaptcha and the hCaptcha Privacy Policy and Terms of Service apply.