


1. Introduction
We’re excited to announce that HA over iHost is now officially available! This project brings the full Home Assistant Operating System to the SONOFF iHost platform, offering users a powerful new way to run Home Assistant locally on iHost hardware.
Born from real community needs and user-driven technical exploration, this initiative reflects the creativity and passion of the Home Assistant and SONOFF user communities. Many iHost users have already been running Home Assistant Core in Docker on the native system to take advantage of its hardware. Some advanced users went even further—modifying and compiling their own builds to run the full Home Assistant OS natively on iHost.
In this guide, I’ll show you how to easily run Home Assistant on your SONOFF iHost. We’ll walk through two flashing methods: using Balena Etcher or Raspberry Pi Imager. Let’s get started!
Watch the detailed video tutorial here:
2. Prerequistes
- A SONOFF iHost is required.
- Ensure your iHost system version is 2.5.1 or later.
- An Application Class 2 (A2) card, with a minimum capacity of 32GB, is recommended for better performance, especially on small read&write operations.
- As iHost is based on a 32-bit processor, some Home Assistant features may not be compatible.


3. Preparing the Micro SD Card
Required Hardware
- An (Application Class 2) (A2) card, with a minimum capacity of 32GB, is recommended for better performance, especially on small read & write operations. We would suggest using a TF card from SanDisk, Kingston, or Samsung. We have been internally using these brand cards for testing.
- An SD card reader: any standard USB card reader will work if your laptop doesn’t have a built-in SD card reader.
Required Software
- Micro SD card flash tool: Balena Etcher or Raspberry Pi Imager, etc.
- Visit the GitHub project for the HA over iHost corresponding image: iHost-Open-Source-Project.

4. Flashing HA Over iHost Image to Micro SD Card
-
Flash with Balena Etcher
- Insert the Micro SD card into the card reader and connect it to your computer.
- Download and run Etcher.

- Click Flash from file, then select the HA over iHost image file downloaded on your computer.

2. Click Select target, then choose the Micro SD card you inserted.
*Note: Please ensure you select the right drive!

3. Click Flash! to start flashing the HA over iHost image onto the Micro SD card.
*Note: Do not remove or use the SD card during the flashing process.
-
Flash with Raspberry Pi Imager
- Insert the SD card into the card reader and connect it to your computer.
- Download and run Raspberry Pi Imager.

- Click CHOOSE DEVICE > No filtering.

- Click CHOOSE OS > Use custom, then select the HA over iHost image file downloaded on your computer.


-
Click CHOOSE STORAGE, then choose the Micro SD card you inserted.
*Note: Please ensure you select the right Micro SD card!

- Click NEXT > NO, CLEAR SETTINGS, and confirm to erase all settings on the SD card.


-
Start flashing the HA over iHost image onto the inserted SD card.
*Note: Do not interact with the SD card (e.g., unplugging or modifying files) during the flashing process.


5. Booting Home Assistant Operating System on iHost
Migrate Zigbee Devices (Optional)
If Zigbee device migration is not needed, skip to the next section.
iHost allows you to export and migrate iHost’s Zigbee device data to Home Assistant by downloading the backup file available to restore in Home Assistant integrated with ZHA/Zigbee2MQTT. Only the Zigbee network and device status are migrated. Timers, groups, scenes, and device names are not included. Click here to learn: How to restore?
Booting Home Assistant Operating System on iHost
- Insert the pre-flashed Micro SD card into the iHost SD Card slot.
- Connect iHost to a network cable and power it on.
- Within 5 seconds after powering on, repeatedly press the Mute button (♪) on the top of the iHost until the LED Side Strip enters a BLUE breathing light pattern. This indicates that the system is switching to the Home Assistant OS flashed onto the SD card.

-
If the LED indicator shows a BLUE breathing light pattern, you can access your new Home Assistant web interface within the next 10 minutes. The first boot may take longer.
On a desktop browser, enter homeassistant.local:8123.
*Note: If you are running an older version of Windows or have stricter network configurations, you may need to access Home Assistant using one of the following URLs:
http://homeassistant:8123 or http://X.X.X.X:8123 (replace X.X.X.X with the IP address of your Raspberry Pi)
Troubleshooting Boot Failures
- If the LED Side Strip does not show a BLUE breathing light pattern but a RED breathing light pattern after powering on for 5 seconds or after pressing the button multiple times, the boot has failed. Try re-booting the Home Assistant Operating System as follows:
- Power cycle iHost;
- No button press is needed.
- iHost retries to boot Home Assistant Operating System from the SD card.

- If you cannot access Home Assistant web interface within 10 minutes after the operations above, it may be due to an incorrectly flashed image. Try re-flashing the SD card or using a new one.
6. Switching Back to eWeLink CUBE
- To switch back to eWeLink CUBE, follow these steps:
- Power cycle iHost.
- Repeatedly single-press the mute button (♪) within 3 seconds.
- The LED Side Strip will switch to a RED flowing light pattern, confirming the system has switched back to eWeLink CUBE.

*Notes:
- If multiple devices are running Home Assistant Operating System on your network, the hostname [homeassistant.local] may not resolve correctly. You can discover the correct IP address via your router’s management interface or by broadcasting mDNS service [_home-assistant._tcp.].
- If the last boot was from the SD Card, and the card is removed without switching back to eWeLink CUBE, the LED Side Strip will show a RED breathing light pattern, indicating Home Assistant Operating System has failed to boot on iHost.
7. Hardware Resources
Once Home Assistant Operating System is successfully running on iHost, you can use the following supported onboard hardwares:
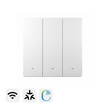
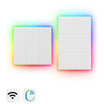
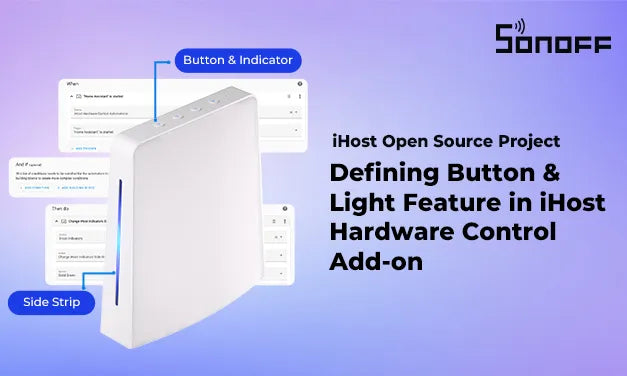
Button & LED indicator
The iHost Hardware Control add-on enables control of iHost’s buttons and LED indicators in Home Assistant. It registers them as devices and separate entities, allowing users to use them in automations for more flexible hardware interactions(e.g., triggering the power button entity to power off iHost). For details, refer to the iHost Hardware Control add-on guide.
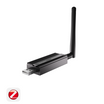
Bluetooth
- Chipset Model: RTL8723DS
- Path: Settings > Devices & Services > Integrations > Bluetooth
- Discovery: Automatic

Wi-Fi
- Chipset Model: RTL8723DS
- Path: Settings > System > Network > Configure Network Interfaces > WLAN0
- Discovery: Automatic

Zigbee Coordinator
- Chipset Model: 00.21.05.0009 SOC EFR32MG21A020F768IM32-B SiliconLabs QFN32-4*4 (RAM 64kB,Flash 768kB)
- Path: Settings > System > Hardware > All Hardware > /dev/ttyS4
- Discovery: Via Zigbee Home Automation (ZHA) or Zigbee2MQTT

8. Supported Add-ons
-
Now available:
-
iHost Hardware Control Add-on
Control physical buttons, RGB indicators, and light strips directly from Home Assistant.
Map hardware inputs to automations for seamless interaction between physical and virtual environments.
You can click here for the tutorial. -
MG21 Flashing Add-on : Upgrade MG21 firmware, with optional support for flashing either Zigbee or Thread stacks.
You can click here for the tutorial. -
Node-Red :This add-on is a standalone packaged version of Node-RED, exclusively designed to support the linux/arm/v7 architecture. It has been packaged by SONOFF, specifically tailored for iHost user.
You can click here for the tutorial. -
Matter Bridge Add-on : Bridge local devices to the Matter ecosystem for cross-platform integration.
You can click here for the tutorial.
-
9. Acknowledgement
This project is a derivative development based on Darkxst’s [ha-operating-system] project from GitHub. We sincerely appreciate the original author for his foundational contributions.

Leave a comment
All comments are moderated before being published.
This site is protected by hCaptcha and the hCaptcha Privacy Policy and Terms of Service apply.